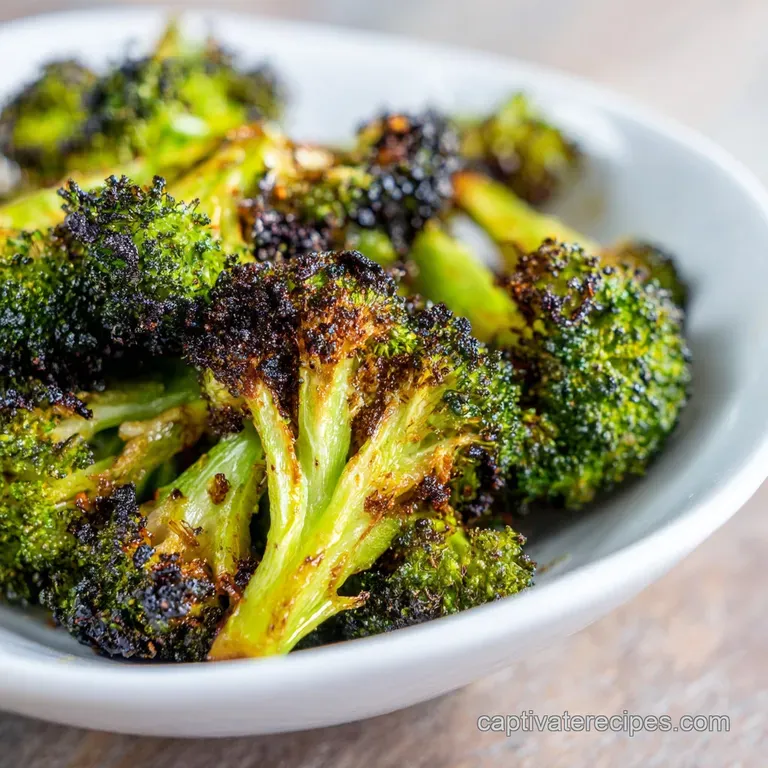
Roasted Broccoli: Crispy and Caramelized
- Time: Active 10 minutes, Passive 20 minutes, Total 30 minutes
- Flavor/Texture Hook: Shatter crisp edges with a buttery, tender crisp core
- Perfect for: Stress free weeknight sides or meal prep batches
- Master the Art of Roasted Broccoli
- Master These Essential Roasting Skills
- Understanding Key Recipe Specifications
- Choosing Perfect Ingredient Components
- Essential Kitchen Tools Required
- Detailed Oven Roasting Procedure
- Solving Common Roasting Obstacles
- Flavorful Substitutions And Variations
- Debunking Roasting Misconceptions
- Handling Leftovers And Storage
- Creative Plating And Pairings
- Recipe FAQs
- 📝 Recipe Card
Master the Art of Roasted Broccoli
Nothing ruins a Tuesday night faster than pulling a tray of gray, limp, and water logged vegetables out of the oven. We’ve all been there tossing a bag of frozen florets onto a pan, hoping for the best, only to end up with a soggy mess that tastes more like a damp basement than a side dish.
I spent years thinking my oven just wasn't "hot enough" or that I needed some fancy convection air fryer gadget to get those deeply browned, crispy edges that restaurants seem to produce so effortlessly.
The reality is much simpler, and honestly, a bit of a relief. It isn't about expensive equipment; it's about managing water. Broccoli is basically a sponge, and if you don't treat it with a little respect, it’ll just steam itself into oblivion.
This recipe is my tried and true fix for the "soggy broccoli blues." We’re going to use high heat, a massive amount of surface area, and a few specific flavor boosters to make sure these florets are the first thing to disappear from the dinner table.
Trust me, once you see those tiny trees start to char and smell the garlic turning golden and sweet, you'll never go back to boiling or steaming. This isn't just a side dish; it’s the kind of snack you'll find yourself picking off the baking sheet with your fingers before it even hits the plate.
Let’s get into the specifics of why this works and how you can nail it every single time without breaking a sweat.
Master These Essential Roasting Skills
To get that perfect texture, we have to look at how the oven interacts with the vegetable. It's a balance of heat transfer and moisture evaporation. If the pan is too cold, the broccoli sits and stews. If it's too crowded, the moisture escaping the florets creates a steam cloud.
We want a dry, intense environment where the natural sugars can caramelize.
- Surface Area Optimization: Cutting florets with flat sides allows for direct contact with the hot metal of the baking sheet, creating a dark, savory crust.
- Oil Emulsification: Massaging the oil into the nooks and crannies of the florets creates a protective barrier that fries the edges while keeping the interior juicy.
- Thermal Blast: Cooking at 425°F (218°C) ensures that the exterior browns before the internal fibers break down into mush.
| Cooking Method | Prep Time | Resulting Texture | Best Use Case |
|---|---|---|---|
| Oven Roast | 10 minutes | Charred, crispy, nutty | Maximum flavor, hands off |
| Stovetop Sear | 5 minutes | Tender with dark spots | Small batches, very fast |
| Air Fryer | 8 minutes | Extra crunchy edges | Single servings, ultra crisp |
Using the oven is my favorite because it’s a set it and forget it situation that handles a full 1.5 lbs of produce without complaint. The dry heat of the oven is far superior to the stovetop for getting that deep, earthy sweetness that only comes from sustained caramelization. If you're looking for a main dish to pair this with, the citrus notes in this Orange Maple Roast Duck cut through the richness of the roasted greens beautifully.
Understanding Key Recipe Specifications
Precision matters when you’re dealing with high temperatures. If you’ve ever pulled a tray out and found the garlic burnt to a charcoal crisp while the broccoli was still raw, you know the frustration.
We use 1.5 lbs of broccoli specifically because it fits perfectly on a standard half sheet pan without overcrowding. Any more than that, and you're entering the "steaming zone."
Component Analysis
| Ingredient | Science Role | Pro Secret |
|---|---|---|
| Broccoli Florets | Fiber structure | Dry them until they feel like bone dry paper. |
| Extra Virgin Olive Oil | Heat conductor | Use a high-quality oil; it carries the garlic flavor deep into the florets. |
| Kosher Salt | Moisture drawer | Salt draws out surface moisture to help the browning happen faster. |
| Parmesan Cheese | Protein/Fat crust | Add it at the very end so it melts but doesn't burn into a bitter sheet. |
The sliced garlic is a specific choice here. Minced garlic will burn at 425°F (218°C) within five minutes, turning bitter. By slicing the 3 cloves into thin "chips," they toast slowly alongside the broccoli, becoming sweet and mellow.
This tiny adjustment is what separates a "good" roasted vegetable from a "why can't I stop eating this" vegetable.
Choosing Perfect Ingredient Components
When you're shopping, look for heads of broccoli that are tight and dark green almost bluish. If the florets are starting to turn yellow or look "loose," they're already losing moisture and will likely turn woody in the oven. The stems are just as valuable as the tops; don't throw them away!
- 1.5 lbs broccoli: Fresh is best. Trim the florets into uniform sizes so they cook at the same rate.
- 2 tbsp extra virgin olive oil: You need enough to coat, but not so much that it pools.
- 3 cloves garlic: Sliced thin like little petals.
- 1 tsp kosher salt: Use Diamond Crystal if you have it; the flakes stick better to the florets.
- 1/2 tsp black pepper: Freshly cracked makes a massive difference in the "bite."
- 1/4 tsp red pepper flakes: Adds a subtle background warmth without being "spicy."
- 1 tbsp lemon juice: This acidity wakes up the heavy roasted flavors.
- 1/4 cup Parmesan: Freshly grated is mandatory; the canned stuff won't melt properly.
| Original Ingredient | Substitute | Why It Works |
|---|---|---|
| Olive Oil | Avocado Oil | Higher smoke point, very neutral flavor profile. |
| Parmesan | Nutritional Yeast | Adds a similar "cheesy" umami but is entirely vegan. |
| Lemon Juice | Apple Cider Vinegar | Provides the necessary acid hit to cut through the oil. |
Don't be afraid to experiment with the fats. I’ve used melted ghee before, and it adds a spectacular toasted milk flavor that pairs perfectly with the char of the broccoli. However, for a reliable weeknight win, standard olive oil is the workhorse we need.
Essential Kitchen Tools Required
You don't need much, but the quality of your pan is the most important factor here. A thin, flimsy baking sheet will warp under the 425°F heat, causing your oil and broccoli to slide into one corner. A heavy duty, rimmed aluminum "half sheet" pan is the gold standard for home cooks.
Chef Tip: Skip the parchment paper if you want maximum crispiness. Placing the vegetables directly on the metal allows for better heat conduction. If you're worried about cleanup, just make sure the pan is well oiled.
Also, grab a large mixing bowl. A lot of people try to toss everything directly on the baking sheet to save a dish, but you'll never get an even coating that way. You want to really get your hands in there and massage the oil, salt, and pepper into every single floret. It only takes an extra 30 seconds, but the payoff in flavor distribution is huge. If you're doing a big roast session, this Garlic Herb Butter Roasted Quail is a great companion that fits right in with the "roasted and rustic" vibe of this meal.
Detailed Oven Roasting Procedure

- Heat the environment. Preheat your oven to 425°F (218°C). If you have a convection fan, turn it on; it helps move that moist air away from the broccoli.
- Strip the moisture. Wash the 1.5 lbs of broccoli and dry it completely. Use a salad spinner or a clean kitchen towel. If it's wet, it's dead.
- Standardize the sizes. Cut the broccoli into uniform florets. Peel the tough skin off the stalks and slice them into 1/2 inch coins so they cook at the same speed as the tops.
- The big toss. In a large bowl, combine the broccoli with 2 tbsp olive oil, 1 tsp salt, 1/2 tsp pepper, 1/4 tsp red pepper flakes, and the sliced garlic.
- The massage. Use your hands to rub the oil into the florets. You want every tiny branch to have a thin, shimmering coat of fat.
- Create space. Spread the mixture onto a large rimmed baking sheet. Ensure the florets are in a single layer with space between them.
- Apply heat. Roast for 20 minutes until the edges are charred and the garlic is golden brown.
- The bright finish. Remove from the oven and immediately hit it with 1 tbsp lemon juice. The steam will carry the citrus flavor through the tray.
- The cheese blanket. Sprinkle with 1/4 cup grated Parmesan while it’s still piping hot so it adheres to the florets.
- Serve immediately. This dish is at its peak the second that cheese starts to soften.
Solving Common Roasting Obstacles
Even with the best intentions, things can go sideways. The most common issue is the "mush factor." If your broccoli feels soft and heavy rather than light and crisp, check your oven temperature. Many home ovens run 25 degrees cooler than the dial says.
Using an oven thermometer is a small investment that solves 90% of roasting problems.
Why Your Broccoli Is Sullen
If your vegetables look more boiled than roasted, you likely overcrowded the pan. When florets are touching, the moisture they release gets trapped, creating a steam pocket. This softens the cell walls of the broccoli without allowing the Maillard reaction (that beautiful browning) to occur.
| Problem | Root Cause | Solution |
|---|---|---|
| Soggy Florets | Too much moisture or crowding | Dry broccoli better; use two pans if needed. |
| Burnt Garlic | Sliced too thin or added too early | Slice into thicker "chips" or toss in halfway through. |
| Bland Flavor | Not enough salt or acid | Increase salt; never skip the lemon juice at the end. |
Common Mistakes Checklist
- ✓ Never use frozen broccoli if you want a "snap" the freezing process breaks down cell walls.
- ✓ Don't skip the stalk; the "coins" are often the sweetest part of the vegetable.
- ✓ Avoid using too much oil; 2 tablespoons is the sweet spot for 1.5 lbs.
- ✓ Make sure the oven is fully preheated before the tray goes in.
- ✓ Use a metal spatula to toss the broccoli halfway through if your oven has "hot spots."
Flavorful Substitutions And Variations
Once you’ve mastered the base technique, you can start playing with the profile. Broccoli is a neutral canvas that loves bold, punchy ingredients. If you want to lean into an Asian inspired profile, swap the Parmesan for a drizzle of toasted sesame oil and a sprinkle of toasted sesame seeds.
Creating Variations
If you're making Roasted Broccoli and Carrots, slice the carrots into thin diagonal rounds. Carrots take slightly longer to cook than broccoli, so cutting them thin ensures they finish at the same time.
For Roasted Broccoli and Cauliflower, keep the cauliflower florets slightly smaller than the broccoli ones, as cauliflower is denser and requires more heat to soften.
| Servings | Broccoli Amount | Oil/Seasoning | Pan Size |
|---|---|---|---|
| 2 People | 0.75 lbs | 1 tbsp oil, 1/2 tsp salt | Small 9x13 rimmed pan |
| 4 People | 1.5 lbs | 2 tbsp oil, 1 tsp salt | Standard half sheet pan |
| 8 People | 3 lbs | 3.5 tbsp oil, 1.5 tsp salt | Two half sheet pans (rotate mid cook) |
Scaling this recipe up is easy, but remember the "spices to 1.5x" rule. If you double the broccoli, you don't necessarily need to double the red pepper flakes or salt immediately start with 1.5x and adjust to your taste at the end. Over salting a giant batch is a nightmare to fix.
Debunking Roasting Misconceptions
There’s a popular myth that you should blanch (boil) broccoli before roasting it to "ensure it's cooked through." This is a recipe for disaster. Blanching introduces massive amounts of internal water into the vegetable. Even if you dry the outside, the inside will stay mushy.
Trust the 425°F (218°C) oven to do the work of softening the stems while crisping the tops.
Another common misconception is that you need a "healthy" amount of oil for roasting. While we want a coating, drowning the broccoli in oil will actually lead to a heavy, greasy texture. The 2 tablespoons of extra virgin olive oil we use is plenty to facilitate the heat transfer without making the dish feel oily.
Handling Leftovers And Storage
Roasted broccoli is best eaten fresh, but it doesn't have to go to waste if you have leftovers. The key is knowing that it will never be as crispy again as it was the moment it left the oven.
- Fridge: Store in an airtight container for up to 4 days.
- Freezer: You can freeze it for up to 2 months, but the texture will become very soft. Best used in soups or quiches later.
- Reheating: Avoid the microwave! It will turn the broccoli into a rubbery mess. Instead, throw it back onto a baking sheet at 400°F (200°C) for 5 minutes until it sizzles.
- Zero Waste: Save the very woody ends of the stalks that you peeled off. Throw them into a bag in the freezer for your next batch of vegetable stock. They add a great earthy depth to broths.
Creative Plating And Pairings
When you're ready to serve, think about contrast. This broccoli is salty, nutty, and slightly bitter. It pairs perfectly with something creamy or something with a bit of sweetness. I love serving this alongside a simple roast chicken or even a hearty pasta dish where the charred florets can act as a texture bomb.
If you’re feeling fancy, a dollop of Greek yogurt or a drizzle of tahini sauce over the top of the roasted broccoli can turn it from a side dish into a legitimate vegetarian main.
The lemon juice we added at the end is crucial here it cuts through the richness of the Parmesan and makes the whole dish feel light. Whatever you do, don't let it sit in the oven after it's done; that carryover heat will keep cooking the centers until they lose their structure.
Pull it, plate it, and enjoy that crunch!

Recipe FAQs
How long do I roast broccoli at 425 degrees?
Roast for exactly 20 minutes. This duration ensures the edges become properly charred while keeping the stems at a pleasant tender crisp texture.
How to eat broccoli for diabetes?
Focus on high fiber preparation methods like roasting. Since roasting retains the vegetable's structural integrity, it helps maintain a lower glycemic impact when served as part of a balanced meal alongside proteins like savory chicken thighs.
What seasoning is good on roasted broccoli?
Use a combination of kosher salt, black pepper, red pepper flakes, and thinly sliced garlic. These aromatics enhance the vegetable's natural earthiness without masking its flavor.
How to make perfect roast broccoli?
Preheat your oven fully to 425°F before placing the tray inside. The secret is ensuring the broccoli is completely dry after washing; any residual surface moisture will cause the florets to steam rather than develop that essential crispy, charred exterior.
Is it true I should use frozen broccoli for convenience?
No, this is a common misconception. Frozen broccoli contains excess water that gets released during roasting, which results in mushy vegetables rather than the desired crispy texture.
How to avoid overcrowding the baking sheet?
Spread the florets in a single layer with space between each piece. Providing enough room for hot air to circulate around every floret is critical for achieving even browning rather than accidental steaming.
How to prep the stalks for roasting?
Peel the tough outer woody layer and slice the interior into 1/2 inch coins. These coins roast beautifully alongside the florets and are frequently the sweetest, most tender part of the vegetable.
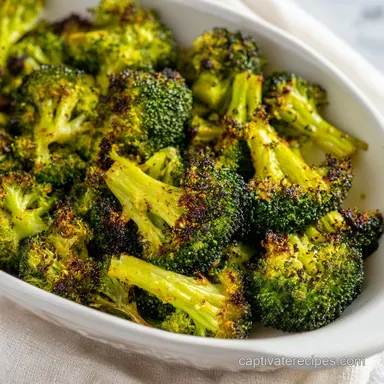
Crispy oven-roasted Broccoli
Ingredients:
Instructions:
Nutrition Facts:
| Calories | 149 kcal |
|---|---|
| Protein | 7.1 g |
| Fat | 9.2 g |
| Carbs | 12.2 g |
| Fiber | 4.4 g |
| Sugar | 2.4 g |
| Sodium | 678 mg |
