Crunchy Jalapeño Poppers Recipe
- Time: Active 25 minutes, Passive 15 minutes, Total 40 minutes
- Flavor/Texture Hook: Smoked paprika heat meets a crispy, golden shell
- Perfect for: Game day snacks or easy party appetizers
- How to Make the Best Crunchy Jalapeño Poppers
- Why This Spicy Recipe Works
- Crucial Specs and Time Details
- What You Will Need Now
- Essential Tools and Kitchen Gear
- Bringing the Whole Dish Together
- Fixing Common Problems and Mistakes
- Simple Variations and Smart Substitutions
- Best Preservation and Storage Secrets
- Ways to Serve and Enjoy
- Recipe FAQs
- 📝 Recipe Card
How to Make the Best Crunchy Jalapeño Poppers
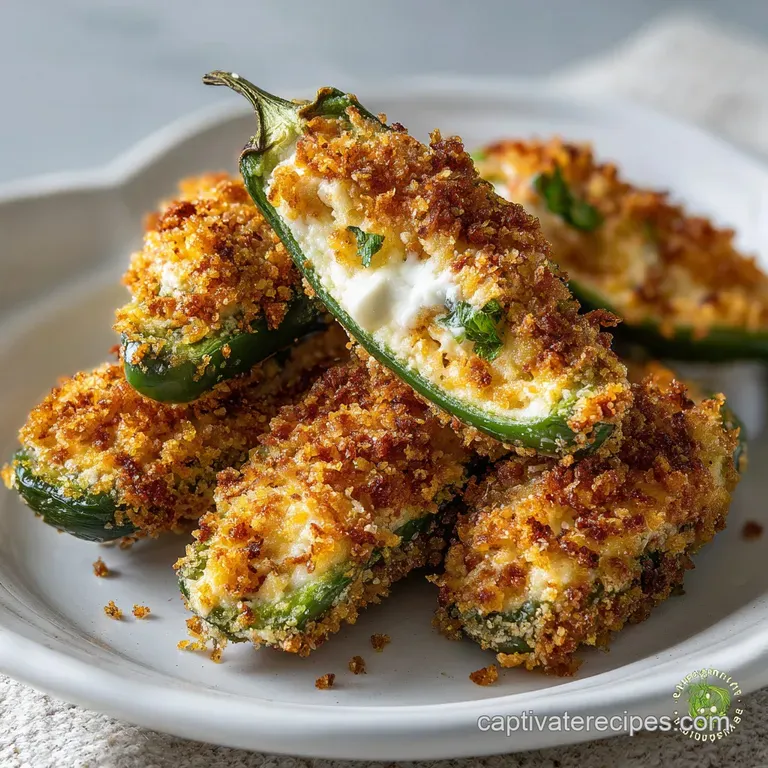
The first time I made these, I didn't use gloves. Big mistake. Huge. My hands burned for two days, but the poppers? They were gone in ten minutes flat. I still remember the sound most that specific shatter of the panko crust hitting a velvety, molten cheese center.
It is the kind of snack that makes people stop talking just to enjoy the crunch.
We have all been there with the frozen version soggy, bland, and somehow both cold and lava hot at the same time. This homemade version changes that. We are aiming for a crust so crisp it crackles when you bite into it, paired with a filling that is creamy but holds its shape.
It is a reliable crowd pleaser that I have refined over dozens of backyard hangouts.
Right then, let's crack on. We are going to use a specific dredging method that I swear by. It prevents that annoying "cheese slide" where the breading falls off in one piece. Trust me, once you see how easy it is to get that golden, bubbly finish at home, you will never look at a frozen box again.
Why This Spicy Recipe Works
The success of these Crunchy Jalapeño Poppers comes down to simple kitchen physics. We are managing moisture and temperature to ensure the breading sets before the cheese melts into a puddle. It is about creating layers that work together rather than fighting each other.
- Capillary Action: The initial flour dust absorbs surface moisture from the jalapeño skin, creating a dry "anchor" for the egg wash to grab onto.
- Triple Layer Barrier: By using a flour egg-panko sequence, we build a structural wall that traps steam inside the pepper, softening it without letting the cheese escape.
- Maillard Reaction: The over high heat environment browns the panko rapidly, developing a complex, nutty flavor that cuts through the richness of the sharp cheddar.
- Starch Gelatinization: As the poppers bake, the flour in the coating hydrates and sets, forming a crisp shell that stays firm even as the poppers cool slightly.
| Cooking Method | Total Time | Final Texture | Best For |
|---|---|---|---|
| Conventional Oven | 15 minutes | Evenly golden and firm | Large batches/parties |
| Air Fryer | 10 minutes | Ultra crunchy and dark | Quick snacks for two |
| Shallow Fry | 6 minutes | Richest flavor, very oily | Maximum indulgence |
When you choose your method, remember that the air fryer is fantastic for speed, but the oven is your best friend when you have a house full of people. If you are looking for more party ready snacks, you might find my Rattlesnake Bites recipe is a great companion for a spicy spread. Both use that creamy crunchy contrast that people crave.
Crucial Specs and Time Details
Planning is everything when you are dealing with peppers and hot cheese. You want to make sure your cream cheese is actually soft, otherwise, you will end up tearing the jalapeños while trying to spread the filling. I usually take the 8 oz cream cheese out of the fridge at least an hour before I start.
If you are in a rush, you can microwave the cream cheese for about 15 seconds, but be careful not to melt it. We want a spreadable paste, not a liquid. For the prep flow, I suggest cleaning and deseeding all 14 large jalapeños first, then mixing the filling, and finally setting up your dredging station.
This keeps the process clean and prevents cross contamination.
| Ingredient | Science Role | Pro Secret |
|---|---|---|
| Panko Breadcrumbs | Surface Area | Use panko over regular crumbs for 3x the crunch factor. |
| Cream Cheese | Fat Buffer | High fat content insulates the peppers from becoming too mushy. |
| Sharp Cheddar | Flavor/Binding | Grate your own from a block to avoid anti clumping starches. |
| Large Eggs | Protein Glue | Whisk with water to thin the proteins for a more even coating. |
What You Will Need Now
Gathering your elements before you start is the secret to a stress free kitchen. For this recipe, we are looking for balance. The sharp cheddar provides the punch, while the green onions add a fresh, sharp bite that cuts through the heavy dairy.
- 14 large jalapeños, halved and deseeded Why this? Large peppers provide the best surface area for filling and breading.
- Substitute: Mini sweet peppers for a zero heat version.
- 8 oz cream cheese, softened Why this? It acts as the creamy base that holds the spices together.
- Substitute: Neufchâtel for a slightly lower fat content.
- 115g sharp cheddar cheese, freshly grated Why this? Grating it yourself ensures it melts into a velvety texture.
- Substitute: Pepper Jack for an extra kick of spice.
- 2 green onions, finely minced Why this? Adds a necessary pop of freshness to the rich filling.
- Substitute: 1 teaspoon of dried chives if fresh is unavailable.
- 0.5 tsp garlic powder Why this? Distributes savory flavor more evenly than fresh garlic.
- Substitute: Onion powder for a sweeter, savory profile.
- 0.25 tsp smoked paprika Why this? Provides a subtle woodsy depth that complements the pepper's heat.
- Substitute: Liquid smoke (1 drop) mixed into the cream cheese.
- 60g panko breadcrumbs Why this? These jagged flakes create the signature "crunch" we're after.
- Substitute: Crushed saltine crackers for a different type of salty snap.
- 65g all purpose flour Why this? Creates the base layer that prevents the breading from sliding off.
- Substitute: Rice flour for an even crispier, lighter shell.
- 2 large eggs Why this? The essential binder that keeps the panko stuck to the pepper.
- Substitute: 1/4 cup heavy cream (though it won't be as sturdy).
- 1 tbsp water Why this? Thins the eggs just enough to create a thin, workable coating.
- 0.5 tsp kosher salt Why this? Enhances all the other flavors without being overly salty.
- 0.25 tsp black pepper Why this? Adds a low level floral heat to the crust.
Essential Tools and Kitchen Gear

You don't need a professional kitchen, but a few specific tools make this much easier. A small spoon or a grapefruit spoon is the best way to scrape the seeds and pith out of the jalapeños without breaking the shells. It gives you a clean "vessel" for your cheese.
I also highly recommend using a wire cooling rack set inside a rimmed baking sheet. This allows hot air to circulate under the poppers, which is the only way to prevent the dreaded "soggy bottom." If you place them directly on a sheet, the moisture from the pepper has nowhere to go.
Chef's Tip: Put on a pair of disposable food safe gloves before you touch the peppers. Jalapeño oils (capsaicin) linger on your skin even after washing with soap, and you really don't want to rub your eyes three hours later!
Finally, having three shallow bowls for your flour, egg wash, and panko makes the dredging process much more efficient. I like to use pie tins or wide pasta bowls. It keeps the mess contained and ensures you have enough room to roll the peppers thoroughly.
Bringing the Whole Dish Together
The goal here is a methodical flow. If you rush the dredging, the coating will be patchy. If you overfill the peppers, they will explode. It is all about that middle ground.
Phase 1: Preparation Basics
Preheat your oven to 200°C (400°F). Slice the 14 jalapeños in half lengthwise. Use a small spoon to scrape out all the seeds and the white membranes. This is where most of the heat lives, so be thorough if you want a milder popper.
Pat the outsides of the peppers completely dry with a paper towel.
Phase 2: Mixing the Filling
In a medium bowl, combine the 8 oz softened cream cheese, 115g grated sharp cheddar, minced green onions, garlic powder, and smoked paprika. Use a sturdy spatula to fold them together until the mixture is uniform and smooth.
Phase 3: Stuffing the Shells
Fill each jalapeño half with about a tablespoon of the cheese mixture. You want the filling to be flush with the edges of the pepper or slightly mounded. Don't overstuff them, or the cheese will expand and leak out during baking.
Phase 4: The Triple Dredge
Set up three bowls: one with 65g flour, one with 2 beaten eggs and 1 tbsp water, and one with 60g panko mixed with salt and pepper. Dip the filled side of the pepper into the flour, then the egg, then back into the flour. This "double flour" base is a secret trick for maximum adhesion.
Phase 5: The Final Crunch
Now, dip the pepper into the egg wash again and then press it firmly into the panko breadcrumbs. Ensure the cheese side is completely covered with a thick layer of crumbs. Place them on your prepared wire rack.
Phase 6: The over High heat Finish
Bake for 15 minutes until the panko is golden brown and the cheese is bubbly. You will see the crust start to "set" and look dry rather than oily.
Let them rest for 5 minutes before serving so the cheese can firm up this prevents the filling from squirting out when you take that first bite.
Fixing Common Problems and Mistakes
The most common issue people face is the breading falling off. This usually happens because the pepper was still wet from washing or the flour layer wasn't pressed in firmly enough. If the breading feels loose before it goes in the oven, it will definitely fall off after.
Another headache is the "cheese volcano." This is caused by overfilling or by the oven temperature being too low, which causes the cheese to melt and boil before the crust can set. If you see the cheese starting to bulge, they are done pull them out immediately!
Why Your Crust Is Soggy
If your poppers aren't crunchy, it is almost always due to steam. If you don't use a wire rack, the pepper releases moisture that gets trapped between the vegetable and the baking sheet, steaming the breading from the bottom up.
| Problem | Root Cause | Solution |
|---|---|---|
| Breading Slips Off | Wet pepper surface | Pat peppers dry and use the double flour method. |
| Cheese Leaks Out | Overstuffed peppers | Fill level with the rim; don't mound too high. |
| No Crunch | Low oven temperature | Ensure oven is fully preheated to 200°C. |
Common Mistakes Checklist:
- ✓ Forgot to pat the peppers dry (coating won't stick)
- ✓ Used pre shredded cheese (waxy coating prevents a smooth melt)
- ✓ Overcrowded the baking sheet (traps steam and prevents browning)
- ✓ Skipped the resting period (molten cheese will burn your mouth)
- ✓ Didn't remove enough pith (makes the poppers unpredictably spicy)
Simple Variations and Smart Substitutions
While the classic Crunchy Jalapeño Poppers are a staple, you can easily tweak them to fit your mood or pantry. I often add crumbled bacon to the filling for a smoky crunch, or swap the cheddar for feta if I want a tangier, salty profile similar to the flavors in my Mexican Street Corn recipe.
For those who want to skip the breading entirely, you can wrap the stuffed peppers in a half slice of thin bacon. It won't have the same "shatter" of the panko, but it provides a different kind of savory crispness. Just be sure to bake them longer to ensure the bacon is fully rendered and crispy.
| Original Ingredient | Substitute | Why It Works |
|---|---|---|
| Panko (60g) | Crushed Pork Rinds | Keeps the crunch while being Keto friendly. |
| Sharp Cheddar (115g) | Monterey Jack | Melts even easier; has a milder, creamier flavor. |
| Green Onions (2) | Fresh Cilantro | Changes the profile to a bright, herbal finish. |
If you are cooking for a larger crowd and need to know how much to make, here is a quick guide to help you plan your shopping list.
| Servings | Jalapeño Count | Cream Cheese | Prep Time |
|---|---|---|---|
| 4-6 people | 14 peppers | 8 oz (1 block) | 25 minutes |
| 8-12 people | 28 peppers | 16 oz (2 blocks) | 45 minutes |
| 15+ people | 42 peppers | 24 oz (3 blocks) | 1 hour |
Best Preservation and Storage Secrets
Poppers are best eaten fresh, but you can definitely manage leftovers. Store any cooked poppers in an airtight container in the fridge for up to 3 days. To reheat, avoid the microwave at all costs! It will turn your beautiful crunchy crust into a limp, soggy mess.
Instead, pop them back into a 175°C (350°F) oven or air fryer for 5 minutes until they sizzle again.
Freezing Instructions: You can freeze these before baking. Follow all the steps up to the final bake, then place them on a tray in the freezer for 2 hours. Once they are frozen solid, transfer them to a freezer bag. They will keep for up to 2 months.
When you're ready to eat, bake them straight from frozen at 200°C for about 20-25 minutes.
Zero Waste Tip: Don't throw away those jalapeño tops! You can finely dice the leftover pepper bits and throw them into an omelet or a batch of cornbread. If you have extra cheese filling, it makes an incredible spread for my Swirled Garlic Herb recipe — just smear it on before baking for a spicy, cheesy upgrade.
Ways to Serve and Enjoy
Presentation is half the fun with these. I like to serve them on a large wooden board with a side of cool ranch dressing or a sweet chili sauce. The sweetness of the chili sauce perfectly balances the heat of the peppers.
If you want to get fancy, a drizzle of hot honey over the top right before serving adds a trendy, sticky sweet element that people love.
These poppers are quite rich, so they pair best with lighter, crisp drinks. Think of a cold lager or a sparkling lime water. If you are serving them as part of a larger meal, they work surprisingly well alongside grilled chicken or even as a spicy side to a burger.
If you find yourself with extra panko, you can toast it in a pan with some butter and garlic to use as a crunchy topping for pasta later in the week. But honestly, these poppers are so addictive that you probably won't have any ingredients left over. They are the ultimate "disappearing" appetizer!

Recipe FAQs
What is the key technique to prevent the breading from falling off the jalapeño?
Use a double flour dredge. After dipping in the egg wash, press the pepper firmly into the panko, but first, dip it back into the flour layer after the initial egg dip. This builds a stronger anchor for the final crust.
How do I ensure the bottom of the poppers stays crunchy, not soggy?
Bake them on a wire rack set inside a rimmed baking sheet. This simple setup allows hot air to circulate underneath the poppers, preventing trapped moisture from steaming the bottom crust.
How to store leftover baked poppers for the best reheating texture?
Reheat in an oven or air fryer, never the microwave. Store cooled leftovers airtight in the fridge for up to three days, then bake at 350°F (175°C) for about five minutes until the crust crisps again.
Is it true that using pre-shredded cheese makes the filling too oily?
Yes, this is common. Pre-shredded cheese contains starches meant to prevent clumping, which can lead to a waxy texture rather than a smooth, velvety melt.
How to prepare the jalapeños to control the final spice level?
Scrape out all white pith and seeds thoroughly. The capsaicin oils that cause the most intense heat are concentrated on the white membrane inside the pepper; removing this dramatically reduces the spice.
Can I freeze these poppers before baking them?
Yes, freezing raw, stuffed poppers works well. Freeze them individually on a tray until solid, then transfer them to a bag to bake directly from frozen at 400°F (200°C) for about 20 to 25 minutes.
What is the best way to achieve a complex, smoky flavor without adding liquid smoke?
Use smoked paprika generously in the filling. This dried spice offers a nuanced smokiness that complements the sharp cheddar; if you enjoy this smoky profile, you might also like the technique used to develop deep flavor in our Skull Potatoes for Halloween recipe.
Crunchy Jalapeno Poppers
Ingredients:
Instructions:
Nutrition Facts:
| Calories | 138 calories |
|---|---|
| Protein | 4.9 g |
| Fat | 9.1 g |
| Carbs | 9.6 g |
| Fiber | 0.8 g |
| Sugar | 1.2 g |
| Sodium | 165 mg |
