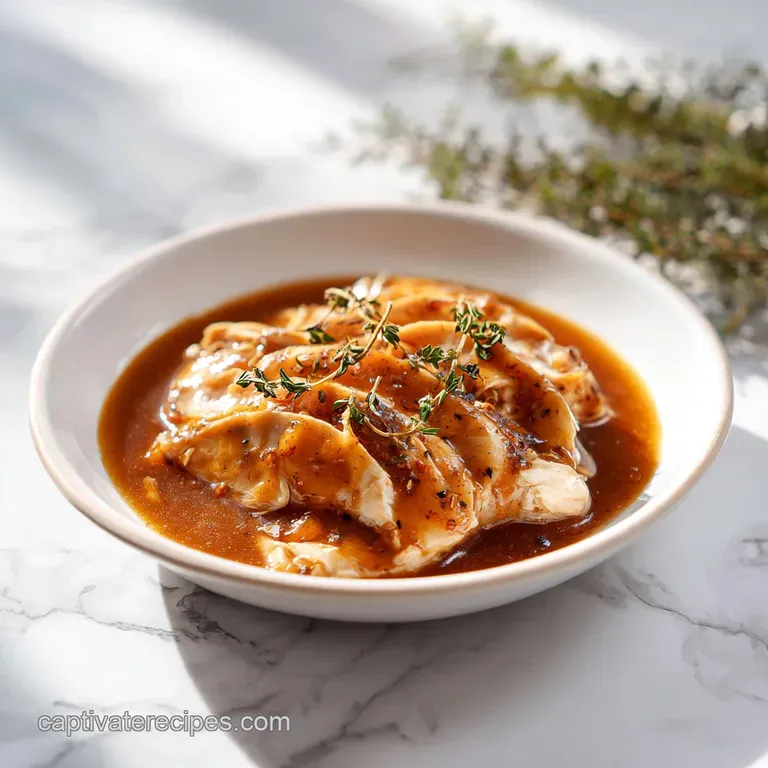
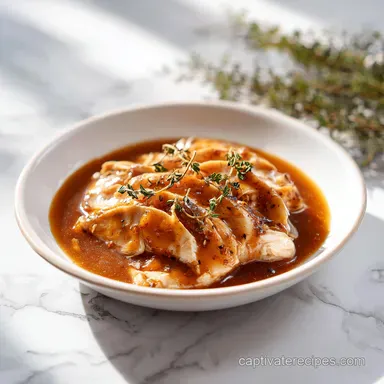
Chicken Gravy: Silky and Homemade

- Time: Active 10 minutes, Passive 5 minutes, Total 15 minutes
- Flavor/Texture Hook: Savory, silky, and deeply umami with a golden hue
- Perfect for: Weeknight dinners, mashed potato sides, and beginner cooks
- The Most Reliable Chicken Gravy Recipe
- Why This Method Actually Works
- Component Analysis for Deep Flavor
- Simple Ingredients for Pantry Success
- Essential Tools for Smooth Results
- Step-by-Step Instructions for Silky Sauce
- Fixing Common Gravy Making Mishaps
- Ways to Customize Your Sauce
- Storing and Reusing Your Gravy
- Best Sides for This Sauce
- Common Kitchen Myths
- Recipe FAQs
- 📝 Recipe Card
The Most Reliable Chicken Gravy Recipe
Have you ever wondered why some gravy tastes like a hug while others just feel like salty wallpaper paste? It is a question that haunted my early kitchen days, especially when I was trying to feed a family on a Tuesday night without a whole roasted bird in sight.
I used to think the only way to get that deep, savory soul into a sauce was to wait hours for a chicken to finish roasting so I could scrape the bottom of the pan. It turns out, that is a complete myth that keeps too many people reaching for those little brown envelopes of powder.
The first time I tried making a "dripping free" sauce, it was a total disaster. I dumped all the broth in at once, the flour clumped into tiny, stubborn islands, and it looked more like lumpy oatmeal than a smooth glaze.
But after years of trial and error, I found the secret lies in the rhythm of the whisk and a few "secret" ingredients that mimic the complexity of a slow cooked roast. Now, this is the only way we make it. It is fast, it is consistent, and it actually tastes like chicken.
We are going to walk through the process of building a foundation of flavor using butter and flour, then layering in seasonings that give it that "cooked all day" vibration. Whether you are pouring this over a mountain of buttery mashed potatoes or using it to moisten up some leftover poultry, you will find this method is the backbone of comfort food.
It's about being practical without sacrificing the textures we crave.
Why This Method Actually Works
Gelatinization Control: By cooking the flour in butter first, we coat the starch granules in fat, which prevents them from clumping together when they hit the liquid.
The Umami Bridge: Adding a splash of soy sauce provides the dark, savory depth and golden color usually provided by caramelised meat juices from a roasting pan.
Gradual Hydration: Adding liquid in small splashes at the start allows the flour to absorb moisture evenly, creating a thick paste that thins out into a velvety sauce without lumps.
| Aspect | Fast (This Method) | Classic (Drippings) |
|---|---|---|
| Preparation Time | 15 minutes total | 2 to 3 hours (roast time) |
| Base Liquid | store-bought or DIY broth | Natural meat juices and fats |
| Consistency | Highly predictable and smooth | Variable depending on bird fat |
It is fascinating how a few simple pantry staples can transform into something so rich. The key is really in that initial stage where the flour and butter meet the heat. If you rush it, you lose the flavor. If you go too slow, you might burn it.
But when you hit that sweet spot, the aroma changes from raw flour to something reminiscent of toasted crackers, and that is when the magic happens.
Component Analysis for Deep Flavor
| Ingredient | Science Role | Pro Secret |
|---|---|---|
| Unsalted Butter | Provides the fat base for the roux and creates a silky mouthfeel. | Use European style butter for a higher fat content and richer flavor. |
| All Purpose Flour | Acts as the primary thickening agent through starch expansion. | Whisk for at least 2 minutes to remove the "cardboard" raw flour taste. |
| Chicken Broth | The primary hydration source that carries the chicken essence. | Use low sodium broth so you can control the final saltiness yourself. |
| Soy Sauce | Enhances color and provides "glutamates" for savory depth. | It adds a hidden complexity that makes people ask for your secret. |
The choice of broth is actually more important than people realize. If you use a very thin, watery broth, your gravy will lack body. I always suggest a high-quality low sodium option because it gives us a blank canvas. This way, we can add our own salt and spices without the sauce becoming an overnight salt bomb.
Simple Ingredients for Pantry Success
To get started, gather these specific items. I have included some easy swaps in case your cupboard is looking a bit bare today.
- 4 tbsp Unsalted Butter: Why this? Provides the essential fat for a rich, stable roux base.
- 1/4 cup All Purpose Flour: Why this? The standard thickener that creates a smooth, traditional texture.
- 2 cups Low Sodium Chicken Broth: Why this? Provides the main flavor profile without excessive saltiness.
- 1/2 tsp Onion Powder: Why this? Adds an aromatic sweetness that mimics sautéed aromatics.
- 1/4 tsp Garlic Powder: Why this? Gives a subtle punch that rounds out the savory notes.
- 1/2 tsp Soy Sauce: Why this? For color and that essential umami kick without drippings.
- 1/4 tsp Black Pepper: Why this? Provides a gentle heat to balance the richness.
- 1/4 tsp Salt: Why this? Enhances all other flavors; adjust only at the very end.
- 2 tbsp Heavy Cream: Why this? An optional finish for a luxurious, cafe style silkiness.
| Original Ingredient | Substitute | Why It Works |
|---|---|---|
| Unsalted Butter | Chicken Fat (Schmaltz) | Same fat ratio but adds an even more intense poultry flavor. |
| All Purpose Flour | Cornstarch (half amount) | Creates a glossier, translucent sauce. Note: Mix with cold water first. |
| Heavy Cream | Whole Milk | Lighter finish. Note: Will be slightly less "velvety" than cream. |
If you find yourself making a Cheesy Chicken Casserole later in the week, you can actually use these same substitution principles to adjust the sauce thickness there too. It is all about understanding how fats and starches play together in the pan.
Essential Tools for Smooth Results
You do not need a kitchen full of gadgets, but two things are non negotiable for me. First, a heavy bottomed saucepan. Thin pans have "hot spots" that will scorch your flour before it has a chance to cook through. Second, a balloon whisk.
A fork just won't cut it here; you need those wires to break up any stubborn flour pockets.
If you are scaling this up for a big holiday meal, a larger saucier pan is even better because the rounded bottoms make it impossible for flour to hide in the corners. I once used a tiny pot and ended up with burnt bits in the "seams" of the pan. Trust me, go a little bigger than you think you need.
step-by-step Instructions for Silky Sauce
- Melt the butter. Place your heavy bottomed saucepan over medium heat and add the 4 tbsp of butter. Let it melt completely until it begins to foam and sizzle.
- Create the roux. Gradually sprinkle in the 1/4 cup of all purpose flour. Whisk this constantly for 2 to 3 minutes. You are looking for the mixture to transition from pale yellow to a light golden tan and smell slightly nutty. Note: This cooks out the raw flour taste.
- Start the hydration. Reduce the heat to medium low. This is the critical part. Pour in about 1/4 cup (60ml) of the chicken broth.
- Whisk vigorously. Use your whisk to work that liquid into the flour paste until a thick, smooth clump forms. It might look weird for a second, but keep going.
- Stream in the rest. Continue adding the remaining broth in small splashes. Whisk until perfectly smooth before adding the next splash. This prevents any lumps from forming in the final sauce.
- Add the aromatics. Whisk in the 1/2 tsp onion powder, 1/4 tsp garlic powder, 1/2 tsp soy sauce, and 1/4 tsp black pepper.
- Simmer to thicken. Continue to simmer over medium low heat, whisking occasionally. Watch as it thickens and coats the back of a spoon.
- The finishing touch. Stir in the 2 tbsp of heavy cream if you are using it.
- Season and serve. Taste the gravy. Add the 1/4 tsp of salt only if needed, as the broth and soy sauce already bring quite a bit to the table.
Chef's Tip: If you want a darker "brown gravy" look, keep whisking the flour and butter (the roux) for an extra 2 minutes until it reaches a peanut butter color. Just be careful not to let it smell burnt!
Fixing Common Gravy Making Mishaps
One of the most frustrating things is watching your sauce go wrong right at the finish line. Usually, it is a matter of temperature or timing. If your gravy looks like it has "broken" (the fat is separating), it usually means the heat was too high.
You can often save it by whisking in a teaspoon of cold water or broth very quickly off the heat.
Why Your Gravy is Lumpy
This usually happens because the liquid was added too fast or the roux was too cold when the hot liquid hit it. It's basically a collision of temperatures that causes the starch to seize up.
| Problem | Root Cause | Solution |
|---|---|---|
| Small white lumps | Flour didn't incorporate | Use an immersion blender or pour the gravy through a fine mesh strainer. |
| Too thin/runny | Not enough simmering | Simmer for 3 to 5 more minutes to allow starches to fully hydrate. |
| Too salty | Broth or soy sauce overkill | Add a splash more cream or a tiny pinch of sugar to balance. |
Don't panic if it isn't "perfect" the first time. Even pros have to strain their sauces occasionally. The flavor is what matters most, and a quick trip through a sieve can fix almost any textural nightmare.
Common Mistakes Checklist:
- ✓ Whisk the roux for the full 2 minutes (prevents a "pasty" flavor).
- ✓ Add liquid slowly at the start (this is the only way to stay lump free).
- ✓ Keep the heat at medium low once liquid is added (prevents scorching).
- ✓ Taste before adding extra salt (soy sauce is sneakily salty).
- ✓ Use a whisk, not a spoon (incorporates air and breaks up flour).
Ways to Customize Your Sauce
While this "chicken gravy recipe" is designed to be a classic, you can easily pivot based on what you are serving. If you are doing a Broccoli Casserole recipe as a side, you might want a punchier, brighter sauce.
To Achieve a Deeper Umami Profile
If you want something that tastes "beefier" or more intense, you can swap the chicken broth for beef broth and add a tiny drop of Worcestershire sauce. This creates a darker, more robust flavor that pairs beautifully with Salisbury steak or roast beef.
For an Herbed Garden Twist
Stir in 1/2 teaspoon of dried thyme or rubbed sage during the simmering process. This is the ultimate "Thanksgiving" shortcut. The herbs hydrate in the warm sauce and release their oils, making the whole kitchen smell like a holiday feast.
| Servings | Butter | Flour | Broth | Pan Size |
|---|---|---|---|---|
| 2 People | 1.5 tbsp | 1.5 tbsp | 160 ml | Small Butter Warmer |
| 6 People | 4 tbsp | 1/4 cup | 475 ml | 1.5 Quart Saucepan |
| 12 People | 8 tbsp | 1/2 cup | 950 ml | 3 Quart Pot |
Storing and Reusing Your Gravy
Storage: You can keep this in an airtight container in the fridge for up to 3 days. Because of the butter and flour, it will turn into a thick "jelly" when cold. Do not be alarmed! This is just the gelatin and fats solidifying.
Reheating: To bring it back to life, place it in a small saucepan over low heat. Add a splash of water or broth (about 1 tablespoon at a time) and whisk constantly. It will loosen up and become silky again as it warms.
Avoid the microwave if possible, as it tends to heat unevenly and can make the edges "explode" or separate.
Zero Waste: If you have just a little bit left over, don't throw it out. Use it as a base for a "fridge raid" pot pie. Stir in some frozen peas, leftover chopped chicken, and put it in a ramekin with a piece of store-bought puff pastry on top. It is the best Wednesday lunch you will ever have.
Best Sides for This Sauce
This sauce was born to live on top of mashed potatoes, but it is surprisingly versatile. I love using it as a dip for crusty bread or pouring it over a simple roasted chicken breast to keep the meat juicy.
It also works wonders as a "binder" for a leftover turkey sandwich just dip the bread in the warm sauce before assembling.
If you are looking for a full meal plan, try serving this over rice alongside some steamed vegetables. The way the savory sauce soaks into the grains is pure comfort. It turns a "boring" meal of plain protein and veggies into something that feels intentional and hearty.
Common Kitchen Myths
Myth: You must have meat drippings for good gravy. Truth: While drippings add a specific depth, you can build incredible flavor using "aromatics" like onion and garlic powder combined with umami rich liquids like soy sauce or Worcestershire. The texture comes from the roux, not the meat fat.
Myth: Boiling the gravy makes it thicker. Truth: Starch actually reaches its maximum thickening power just as it hits a simmer (around 95°C). Hard boiling for a long time can actually start to break down the starch chains, potentially making your sauce thinner or causing it to separate.
A gentle simmer is all you need.
Myth: Flour and cornstarch are interchangeable. Truth: Flour creates an opaque, matte finish that is traditional for "country style" or "turkey" gravies. Cornstarch creates a translucent, shiny glaze often seen in stir fries.
They also require different methods; flour needs to be cooked in fat (roux), while cornstarch needs to be mixed with cold liquid (slurry) before adding to heat.

Recipe FAQs
How to make simple gravy for chicken?
Melt 4 tablespoons of butter in a saucepan over medium heat, whisk in 1/4 cup of flour for 3 minutes, then gradually stream in 2 cups of chicken broth while whisking constantly. Finish by adding the onion powder, garlic powder, soy sauce, pepper, salt, and heavy cream, simmering until the sauce reaches your preferred thickness.
Can you eat gravy with diabetes?
Yes, but you should consume it in moderation and keep portions small. Since this recipe relies on all-purpose flour for thickening, it does contain carbohydrates that will impact blood sugar levels.
What is the secret ingredient for good gravy?
The secret is the 1/2 teaspoon of soy sauce. It provides an umami boost and deep color, acting as a flavor enhancer that bridges the gap between the chicken broth and the richness of the butter.
How to make the best chicken stock for gravy?
Simmer chicken bones, mirepoix, and herbs for several hours to extract maximum gelatin and collagen. If you enjoyed the crispy texture achieved by drying out wings, you can apply similar logic to roasting your soup bones before boiling to deepen the savory base of your stock.
Is it true I can use a microwave to reheat leftover gravy?
No, this is a common misconception. Microwaving often leads to uneven heating, which can cause the fat in the butter and cream to separate and break the silky emulsion of the sauce.
How to fix lumpy gravy?
Whisk the sauce vigorously or pass it through a fine mesh sieve into a clean pan. Ensure you always add the broth in small, slow splashes while whisking constantly to prevent flour clumps from forming in the first place.
How long does homemade gravy last in the fridge?
Store your gravy in an airtight container for up to 3 days. Expect it to turn into a thick, jelly like consistency when chilled, which will return to a silky, pourable state once reheated slowly on the stovetop with a splash of broth.
Easy Chicken Gravy Recipe
Ingredients:
Instructions:
Nutrition Facts:
| Calories | 110 calories |
|---|---|
| Protein | 1.3 g |
| Fat | 10 g |
| Carbs | 4.5 g |
| Fiber | 0.1 g |
| Sugar | 0.5 g |
| Sodium | 185 mg |
