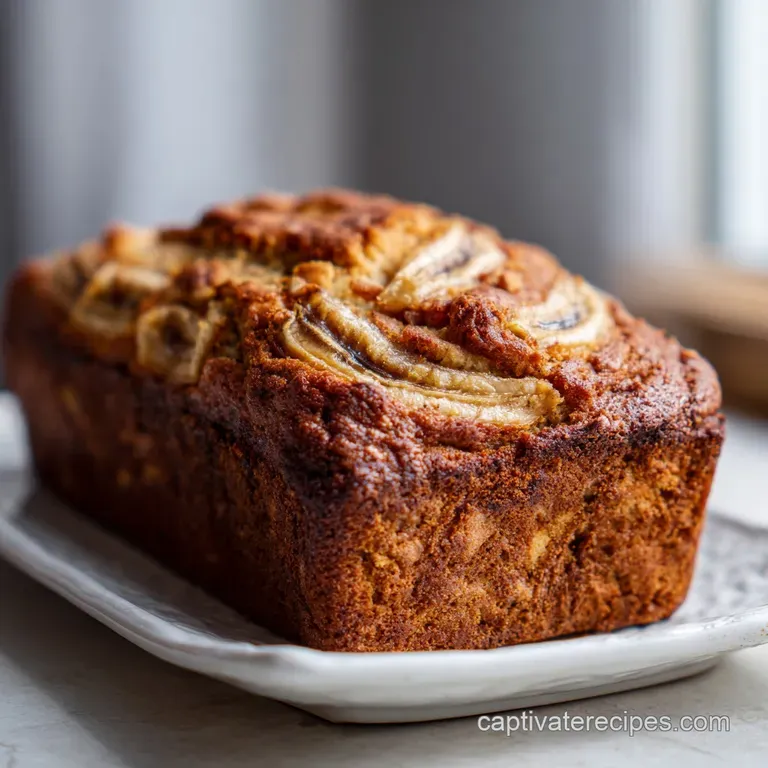
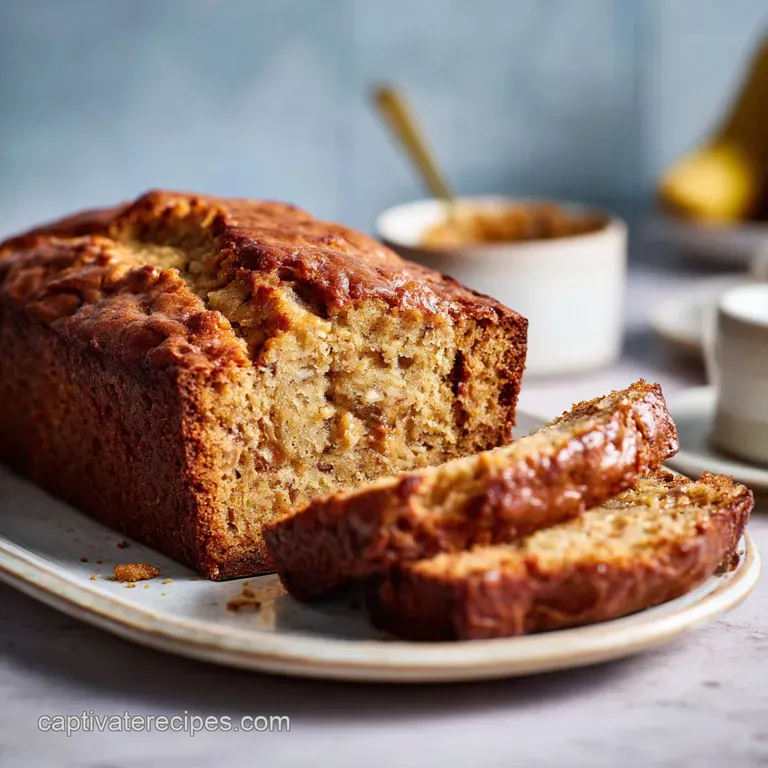
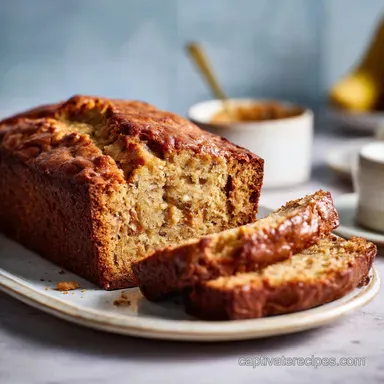
Moist Peanut Butter Banana Bread Recipe
- Time: Active 15 minutes, Passive 60 minutes, Total 1 hour 15 minutes
- Flavor/Texture Hook: Nutty, caramelized sweetness with a tender, moist crumb
- Perfect for: School lunchboxes, lazy Sunday brunches, or a low stress baking project
- The Secret to Perfecting Peanut Butter Banana Bread
- Precision Metrics for a Reliable Golden Loaf
- The Science of the Nutty Crumb
- Basic Kitchen Tools for Minimal Cleanup Success
- Step by Step Guide to a Flawless Bake
- Common Pitfalls and Simple Baking Fixes
- Creative Ways to Customize Your Banana Loaf
- Scaling This Recipe for Crowds or Couples
- Storing Tips to Keep Every Slice Moist
- What to Serve with This Rich Peanut Loaf
- Flavor Truths and Baking Realities
- Recipe FAQs
- 📝 Recipe Card
The Secret to Perfecting Peanut Butter Banana Bread
You know that smell? The one where the kitchen starts to fill with a scent that’s half caramelized fruit and half toasty nut butter? That's when you know you've nailed it. I used to think banana bread was just a way to get rid of trash, but after a few failed, gummy loaves, I realized it's actually an art form.
This version is my absolute favorite because it doesn't just taste like "regular" bread with a hint of fruit, it tastes like a decadent, rich treat that still feels honest enough for breakfast.
I remember once trying to make this with bananas that were just "yellow." Big mistake. They were starchy, the bread was dry, and the flavor was nonexistent. Now, I wait until those peels look like they’ve seen better days. Trust me, the uglier the banana, the better the bread.
We're going for deep, dark spots and a texture that's almost liquid inside. That’s where the magic happens.
If you’re looking for a reliable bake that works every single time, you’re in the right place. We aren't doing anything fancy or complicated here. We’re just taking basic pantry staples and turning them into something that’ll have your friends texting you for the recipe before the loaf is even cool.
It's easy, it's hearty, and it’s a total crowd pleaser for any tired home cook.
Precision Metrics for a Reliable Golden Loaf
When we talk about getting a consistent result, the numbers really matter. I’ve tested this dozen of times to find the sweet spot where the center isn't raw but the edges aren't burnt.
Using a scale for your bananas (about 340g) is the best way to ensure you aren't adding too much moisture, which is the number one cause of a sunken middle.
| Cooking Method | Total Time | Texture Outcome | Best For |
|---|---|---|---|
| Standard Oven | 1 hour | Even crumb, thick crust | Traditional slicing |
| Muffin Tin | 22 minutes | High surface area, crispy edges | On the-go snacking |
| Air Fryer (320°F) | 45 minutes | Very dark exterior, fudge like center | Small batches/quick fix |
Using a smaller pan or shifting to muffins changes the physics of how heat hits the batter. If you're in a rush, the muffin tin is a life saver, but for that classic "coffee shop" slice, stick with the loaf pan. The air fryer works in a pinch, though the crust can get a bit thicker than some people like.
For those who want to save a little money or don't have fresh produce on hand, there are always shortcuts. While I'm a purist about the fruit, you can definitely play around with how you get that nutty punch into the batter without breaking the bank on premium jars.
| Fresh/Standard | Shortcut Alternative | Flavor Impact | Savings |
|---|---|---|---|
| Creamy Peanut Butter | PB Powder (reconstituted) | Less fat, slightly more "roasted" | Save $2-3 per jar |
| Pure Vanilla Extract | Imitation Vanilla | Negligible once baked | Save $10+ per bottle |
| Brown Sugar | White Sugar + 1 tsp Molasses | Same moisture and color | Use what's in the pantry |
If you find yourself making this often, stocking up on bulk oats and store brand peanut butter is the way to go. This Peanut Butter Banana Bread Recipe is designed to be forgiving, so don't feel like you need the most expensive ingredients on the shelf to get a result that tastes like a million bucks.
The Science of the Nutty Crumb
Protein Interference: The fats in the peanut butter coat the flour particles, which physically prevents long gluten strands from forming, resulting in a more tender, cake like texture.
Hygroscopic Action: Brown sugar and honey like sugars in the overripe bananas pull moisture from the air, ensuring the loaf stays moist for days rather than drying out like standard wheat bread.
Starch Gelatinization: As the loaf hits 200°F, the starches in the flour and oats set, creating a stable structure that can support the heavy weight of the fruit and nut butter.
| Ingredient | Science Role | Pro Secret |
|---|---|---|
| Overripe Bananas | Primary Hydration | Mash them until they are a complete liquid for a smoother crumb. |
| Creamy Peanut Butter | Fat & Structure | Whisk with sugars for 2 minutes to create a stable emulsion. |
| Rolled Oats | Moisture Reservoir | Let the batter sit for 5 mins before baking so oats can hydrate. |
| Baking Soda | Leavening | Ensure your soda is fresh by dropping a pinch in vinegar; it should fizz violently. |
The oats are a secret weapon here. They act like little sponges, holding onto the moisture from the bananas and releasing it slowly as the bread sits. This is why this loaf actually tastes better on day two. If you're looking for another way to use up those oats, you might enjoy an Oatmeal Peanut Butter recipe for your next baking session.
Basic Kitchen Tools for Minimal Cleanup Success
You don't need a high tech kitchen to make this work. In fact, I usually just use two bowls and a fork. A sturdy loaf pan is the only non negotiable. I prefer a light colored metal pan because dark pans tend to brown the bottom too quickly before the middle is set.
If you only have a glass dish, lower your oven temperature by 25°F to prevent the outside from getting too tough.
A good whisk is helpful for getting the egg and sugars properly combined, but a fork works just fine for the bananas. If you have a stand mixer, you can use the paddle attachment on low speed, but be careful not to overmix. Overworking the flour is the fastest way to turn a fluffy loaf into a brick.
I've made that mistake more times than I'd like to admit, usually when I'm trying to multitask and forget the mixer is running!
step-by-step Guide to a Flawless Bake
- Preheat and Prep. Set your oven to 350°F (180°C). Grease a 9x5 inch loaf pan thoroughly with butter or non stick spray. Note: This ensures the high sugar batter won't stick to the corners.
- Mash the bananas. In a large bowl, mash 3 large overripe bananas (340g) until liquid and bubbly.
- Cream the fats. Whisk in 1/2 cup creamy peanut butter (125g) and 1/4 cup melted unsalted butter (57g) until the mixture looks like a smooth caramel.
- Sweeten it up. Add 3/4 cup light brown sugar (150g) and 1/4 cup granulated sugar (50g). Whisk vigorously for 1 minute until the grit disappears.
- Bind the batter. Whisk in 1 large egg (50g) and 1 tsp vanilla extract (4g). Note: Room temperature eggs emulsify better with fats.
- Whisk dry ingredients. In a separate bowl, stir together 1 1/2 cups all purpose flour (190g), 1/2 cup rolled oats (45g), 1 tsp baking soda (5g), 1/2 tsp salt (3g), and 1/2 tsp cinnamon (1g).
- Combine gently. Fold the dry ingredients into the wet until no white streaks remain. Stop immediately once combined to keep it tender.
- Transfer and level. Pour the batter into your prepared pan and smooth the top with a spatula.
- Bake until set. Bake for 60 minutes. Check at 50 mins; if the top is dark, tent with foil.
- Test for doneness. Insert a toothpick; it should come out with a few moist crumbs but no raw batter. The internal temp should be 200°F.
Chef's Tip: For a "shatter" crust on top, sprinkle a tablespoon of coarse demerara sugar over the batter just before it goes into the oven. The crunch against the soft interior is incredible.
| Original Ingredient | Substitute | Why It Works |
|---|---|---|
| Unsalted Butter | Coconut Oil (melted) | Same fat ratio. Note: Adds a slight tropical scent to the loaf. |
| Light Brown Sugar | Coconut Sugar | Similar moisture level. Note: Result will be slightly less sweet and darker. |
| All Purpose Flour | Whole Wheat Pastry Flour | Lower protein than regular whole wheat. Note: Adds a nice nutty depth. |
If you're out of eggs, you can use a "flax egg" (1 tbsp ground flax + 3 tbsp water), but the rise won't be quite as high. This is an Easy Peanut Butter Banana Bread precisely because it's so flexible with what's in your cupboard.
Common Pitfalls and Simple Baking Fixes
The most common issue I hear about is the dreaded "sunken center." It usually happens because the bread looks done on the outside, but the heavy peanut butter and banana haven't fully set in the middle. When you pull it out too early, the steam inside condenses and the whole thing collapses.
Always use a toothpick or a thermometer to be 100% sure.
Why Your Bread Is Gummy
If the texture feels more like fudge than bread, you likely overmixed the batter or used bananas that weren't ripe enough. When you overmix, you develop too much gluten. Combined with the moisture from the fruit, it creates a rubbery, gummy consistency that isn't very pleasant.
Mix until the flour just disappears and not a second longer.
Why the Bottom is Soggy
This often happens if you leave the bread in the pan for too long after baking. The heat from the bread creates steam, and if it has nowhere to go, it gets trapped between the loaf and the pan. Let it sit in the pan for exactly 10 minutes, then move it to a wire rack so air can circulate underneath.
| Problem | Root Cause | Solution |
|---|---|---|
| Sunken Center | Underbaked or too much banana | Use a thermometer (200°F) and weigh your fruit. |
| Burnt Top | Oven rack too high | Move to the center rack and tent with foil after 40 mins. |
| Dry Crumb | Too much flour | Spoon flour into the measuring cup instead of scooping it. |
Common Mistakes Checklist: ✓ Weigh your bananas (340g) to prevent excess moisture issues. ✓ Use "black" bananas for the highest natural sugar content. ✓ Check baking soda freshness before starting the recipe.
✓ Allow the loaf to cool completely before slicing to let the structure set. ✓ Avoid opening the oven door repeatedly during the first 40 minutes.
Creative Ways to Customize Your Banana Loaf
Once you've mastered the base, you can start having some fun. I love adding textures. A handful of chopped walnuts or pecans adds a lovely bitter contrast to the sweet bananas. If you're a fan of the classic PB&J combo, you can even swirl a few tablespoons of raspberry jam into the batter right before baking.
- For the Chocolate Lovers: Fold in 1/2 cup of dark chocolate chips. If you want a deeper chocolate experience, you might prefer this Banana Chocolate Chip recipe.
- The Protein Boost: Swap 1/4 cup of the flour for your favorite vanilla protein powder. It makes a great "Healthy Peanut Butter Banana Bread" for post workout snacking.
- The Crunch Factor: Use extra crunchy peanut butter instead of creamy. The little bits of toasted peanut throughout the bread are a total game changer.
If you are looking for something even simpler, try this 3ingredient peanut butter recipe which uses similar pantry staples but in cookie form.
Scaling This Recipe for Crowds or Couples
Scaling baking recipes can be tricky because of the pan sizes. If you want to double this, I highly recommend baking it in two separate loaf pans rather than one giant one. The middle of a double sized loaf would take forever to cook, and the edges would be charred before it was done.
If you're scaling down, you can halve the recipe and bake it in a mini loaf pan or 6 muffin tins. When halving the egg, just whisk it in a small bowl and use about 2 tablespoons. Reduce the bake time by about 25% and start checking for doneness early.
For the spices and salt, I usually keep them around 75% of the original amount rather than a strict 50% to keep the flavor from getting too diluted.
| Servings | Ingredient Adjustments | Pan Size | Approx Cook Time |
|---|---|---|---|
| 5 people | Halve all ingredients | Mini Loaf Pan | 35-40 minutes |
| 10 people | Follow Schema exactly | 9x5 Loaf Pan | 60 minutes |
| 20 people | Double all (2 eggs) | Two 9x5 Pans | 60 minutes |
Storing Tips to Keep Every Slice Moist
This bread is a champion of shelf life. Because of the high fat content from the peanut butter, it stays soft much longer than a standard loaf. Keep it in an airtight container at room temperature for up to 4 days.
If you find it's starting to lose its "zip," a quick 10 second zap in the microwave will revive that velvety texture perfectly.
For long term storage, this bread freezes beautifully. I like to slice it first, then place pieces of parchment paper between the slices before wrapping the whole loaf in foil and putting it in a freezer bag. This way, you can pull out exactly one slice whenever the craving hits.
It’ll stay fresh in the freezer for up to 3 months. To reheat, just pop a frozen slice directly into the toaster it gets these amazing crispy edges while the peanut butter inside gets all melty again.
Zero Waste Tip: Don't throw away those banana peels! You can actually soak them in water for 24 hours to create a nutrient rich "tea" for your houseplants. Or, if you have a compost bin, they are a fantastic "green" addition that breaks down quickly.
What to Serve with This Rich Peanut Loaf
Honestly, a thick slice of this bread is a meal on its own, but there are ways to make it even better. A smear of salted butter is the classic choice the salt really makes the peanut flavor pop.
If I'm feeling extra, I’ll top a warm slice with a dollop of Greek yogurt and a drizzle of honey for a bit of tang.
If you want X, do Y: If you want a dessert vibe, serve a warm slice with a scoop of vanilla bean ice cream. If you want a balanced breakfast, pair it with a couple of hard boiled eggs for extra protein. If you want a tea time snack, serve it alongside a strong Earl Grey or a cold glass of almond milk.
I’ve also found that this bread makes incredible French toast. If you have a few slices that have gone a bit stale after 5 or 6 days, dip them in a standard egg and milk wash and fry them up. The peanut butter in the batter caramelizes in the pan and creates a crust that is out of this world.
It’s a reliable trick for making sure not a single crumb goes to waste!
Flavor Truths and Baking Realities
One big myth is that you can "force ripen" bananas in the oven to get the same result as naturally aged ones. While baking yellow bananas at 300°F for 15 minutes will make them soft and brown, it doesn't actually develop the complex sugars and intense aroma that come from days of sitting on the counter.
Use the oven trick only as a last resort; the flavor will be much thinner.
Another misconception is that the oats will make the bread "healthy" but dry. In reality, the oats act as a stabilizer. They prevent the heavy oils from the peanut butter from separating during the bake, which leads to a more consistent crumb.
They don't make it taste like a "health food" loaf; they just give it a heartier, more satisfying chew that works perfectly with the creamy nut butter.

Recipe FAQs
Can I put peanut butter in banana bread?
Yes, absolutely. Adding peanut butter replaces some of the fat, lending an intense nutty depth and incredibly moist crumb structure to the loaf.
What is the one ingredient banana bread upgrade?
Use the darkest, spotty bananas available. The high sugar concentration in truly overripe fruit provides superior moisture and intense, caramelized flavor that fresh bananas cannot replicate.
Are peanut butter and bananas on bread good for you?
It depends on your goals, but they offer good macronutrients. This bread provides healthy fats and protein from the peanut butter, and potassium from the bananas, making it a hearty snack or breakfast option.
Do bananas and peanut butter go together well in baking?
Yes, they are a classic pairing because of textural balance. The creamy, slightly acidic banana complements the richness of the peanut butter fats perfectly, creating a satisfying, complex flavor profile.
How do I ensure the bread rises well when adding heavy peanut butter?
Use fresh baking soda and cream the sugar and peanut butter together first. Whisking the peanut butter into the sugar traps tiny air bubbles; if you master this initial aeration, the structure holds up better against the heavy add-ins.
Is it true I must use brown sugar, or can I use all white sugar?
No, using only white sugar results in a drier loaf. Brown sugar contains molasses, which is hygroscopic, meaning it actively pulls and retains moisture, leading to a softer crumb that lasts longer.
How can I make this recipe dairy-free while keeping it moist?
Substitute the butter with melted coconut oil at a 1:1 ratio. The texture remains soft because coconut oil is solid at room temperature, mimicking butter’s function, similar to how we handle fats in the Strawberry Banana Smoothie recipe for creaminess.
Peanut Butter Banana Bread
Ingredients:
Instructions:
Nutrition Facts:
| Calories | 316 kcal |
|---|---|
| Protein | 6.7g |
| Fat | 12.0g |
| Carbs | 47.5g |
| Fiber | 2.6g |
| Sugar | 28.1g |
| Sodium | 295mg |
