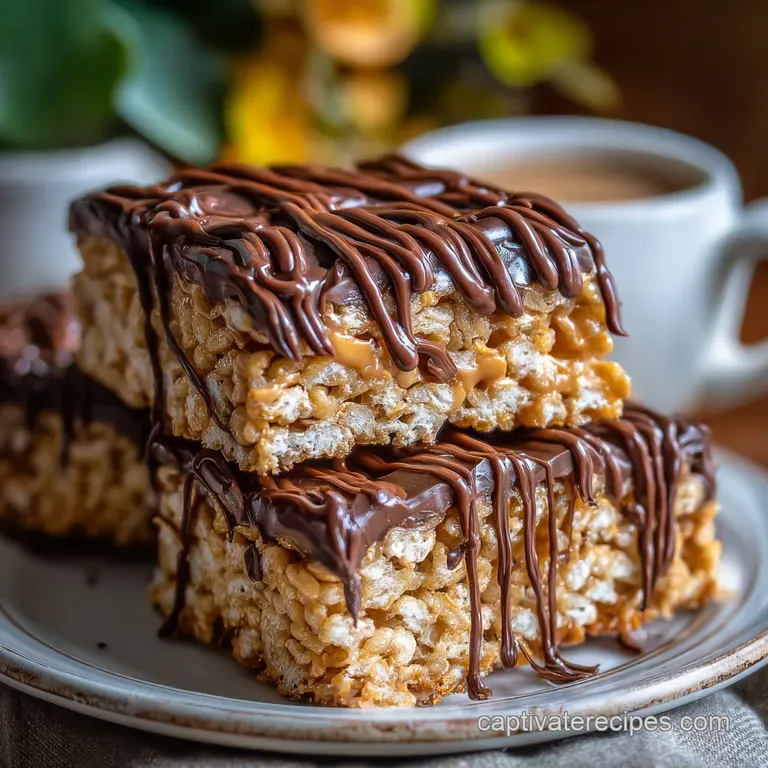
Velvety Peanut Butter Rice Krispie Treats with Chocolate
- Time: Active 10 minutes, Passive 5 minutes, Total 15 minutes
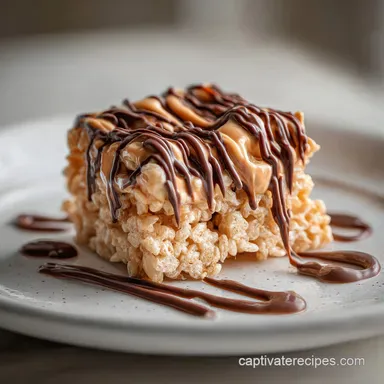
- Flavor/Texture Hook: Velvety peanut butter and shatter crisp rice
- Perfect for: School bake sales, late night cravings, or beginner friendly gifting
- Create the Ultimate Peanut Butter Rice Krispie Treat
- Essential Recipe Metrics and Timing
- high-quality Ingredients for Better Results
- Necessary Tools for No Bake Success
- Simple Instructions for Crispy Bars
- Preventing Common Sticky Kitchen Mishaps
- Smart Swaps and Flavor Twists
- Keeping Your Treats Fresh Longer
- Perfect Pairings and Serving Ideas
- Debunking Kitchen Myths
- Recipe FAQs
- 📝 Recipe Card
Create the Ultimate Peanut Butter Rice Krispie Treat
The smell of butter hitting a warm pan is a universal signal that something good is happening, but when you stir in a hefty cup of creamy peanut butter, the aroma becomes downright hypnotic.
I remember the first time I tried to make these without a recipe, I cranked the heat too high and ended up with a scorched, sticky mess that nearly ruined my favorite pot. This recipe delivers the ultimate Peanut Butter Rice Krispie Treat with Chocolate Drizzle by focusing on low, slow melting and a gentle folding technique.
We have all been there, reaching for a treat only to find it has gone rock hard or, worse, turned into a soggy pile of disappointment. The trick isn't just in the ingredients, but in how you handle them once they start to bubble.
You want that perfect pull, the kind where the marshmallows stretch into thin, translucent threads before you press them into the pan.
It is about finding that sweet spot where the salt cuts through the sugar and the chocolate drizzle adds just enough bitterness to keep you coming back for a second square. Trust me, once you master the balance of fats and sugars here, you will never go back to the plain boxed version.
We are going for a texture that is both sturdy enough to hold and soft enough to melt away the second it hits your tongue.
Essential Recipe Metrics and Timing
Making a batch of these treats is a sprint, not a marathon. Because we are working with sugar that hardens as it cools, you need to have everything measured and ready before you turn on the stove. These numbers are your guardrails to ensure every bite is consistent.
| Method | Time | Texture | Best For |
|---|---|---|---|
| Stovetop | 15 mins | Extra gooey and soft | Maximum chewiness and control |
| Oven (Warmth) | 20 mins | Firmer and more set | Batch cooking for large crowds |
| Microwave | 8 mins | Quick but prone to dryness | Emergency snack cravings only |
The stovetop remains the gold standard for this specific snack because it allows you to watch the marshmallows transform. If you use the oven method, you risk evaporating too much moisture from the marshmallows, which is the primary cause of "rock hard" treats.
The goal is to apply just enough heat to change the state of the sugar without caramelizing it into a hard candy.
high-quality Ingredients for Better Results
Selecting the right components makes the difference between a generic snack and a gourmet bar. While it is tempting to grab whatever is in the pantry, the age of your marshmallows and the type of peanut butter you choose will dictate the final structural integrity of the bar.
The Molecular Bond of Sugars: Marshmallows act as a flexible adhesive because the gelatin and corn syrup create a suspension that traps air. When combined with the fats in peanut butter, this creates a stabilized matrix that prevents the cereal from becoming soggy.
| Component | Science Role | Pro Secret |
|---|---|---|
| Unsalted Butter | Fat Emulsifier | Use European style butter for higher fat content and less water |
| Mini Marshmallows | Structural Adhesive | Use fresh bags only; stale marshmallows won't melt into a smooth syrup |
| Creamy Peanut Butter | Flavor & Fat Stabilizer | Avoid "natural" oils on-top versions to prevent the treats from separating |
| Crisped Rice Cereal | Texture Foundation | Toast the cereal in a dry pan for 2 minutes to maximize the "shatter" |
If you find yourself running low on the basics, you might consider trying my 3 ingredient peanut butter recipe for a different spin on these flavors. The science of fat to sugar ratios is similar, but the outcome is a crumbly cookie rather than a chewy bar.
Necessary Tools for No Bake Success
You don't need a kitchen full of gadgets, but two specific items will save your sanity. A heavy bottomed pot, such as a Dutch oven or a thick stainless steel saucepan, is non negotiable. Thin pots create hot spots that will burn your marshmallows before the butter even finishes melting.
- 8x8 inch Square Pan: This size provides the perfect thickness for 16 servings.
- Silicone Spatula: Essential for scraping every bit of the sticky mixture out of the pot.
- Parchment Paper: Do not rely on cooking spray alone; parchment allows you to lift the whole block out for clean slicing.
- Small Microwave Safe Bowl: For melting the chocolate chips and coconut oil without scorching.
Chef Tip: Before you start mixing, lightly coat your silicone spatula with a tiny bit of butter or neutral oil. This prevents the "marshmallow web" from sticking to your tool, allowing you to fold the cereal in without crushing the delicate bubbles.
Simple Instructions for Crispy Bars

- Line the pan. Cover your 8x8 inch baking pan with parchment paper, leaving an inch of overhang on the sides. Note: This acts as a sling to lift the bars out later.
- Melt the butter. Place 1/2 cup (115g) unsalted butter in a large pot over low heat until it is completely liquid and begins to sizzle softly.
- Incorporate the peanut butter. Stir in 1 cup (250g) creamy peanut butter until the mixture is velvety and fully combined.
- Add the marshmallows. Pour in 10 oz (283g) mini marshmallows. Note: Using mini marshmallows ensures they melt faster and more evenly than the large ones.
- Stir until smooth. Keep the heat low and stir constantly until the marshmallows have just melted into a glossy, pale tan cream.
- Season the base. Remove the pot from the heat and stir in 1 tsp pure vanilla extract and 1/4 tsp fine sea salt.
- Fold the cereal. Add 6 cups (160g) crisped rice cereal and fold gently until every piece of rice is coated in the peanut butter mixture.
- Press into pan. Transfer the mixture to the prepared pan and press down very lightly. Do not pack it tightly or the treats will be hard.
- Melt the drizzle. Combine 1/2 cup (90g) semi sweet chocolate chips and 1 tsp coconut oil in a bowl; microwave in 20 second bursts until the chocolate is silky and pourable.
- Finish and set. Drizzle the chocolate over the bars and let them sit at room temperature until the chocolate has snapped and the bars feel firm to the touch.
Preventing Common Sticky Kitchen Mishaps
The most frequent complaint with any Rice Krispie treat variation is that they become too hard to chew after just a few hours. This is almost always due to high heat. When sugar is heated too much, it moves toward the "hard ball" stage of candy making.
By keeping your stove on the lowest setting, you preserve the marshmallow's moisture.
Rescuing Rock Hard Treats
If you accidentally packed the pan too tight or overheated the sugar, don't toss them. You can place a single square in the microwave for exactly 6-8 seconds. This briefly softens the sugar bonds, making them edible again. However, this is a temporary fix, so only do it right before eating.
Preventing a Soggy Bottom
Soggy treats happen when there is too much moisture or if you used a "natural" peanut butter that separated. The oil seeps into the cereal and softens the rice's toasted shell. Always use a stabilized, creamy peanut butter like Jif or Skippy for the best structural results.
| Problem | Root Cause | Solution |
|---|---|---|
| Bars fall apart | Not enough marshmallow | Stick strictly to the 10 oz measurement; don't eye ball it |
| Greasy texture | Butter didn't emulsify | Stir the butter and peanut butter vigorously before adding marshmallows |
| Cereal is soft | High humidity or old cereal | Ensure your cereal box was sealed and the kitchen isn't overly steamy |
Common Mistakes Checklist
- ✓ Never use high heat; low and slow prevents the sugar from turning into glass.
- ✓ Avoid packing the mixture into the pan with force; use the "light touch" method.
- ✓ Check the expiration date on your marshmallows; old ones won't melt properly.
- ✓ Let the treats set at room temperature rather than the fridge to prevent sweating.
- ✓ Use a sharp, serrated knife to cut the bars for the cleanest edges.
Smart Swaps and Flavor Twists
While the classic recipe is a crowd pleaser, there are ways to adapt it to your dietary needs or pantry stock. Just remember that every swap changes the fat or sugar content slightly, which can impact how well the bars hold their shape.
| Original Ingredient | Substitute | Why It Works |
|---|---|---|
| Unsalted Butter | Salted Butter | Adds a deeper savory note. Note: Omit the extra 1/4 tsp sea salt. |
| Semi Sweet Chips | Dark Chocolate (70%) | Provides a more sophisticated, less sweet contrast to the peanut butter. |
| Creamy Peanut Butter | Almond Butter | Similar fat profile but offers a nuttier, more toasted flavor. |
If you enjoy experimenting with different textures in your baking, you might find the techniques in my Chewy Chocolate Chip recipe helpful for understanding how butter and sugar interact during the setting process.
Adding a Salty Sweet Twist
For those who love a "sweet and salty" combo, try folding in a half cup of crushed pretzels along with the cereal. The added crunch is fantastic. You can also sprinkle a tiny bit of Maldon sea salt over the chocolate drizzle before it sets to make the flavors pop.
Making it Vegan Friendly
You can easily make these vegan by swapping the butter for a high-quality plant based butter stick and using vegan certified marshmallows (like Dandies). Be aware that vegan marshmallows often take a bit longer to melt and can be stickier, so keep that heat extra low.
Keeping Your Treats Fresh Longer
Storage is where most people lose the battle against staleness. These treats are sensitive to air. If left on a counter uncovered, the marshmallows will dehydrate and the cereal will lose its "shatter" quality within hours.
Storage Guidelines: Store your treats in an airtight container at room temperature for up to 4 days. If you need to stack them, place a sheet of parchment paper between layers to prevent the chocolate drizzle from sticking to the bars above.
Do not refrigerate them, as the cold air will cause the sugars to crystallize and the treats to become brittle.
Freezing Instructions: These actually freeze remarkably well. Wrap individual squares tightly in plastic wrap, then place them in a heavy duty freezer bag. They will stay fresh for up to 2 months. When you are ready for a snack, let them thaw on the counter for about 20 minutes.
Zero Waste Tip: If you have a few crumbs or broken pieces at the bottom of the pan, don't throw them away. They make an incredible topping for vanilla bean ice cream. The salty peanut butter and chocolate bits add a perfect crunch to a soft dessert.
Perfect Pairings and Serving Ideas
These treats are quite rich, so they benefit from being served alongside something that can cut through the fat. A cold glass of milk is the traditional choice, but a strong cup of black coffee or an espresso is even better for adults. The bitterness of the coffee highlights the nuttiness of the roasted peanuts.
If you are putting together a dessert board for a party, these look beautiful next to lighter options. Think fresh strawberries or tart green apple slices. The acidity in the fruit cleanses the palate between bites of the dense, peanut y bar.
For a real "treat yourself" moment, serve a square alongside a warm Almond Dacquoise Cream recipe or even a stack of Fluffy Pancake from recipe if you are feeling like a truly decadent weekend brunch. The contrast between the crispy rice and a soft pancake is a texture lover's dream.
Decision Shortcut
- If you want a softer chew, use 12 oz of marshmallows instead of 10 oz.
- If you want a cleaner cut, lightly oil your knife before slicing through the set bars.
- If you want maximum crunch, toast the rice cereal in a 300°F oven for 5 minutes before mixing.
Debunking Kitchen Myths
A common misconception is that you must use a lot of pressure to get the bars to stay together. In reality, the "glue" is the marshmallow butter mixture, not physical force. If you press too hard, you crush the air pockets in the cereal, resulting in a dense, heavy bar that is difficult to bite into.
Another myth is that "any" peanut butter will work. While you can use natural peanut butter, the results are often inconsistent. The lack of stabilizers in natural brands means the oil can separate during the melting process, leaving you with a greasy film on the bottom of your pan.
For the most reliable, "just like the bakery" results, stick with a standard processed creamy peanut butter. It is one of the few times where the less "fancy" option is actually the superior choice for the chemistry of the dish.

Recipe FAQs
Is it true I need to press the mixture into the pan with a lot of force to ensure it holds together?
No, avoid packing it tightly. Applying too much pressure crushes the air incorporated by the cereal, leading to dense, hard treats rather than soft ones.
How to ensure the marshmallows melt smoothly without scorching on the stovetop?
Melt butter first, then incorporate marshmallows over low heat only. Keep the heat set to the lowest possible setting and stir constantly until the mixture is just glossy; high heat turns the sugar brittle.
Can I substitute natural, oil-separated peanut butter for standard creamy peanut butter?
No, stick to stabilized creamy peanut butter for best results. Natural peanut butter oil can separate when heated, leading to a greasy residue or bars that fall apart upon cooling.
How to store these treats so they do not harden overnight?
Store them airtight at room temperature, never in the refrigerator. Refrigeration causes the sugar matrix to crystallize rapidly, leading to rock hard bars; room temperature preserves the chewiness.
What is the secret to getting that perfect, velvety texture instead of a crunchy brick?
Control your heat and do not overmix the cereal. The key is preserving the air bubbles created by the marshmallows; if you enjoyed mastering gentle folding here, see how that principle applies when handling batters in our simple nobake strawberry recipe.
Can I make these vegan, and what ingredient change is most crucial?
Yes, use plant based butter and vegan marshmallows. Be aware that vegan marshmallows may take slightly longer to melt completely; keep your heat extra low throughout the process.
How long do I need to let the treats sit before I can slice them cleanly?
Allow the treats to cool completely at room temperature until the chocolate drizzle is firm. For the cleanest slices, lightly oil your knife blade before cutting through the set bars.
Peanut Butter Crispy Treats
Ingredients:
Instructions:
Nutrition Facts:
| Calories | 267 kcal |
|---|---|
| Protein | 4.6 g |
| Fat | 15.6 g |
| Carbs | 30.3 g |
| Fiber | 0.9 g |
| Sugar | 14.7 g |
| Sodium | 163 mg |
