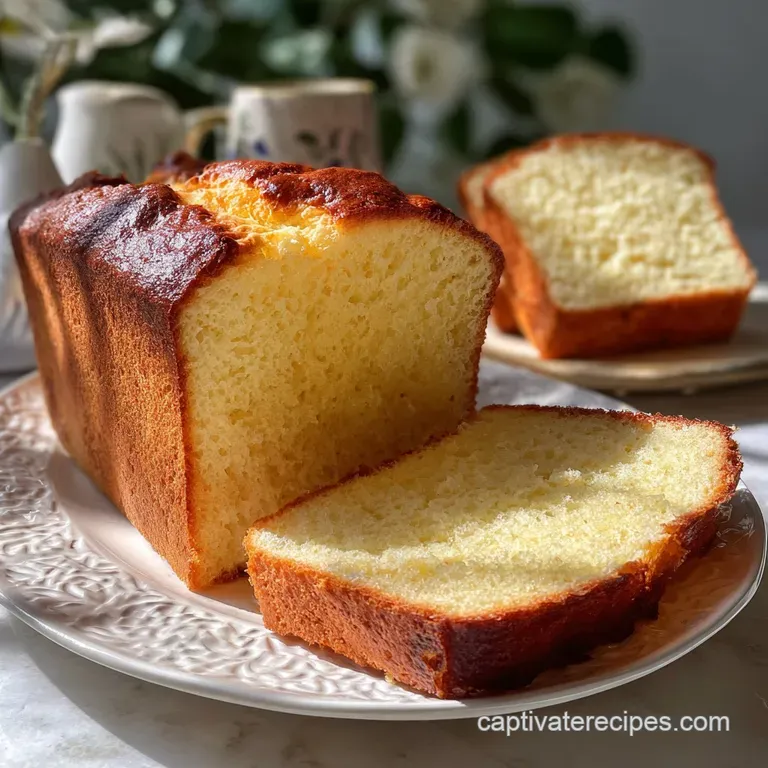
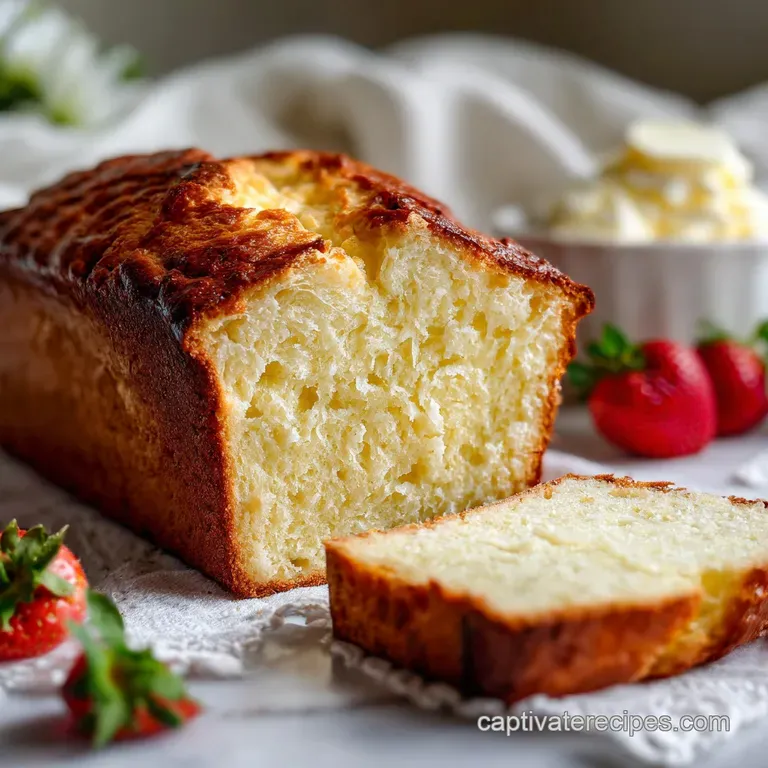
Fluffy Zerocarb Yogurt Bread: Airy & Savory
- Time: Active 15 minutes, Passive 30 minutes, Total 45 minutes
- Flavor/Texture Hook: Cloud like, velvety crumb with a subtle savory garlic finish
- Perfect for: Low carb sandwiches, gluten-free toast, or a reliable keto meal prep side
- Baking a Perfect Fluffy ZeroCarb Yogurt Bread
- Science Behind the Airy Texture
- Essential Timing and Recipe Specifications
- Selecting Your Core Baking Elements
- Gear for the Best Rise
- Mastering the Step-by-Step Method
- Troubleshooting Your Yogurt Bread Success
- Easy Variations and Ingredient Swaps
- Proper Storage and Reheating Tips
- Perfect Pairings for Your Bread
- Recipe FAQs
- 📝 Recipe Card
Baking a Perfect Fluffy ZeroCarb Yogurt Bread
The first time I pulled this out of the oven, the aroma of toasted garlic and warm protein hit me like a nostalgic memory of Sunday morning toast. I remember standing in my kitchen, hovering over the cooling rack, just watching that golden crust.
For years, I struggled with keto breads that felt more like bricks or wet sponges, but this one actually has that bouncy, soft texture we all miss. It is honestly the closest thing to a "cloud" you will ever eat, and it smells like a dream while it bakes.
I once made the massive mistake of trying to rush the cooling process, and let me tell you, patience is the secret ingredient here. If you cut into it while it's steaming, you'll lose that beautiful structure. But if you wait? You get a slice that holds up to butter, avocado, or even a heavy stack of deli turkey.
It's reliable, simple, and has become my absolute go to when I'm craving something bready without the heavy carb count. We're going to walk through exactly how to keep it from deflating so you get that lovely height every single time.
Science Behind the Airy Texture
The Physics of Protein Aeration: Beating egg whites creates a protein reinforced bubble matrix that provides the entire structure of the bread without needing gluten or starches.
Acidic Stabilization: The interaction between the cream of tartar and the yogurt’s acidity ensures these air bubbles don't collapse when heat hits the proteins.
| Method | Time | Texture | Best For |
|---|---|---|---|
| Standard Oven | 30 minutes | Golden crust, even rise | Sandwiches and toast |
| Air Fryer | 22 minutes | Very crispy exterior | Quick individual buns |
| Stovetop (Lidded) | 25 minutes | Soft, steamed texture | English muffin style |
Using the oven is my favorite because it provides the most consistent heat for that "shatter light" crust. While the air fryer is fast, the high velocity air can sometimes lopsided your bread if you aren't careful. If you are looking for more morning inspiration, my Simple Overnight Oats recipe also uses Greek yogurt to create a similarly velvety texture, just in a much cooler format.
Essential Timing and Recipe Specifications
| Component | Science Role | Pro Secret |
|---|---|---|
| Large Eggs | Structural foundation | Room temperature eggs whip 30% faster |
| Greek Yogurt | Moisture and fat | Use full fat for the most velvety crumb |
| Cream of Tartar | Foam stabilizer | Never skip this; it prevents the "deflate" |
Success with this bread depends on the temperature of your ingredients. Cold yogurt hitting warm egg whites can cause a thermal shock that pops your air bubbles. I always pull my yogurt and eggs out of the fridge at least 20 minutes before I start.
It's a small step, but it makes the folding process so much smoother.
Selecting Your Core Baking Elements
- 3 large Eggs: These must be separated perfectly; even a tiny drop of yolk in the whites will prevent them from reaching their full height.
- 1/4 tsp Cream of Tartar: This is the "glue" for your bubbles. Why this? It lowers pH to stabilize egg proteins.
- 1/2 cup Plain Full Fat Greek Yogurt: This provides the fat and tangy flavor. Why this? Full fat ensures the bread isn't rubbery.
- 1/4 tsp Sea Salt: Essential for bringing out the savory notes.
- 1/2 tsp Garlic Powder: Gives it that "real bread" aroma that fills the house.
| Original Ingredient | Substitute | Why It Works |
|---|---|---|
| Greek Yogurt | Sour Cream | Similar fat/acid profile. Note: Slightly richer flavor. |
| Garlic Powder | Onion Powder | Keeps the savory profile without the garlic bite. |
| Cream of Tartar | Lemon Juice (1/2 tsp) | Acid provides similar stabilization for the egg foam. |
If you find yourself missing the traditional fluff of a wheat based breakfast, you might also enjoy my Fluffy Pancake from recipe which uses a different aeration technique but delivers a similarly soft result. Both recipes rely heavily on getting those eggs just right to achieve a light as-air feel.
Gear for the Best Rise
You don't need a high end bakery setup for this, but a few specific tools make life easier. A stand mixer (like a KitchenAid) is a life saver for getting those egg whites to stiff peaks without your arm falling off. If you're using a hand mixer, just be prepared to stay at it for about 5 to 7 minutes.
You'll also need a very flexible rubber spatula for the folding stage.
A standard parchment lined baking sheet or a silicone mat is non negotiable. This bread is high in protein and will stick to a bare pan like superglue. I prefer a light colored aluminum sheet because it prevents the bottom from browning too quickly before the center is set.
Mastering the step-by-step Method
- Preheat oven to 300°F. Line your baking sheet with parchment paper. Note: A lower temp prevents the outside from burning while the inside sets.
- Separate the eggs. Place whites in a large, spotlessly clean bowl and yolks in a medium bowl.
- Whip the whites. Add the cream of tartar to the whites and beat on high until they form stiff, shimmering peaks.
- Mix the base. In the yolk bowl, whisk the Greek yogurt, sea salt, and garlic powder until the mixture is completely smooth and pale yellow.
- Temper the batter. Add one large spoonful of the whipped whites into the yolk mixture.
- Fold gently. Stir the yolk mixture into the whites using a "cut and fold" motion. Note: Do not stir in circles or you will deflate the air.
- Shape the loaves. Scoop the mixture into 8 even mounds on the baking sheet.
- Bake for 30 minutes. Cook until the tops are golden and the bread feels firm to a light touch.
- Cool completely. Leave the bread on the pan for 10 minutes, then move to a wire rack.
Troubleshooting Your Yogurt Bread Success
Why did my bread turn out flat?
This usually happens during the folding stage. If you stir too vigorously, you pop the millions of tiny air bubbles you worked so hard to create. It can also happen if your egg whites weren't truly at "stiff peaks" they should be able to stand straight up when you lift the whisk.
Why is there liquid at the bottom?
This "weeping" is common if the yogurt hasn't been fully incorporated or if the eggs were cold. It can also happen if you use a watery, low-fat yogurt. Stick to the thick, Greek style varieties to keep the moisture where it belongs.
| Problem | Root Cause | Solution |
|---|---|---|
| Rubbery Texture | Over mixing | Fold only until no white streaks remain. |
| Burnt Bottoms | Pan too thin | Use a heavy baking sheet or double pan it. |
| Egg Flavor | Lack of seasoning | Increase garlic powder or add dried herbs. |
Common Mistakes Checklist
- ✓ Ensure the mixing bowl is free of any grease or oil before adding egg whites.
- ✓ Use room temperature yogurt to prevent the egg proteins from seizing up.
- ✓ Don't open the oven door during the first 20 minutes of baking.
- ✓ Let the bread cool on a wire rack to prevent a soggy bottom.
- ✓ Check that your cream of tartar isn't expired for maximum lift.
Easy Variations and Ingredient Swaps
Scaling this recipe is fairly straightforward, though baking multiple batches requires a bit of speed. If you want to double the recipe (16 servings), use 6 large eggs and 1 cup of yogurt.
Just be careful not to let the first batch of whipped whites sit too long while you prepare the second, as they will start to lose their structure.
For a smaller batch (4 servings), you can use 2 eggs (beat one, then use half for the yolk mix if needed, or just use 2 yolks for a richer bread) and 1/4 cup yogurt. Since this is a protein based bake, I don't recommend scaling the salt or garlic powder down too much, or the flavor will become quite bland.
| If you want... | Then do... |
|---|---|
| Extra Crunch | Sprinkle sesame seeds or "everything" seasoning on top before baking. |
| Cheesy Flavor | Fold in 2 tablespoons of finely grated parmesan (not the canned stuff). |
| Sweet Version | Swap garlic and salt for cinnamon and a keto friendly sweetener. |
Proper Storage and Reheating Tips
Because of the high moisture content from the yogurt, this bread shouldn't sit on the counter for more than a few hours. Keep it in an airtight container in the fridge for up to 3 days. To get that "just baked" texture back, I highly recommend popping it in a toaster oven for 2 minutes.
It crisps up the edges beautifully and revives the soft interior.
For long term storage, you can freeze these slices! Wrap them individually in plastic wrap and store in a freezer bag for up to 2 months. When you're ready to eat, don't thaw them on the counter. Go straight from the freezer to the toaster. This prevents them from becoming soggy during the defrosting process.
To reduce waste, any broken pieces make fantastic keto croutons just toss them in a little olive oil and bake at 350°F until they shatter when bitten.
Perfect Pairings for Your Bread
The Savory Stack
This bread is the ultimate vessel for a classic turkey and swiss sandwich. Since the flavor is mild with a hint of garlic, it doesn't fight with your toppings. I love to schmear a little spicy brown mustard and add some crisp sprouts.
It's the kind of lunch that makes you forget you're doing the "low carb thing" entirely.
The Sweet "French Toast"
If you leave out the garlic powder during the bake, you can actually turn these into amazing French toast. Dip the cooled slices into an egg and cinnamon wash, then sear them in a pan with plenty of butter.
The bread soaks up the wash without falling apart, resulting in a velvety center that feels incredibly indulgent for a 41 calorie serving.
Myths About Flourless Baking
A common myth is that you need "special" keto flours like almond or coconut to make bread. The truth is, eggs and dairy provide all the structural proteins you need. Another misconception is that these will taste exactly like sourdough.
While the yogurt provides a nice tang, the texture is much lighter closer to a fluffy focaccia than a dense rustic loaf. Don't expect a chewy "pull," but do expect a melt in-your mouth experience.
Right then, you're all set to go. Just remember to be gentle with those egg whites and give the loaf time to rest after it comes out of the heat. It’s a reliable little recipe that has saved my breakfast routine more times than I can count. Let me know how yours turns out!

Recipe FAQs
Why did my bread turn out flat?
The most likely cause is overmixing during the folding stage. Vigorously stirring pops the air bubbles created in the egg whites. Ensure your egg whites reached stiff peaks and fold gently until just combined.
What should I do if there's liquid at the bottom of the bread?
This "weeping" often stems from under incorporated yogurt or using cold eggs. Using a thick, full fat Greek yogurt is crucial for proper moisture balance.
Can I use low-fat yogurt instead of full fat Greek yogurt?
No, it's best to stick with full fat Greek yogurt. low-fat varieties can contain more water, leading to a potentially rubbery texture or liquid weeping.
How long does the bread need to cool before slicing?
Allow the bread to cool completely on a wire rack, at least 30 minutes. Cutting into it while warm will cause it to deflate and lose its structure.
How should I store the Fluffy ZeroCarb Yogurt Bread?
Store it in an airtight container in the refrigerator for up to 3 days. This high moisture bread needs refrigeration to prevent spoilage.
Can I freeze this yogurt bread?
Yes, it freezes well for long term storage. Wrap individual slices tightly and place them in a freezer bag for up to 2 months; toast directly from frozen.
What's the best way to reheat the bread?
A toaster oven is ideal for reheating. Pop slices in for about 2 minutes to revive crispness and a soft interior without drying it out.
Zero Carb Yogurt Bread

Ingredients:
Instructions:
Nutrition Facts:
| Calories | 41 kcal |
|---|---|
| Protein | 3.7 g |
| Fat | 2.6 g |
| Carbs | 0.7 g |
| Fiber | 0 g |
| Sugar | 0.5 g |
| Sodium | 94 mg |
