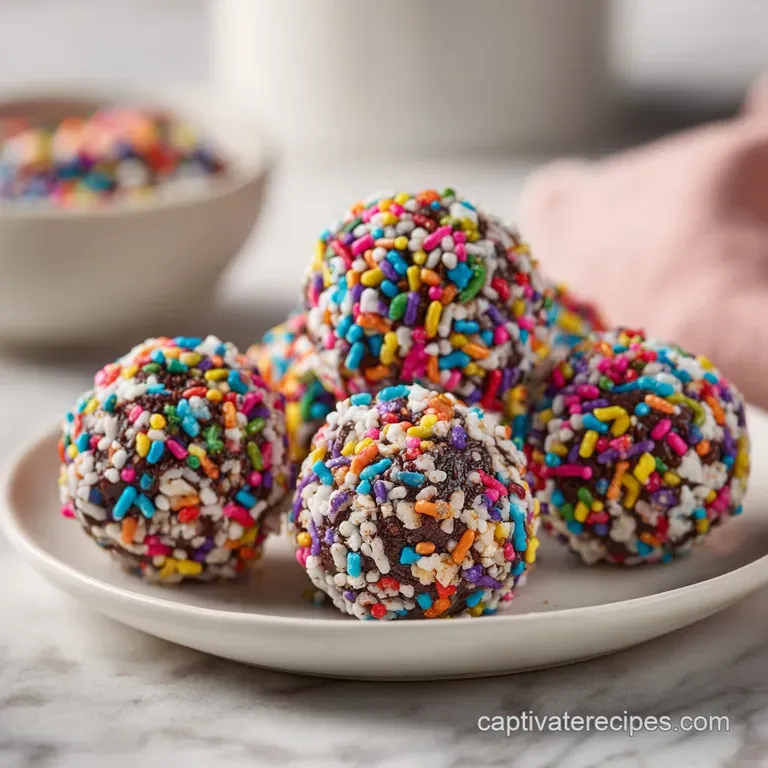
Classic No Bake Cookies Recipe
- Time: Active 10 mins, Passive 35 mins, Total 45 mins
- Flavor/Texture Hook: Deeply fudgy with a chewy, nutty bite
- Perfect for: Busy weeknights, hot summer days, or budget-friendly snacking
- Master the Classic No Bake Cookies
- Techniques for Achieving a Fudgy Cookie Texture
- Detailed Overview of Recipe Specifications
- Exploring the Science of Our Ingredients
- Required Kitchen Tools for Efficient Prep
- Clear Steps for Making These Treats
- Troubleshooting Guide for Common Issues
- Alternative Ingredients and Creative Variations
- Best Practices for Storage and Freshness
- Recommended Pairings for Your Sweet Treat
- Recipe FAQs
- 📝 Recipe Card
Master the Classic No Bake Cookies
The smell of bubbling cocoa and grass fed butter hitting a hot pan is enough to bring anyone to the kitchen. I remember the first time I tried making these, I was so impatient that I pulled them off the heat the second I saw one tiny bubble.
The result was a tray of "pudding cookies" that we had to eat with spoons because they never actually set up. It was a messy lesson in the importance of the rolling boil, but honestly, those chocolate oat puddings still tasted incredible.
Now, I’ve got the timing down to a science so you don't have to guess. We are looking for that specific moment when the glossy liquid transforms into a thick, volcanic simmer.
It's about finding that sweet spot where the sugar crystallizes just enough to hold everything together without becoming a dry, crumbly mess that shatters when you take a bite. We want a velvety, flexible fudge that yields to your teeth while the quick cooking oats provide a substantial, satisfying chew.
Techniques for Achieving a Fudgy Cookie Texture
Getting that perfect set depends on how the ingredients interact under heat. It isn't just about mixing things together, it’s about a specific thermal reaction.
- Thermal Concentration: Boiling the syrup for exactly 60 seconds evaporates just enough water from the milk to reach the "soft ball" stage of candy making.
- Fat Stabilization: The natural creamy peanut butter acts as an emulsifier, preventing the cocoa and sugar from separating as they cool.
- Starch Hydration: Quick cooking oats have a larger surface area than old-fashioned oats, allowing them to soak up the warm syrup instantly for a dense, cohesive structure.
- Protein Network: The proteins in the grass fed butter and whole milk create a microscopic lattice that traps the sugar crystals, ensuring a silky mouthfeel rather than a gritty one.
The Physics of the Rolling Boil
The secret to this recipe is the transition of the sugar. As the coconut sugar dissolves into the milk and butter, it creates a concentrated syrup. Once that syrup hits a full rolling boil, the water content drops rapidly, and the sugar concentration increases.
If you stop too early, the mixture stays liquid; if you go too long, the sugar becomes brittle. We are aiming for a precise 60 second window to hit that fudge like consistency.
| Method | Total Time | Texture | Best For |
|---|---|---|---|
| Stovetop (Classic) | 45 mins | Fudgy and stable | Traditional flavor and reliable set |
| Microwave (Shortcut) | 15 mins | Softer, more "gooey" | Immediate cravings with less cleanup |
| Freezer Set | 20 mins | Firm and cold | Hot summer days and rapid firming |
Choosing the stovetop method allows for better visual cues. You can actually see the bubbles change from thin and watery to thick and "lazy," which is your signal that the syrup is ready for the oats.
Detailed Overview of Recipe Specifications
This recipe is designed to be approachable and budget friendly while still delivering a high-quality result. We use 1/2 cup (115g) of unsalted grass fed butter to provide a richer base than standard butter, which complements the 1/4 cup (25g) of unsweetened dark cocoa powder.
The 1 1/2 cups (240g) of coconut sugar gives a slight caramel note that regular white sugar lacks.
You'll find that the 2/3 cup (165g) of natural creamy peanut butter adds enough fat to keep the cookies moist for days. Using 1/2 cup (120ml) of whole milk provides the necessary liquid for the boil without thinning the mixture too much.
The 3 cups (270g) of quick cooking oats are non negotiable here, as they provide the structural integrity required for a 45 minute total turnaround time.
| Ingredient | Science Role | Pro Secret |
|---|---|---|
| Coconut Sugar | Sweetener & Structure | Provides a lower glycemic index and deeper molasses like flavor. |
| Grass fed Butter | Lipid Binder | Contains more omega-3s and offers a yellow, creamy richness to the fudge. |
| Quick Cooking Oats | Structural Filler | Their par cooked nature means they soften instantly in the hot syrup. |
Using the right oats is the difference between a cookie that stays together and one that feels like you're eating birdseed. The fine sea salt and pure vanilla extract might seem small, but they are the primary flavor balancers that keep the cocoa from being one dimensional.
Exploring the Science of Our Ingredients
The ingredients in this recipe are staples, but their quality impacts the final "shatter" of the sugar coating. I always recommend using the best butter you can afford because it makes up a huge portion of the flavor profile.
- 1/2 cup (115g) unsalted grass fed butter: Substitute with refined coconut oil for a dairy-free version. Why this? Grass fed butter has a higher fat to water ratio than cheap brands.
- 1 1/2 cups (240g) coconut sugar: Substitute with granulated white sugar. Why this? Coconut sugar adds a warm, toasted flavor that pairs with cocoa.
- 1/2 cup (120ml) whole milk: Substitute with full fat oat milk. Why this? The fat in whole milk is essential for a creamy set.
- 1/4 cup (25g) unsweetened dark cocoa powder: Substitute with regular Dutch process cocoa. Why this? Dark cocoa provides a more intense, sophisticated chocolate profile.
- 2/3 cup (165g) natural creamy peanut butter: Substitute with almond butter or sunbutter. Why this? It acts as the primary glue for the oats.
- 1 tbsp (15ml) pure vanilla extract: Substitute with vanilla bean paste. Why this? Real vanilla rounds out the bitterness of the cocoa.
- 1/4 tsp fine sea salt: Substitute with kosher salt. Why this? Salt is required to cut through the heavy sugar content.
- 3 cups (270g) quick cooking oats: Substitute with pulsed old-fashioned oats. Why this? They absorb moisture quickly so the cookies set before cooling.
Chef's Tip: If you only have old-fashioned oats, pulse them in a blender 3 or 4 times. You want them broken down slightly so they don't stay "crunchy" in the middle of the fudgy cookie.
Required Kitchen Tools for Efficient Prep

You don't need a lot of fancy gear for this. A heavy bottomed saucepan is the most important item because it distributes heat evenly, preventing the chocolate from scorching on the bottom before the liquid reaches a boil.
I prefer a 3 quart size so there is plenty of room to stir in the oats later without slopping them over the sides.
You will also want two large sheets of parchment paper or silicone mats spread out on your counter before you even turn on the stove. Once the oats are in, the mixture starts to cool and set immediately. If you're fumbling for paper while the cookies are in the pot, they might become too stiff to scoop properly.
A medium cookie scoop (about 2 tablespoons) is my secret weapon for getting 24 uniform servings quickly.
Clear Steps for Making These Treats
Preparation is everything here. Have your peanut butter and vanilla measured out and ready to go next to the stove. The "boil" phase moves fast, and you don't want to be measuring vanilla while the sugar is burning.
- Combine the base. Place the butter, coconut sugar, milk, and cocoa powder in your saucepan.
- Heat slowly. Turn the heat to medium and stir constantly until the butter is completely melted and the cocoa is smooth.
- Reach the boil. Increase the heat slightly until the mixture reaches a full rolling boil (where bubbles don't disappear when you stir).
- Timer start. Boil for exactly 60 seconds. Note: Going 10 seconds over can make them dry, so use a phone timer.
- Remove from heat. Take the pan off the burner immediately to stop the temperature from rising further.
- Add the binders. Stir in the peanut butter, vanilla extract, and sea salt until the mixture looks glossy and uniform.
- Incorporate the oats. Fold in the 3 cups of quick cooking oats. Stir until every oat is coated in the chocolate syrup.
- Scoop the cookies. Use your scoop or two spoons to drop mounds onto the parchment paper.
- Set and cool. Let the cookies sit undisturbed for 30 to 35 minutes until they are firm to the touch and no longer shiny.
If you're looking for another quick treat that doesn't require an oven, you might like this 3ingredient peanut butter recipe for those days when you're even shorter on time.
Troubleshooting Guide for Common Issues
The most common frustration with this recipe is the "set." It’s either too wet or too dry. Usually, this comes down to how we measure the boiling time or the humidity in the kitchen on that specific day.
Managing Excessively Gooey Texture
If your cookies are still sticky after an hour, the mixture didn't reach a high enough temperature. This happens if the "boil" was just a few stray bubbles rather than a vigorous, foaming action.
You can try putting the tray in the fridge to help them firm up, but next time, ensure the entire surface of the liquid is bubbling before you start your 60 second timer.
Fixing Crumbly and Dry Cookies
On the flip side, if the cookies are falling apart or look "dusty," the syrup was boiled too long or the heat was too high. This causes the sugar to move toward the "hard crack" stage.
If you notice the mixture getting very stiff in the pot, add a teaspoon of milk and stir vigorously to loosen it back up before scooping.
| Problem | Root Cause | Solution |
|---|---|---|
| Cookies won't firm up | Under boiled syrup | Chill in the fridge or boil 10 seconds longer next time. |
| Gritty texture | Sugar didn't dissolve | Melt sugar and butter on lower heat before cranking it up to boil. |
| Dry and falling apart | Over boiled syrup | Add 1 tsp of milk to the pot to re hydrate the mixture. |
Common Mistakes Checklist
- ✓ Never use "old fashioned" oats without pulsing them first (they stay too hard).
- ✓ Don't skip the salt; it’s the only thing that balances the coconut sugar.
- ✓ Start the timer ONLY when the boil is "rolling" (bubbling across the whole surface).
- ✓ Use a heavy bottomed pan to prevent the bottom layer from scorching.
- ✓ Work quickly once the oats are added, as the temperature drops fast.
Alternative Ingredients and Creative Variations
Once you’ve mastered the base, you can start playing with the flavors. One of my favorite tricks is to add a pinch of espresso powder to the cocoa. It doesn't make the cookies taste like coffee; it just makes the chocolate taste "more" like chocolate. It's a trick I often use in my Mini Chocolate Chip recipe to add depth to the dough.
- The Protein Boost: Swap half the oats for hemp hearts or add a scoop of collagen powder. It changes the texture slightly but makes them feel more like a "fuel" snack for the kids.
- The Salted Almond Crunch: Use almond butter instead of peanut butter and top each cookie with a few flakes of Maldon sea salt while they are still wet.
- Vegan Adaptation: Use vegan butter sticks and soy or oat milk. Avoid thin milks like almond milk as they don't have enough fat to stabilize the fudge.
Adjusting the Recipe Volume
If you are cooking for a smaller crowd, you can easily halve this. However, since the boiling time is so specific, I recommend using a smaller saucepan to keep the liquid depth the same. If you use a giant pan for a half batch, the liquid will evaporate too quickly, and you'll end up with dry cookies.
When doubling the batch, increase the boiling time by about 15 seconds. The larger volume takes longer to reach the correct internal temperature. I usually don't recommend tripling this in one pot because stirring 9 cups of oats into a thick syrup is an accidental arm workout you probably don't want.
Best Practices for Storage and Freshness
These cookies are actually better the second day. The oats have more time to soften, and the flavors meld together. Store them in an airtight container at room temperature for up to 5 days.
If your kitchen is particularly warm, keep them in the fridge to prevent the fat from softening too much, which can make them feel greasy.
For long term storage, these freeze beautifully. Place them in a single layer on a tray to freeze solid, then toss them into a freezer bag for up to 3 months. You can eat them straight from the freezer for a chilly, fudge like treat, or let them sit on the counter for 10 minutes to soften back up.
To reduce waste, keep the "dust" from the bottom of the oat container. That fine oat flour actually helps thicken the cookies. If you have leftover crumbs in the container after the cookies are gone, sprinkle them over yogurt or oatmeal it’s basically chocolate peanut butter granola at that point!
Recommended Pairings for Your Sweet Treat
Since these are quite rich and sweet, they pair best with something that has a bit of acidity or bitterness. A cold glass of whole milk is the classic choice, but a strong cup of black coffee or an unsweetened Earl Grey tea is a more "grown up" way to enjoy them.
If you are putting together a dessert platter, try serving these alongside something tart, like fresh raspberries or sliced green apples. The crispness of the fruit cuts through the velvety chocolate and peanut butter. If you're in the mood for more no bake options, these go great alongside some Peanut Butter Rice recipe bars for a texture contrast between the soft oats and the crunchy cereal.
No bake treats are all about the joy of the process without the stress of the oven. Once you get that 60 second boil down, you’ll be making these on repeat for every bake sale and late night craving that comes your way. Trust me, your friends will be asking for the "secret" to that fudgy set!

Recipe FAQs
What are the common mistakes in no bake cookies?
Under boiling the syrup or using the wrong oats. If you don't boil the sugar mixture long enough, the cookies stay too wet; if you boil too long, they become brittle and dry.
What is the secret to getting no bake cookies to set up?
Boil the liquid base for exactly 60 seconds once it reaches a full, rolling boil. This evaporates just enough water to reach the soft ball stage necessary for fudgy stability when cooling.
Why didn't my no bake cookies get hard?
The mixture was removed from the heat too soon during the boil phase. The sugar needs adequate time to concentrate its crystalline structure to bind the oats; next time, let the bubbles foam vigorously for a full minute.
Can you turn boxed cake mix into cookies?
No, this recipe relies on a specific stovetop sugar crystallization process, not leavening agents found in cake mix. Cake mix cookies require baking to set the structure, unlike this no-bake method.
Can I substitute quick oats for old-fashioned oats?
No, stick strictly to quick cooking oats for the best texture. Old-fashioned oats are denser and will remain slightly chewy or crunchy after setting because they don't absorb the hot syrup quickly enough.
Is it true that adding espresso powder makes the chocolate taste stronger?
Yes, this is a common flavor trick often used in baking. The coffee compounds enhance the perception of chocolate flavor without making the cookie taste explicitly like coffee, similar to how acid brightens savory dishes; master this principle in our Banana Pudding Cookies recipe.
How do I make sure the peanut butter blends in smoothly without clumping?
Stir the peanut butter in vigorously immediately after removing the pan from the heat. The residual heat melts the fat, allowing it to emulsify cleanly into the hot sugar syrup before it cools down too much.
Classic No Bake Cookies
Ingredients:
Instructions:
Nutrition Facts:
| Calories | 162 kcal |
|---|---|
| Protein | 3.5 g |
| Fat | 8.3 g |
| Carbs | 19.4 g |
| Fiber | 1.9 g |
| Sugar | 10.1 g |
| Sodium | 58 mg |
