Cinnamon Sugar Scones: Flaky Buttery Layers
- Time: Active 30 minutes, Passive 18 minutes, Total 48 minutes
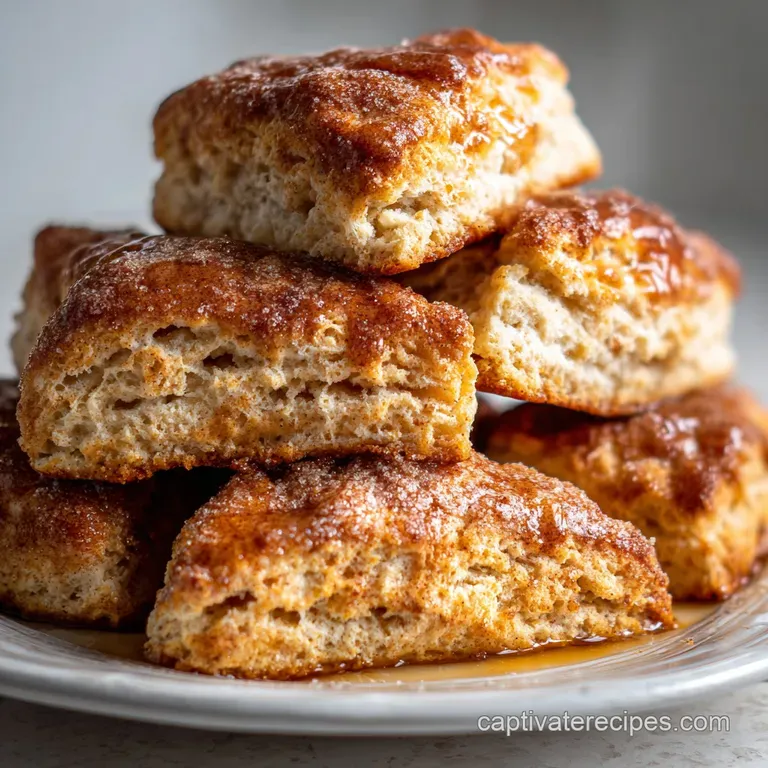
- Flavor/Texture Hook: Flaky, buttery layers with a shatter crisp cinnamon crust
- Perfect for: Lazy Sunday mornings or a low cost brunch treat
- Baking Fluffy Cinnamon Sugar Scones at Home
- The Physics of the Flake
- Essential Specs for Success
- Deep Dive into Each Ingredient
- Simple Tools for Better Baking
- Step-by-Step Instructions for Success
- Fixing Common Scone Baking Errors
- Simple Ways to Change Flavors
- Debunking Scone Baking Myths
- Storage and Reheating Advice
- Best Pairings for Scone Breakfasts
- Recipe FAQs
- 📝 Recipe Card
Baking Fluffy Cinnamon Sugar Scones at Home
There is nothing quite like that first hit of warm, spicy air when you crack open the oven door. I remember the first time I tried making these, I was so worried about them being dry that I over handled the dough. They came out like literal rocks, and I almost gave up on scones forever.
But then I learned the trick about frozen butter, and honestly, it changed my entire kitchen game.
Now, whenever I hear that sizzle of the butter melting into the flour, I know I'm in for a treat. This recipe is all about that contrast between the velvety, soft interior and the sugary crust that shatters when you bite into it.
It's the kind of breakfast that makes the whole house smell like a cozy hug, and the best part is it uses basic pantry staples you probably already have in the cupboard.
We are going to skip the complicated techniques and focus on what actually works for a tired home cook. You don't need a heavy duty mixer or expensive imported butter to get a professional result.
Just follow my lead on the temperature control, and you'll have a batch of Fluffy Cinnamon Sugar Scones that look like they cost five dollars each at a posh cafe. Let's get into the details so you can start baking.
The Physics of the Flake
- Steam Expansion: Grating frozen butter creates tiny pockets that evaporate during baking, forcing the dough upward for a dramatic rise.
- Chemical Leavening: The reaction between acidic buttermilk and baking powder creates immediate CO2 bubbles for a light texture.
- Gluten Control: Minimal mixing prevents long protein chains from forming, which ensures the crumb remains tender rather than bread like.
| Method | Time | Texture | Best For |
|---|---|---|---|
| Standard Oven | 18 mins | Crisp exterior, airy middle | Traditional bakery results |
| Cast Iron Stovetop | 15 mins | Dense, biscuit like, browned | Small batches or "scone cakes" |
| Air Fryer | 12 mins | Extremely crunchy outer shell | Quick single serving snacks |
If you are looking for more easy bakes that don't require a lot of fuss, you should try my Moist Vanilla Cupcakes recipe. They use a similar logic regarding fat and moisture to keep the crumb soft for days.
Essential Specs for Success
When we talk about Fluffy Cinnamon Sugar Scones, precision with temperature is much more important than having expensive gear. If your kitchen is hot, your butter will melt before it even hits the oven, and you'll lose those flaky layers we're hunting for.
I always recommend clearing a spot in your freezer for your butter about 30 minutes before you start.
| Category | Requirement | Detail |
|---|---|---|
| Oven Temp | 400°F (204°C) | High heat is vital for the "oven spring" rise |
| Butter State | Frozen | Do not just use "cold" butter; it must be frozen |
| Liquid State | Fridge Cold | Keep the egg and buttermilk chilled until use |
Chef's Tip: If you don't have buttermilk, don't run to the store. Just add a teaspoon of white vinegar or lemon juice to your 2/3 cup of regular milk and let it sit for five minutes. It works perfectly for this recipe and saves you a few dollars on your grocery bill.
Deep Dive into Each Ingredient
The magic of this Easy Cinnamon Sugar Scones recipe lies in how these simple components interact. We aren't just tossing things in a bowl; we're building a structural masterpiece using basic chemistry. For a super fast snack that uses even fewer ingredients, my 3ingredient peanut butter recipe is a lifesaver when the pantry is looking thin.
| Ingredient | Science Role | Pro Secret |
|---|---|---|
| All Purpose Flour | Provides the structure | Spoon and level your flour; never scoop directly |
| Baking Powder | Primary lifting agent | Check the expiration; old powder means flat scones |
| Frozen Butter | Creates flaky layers | Grate it with a box grater for even distribution |
| Buttermilk | Tenderizes the gluten | The fat content adds a rich, tangy depth |
Components and Smart Substitutes
- 2 cups All Purpose Flour: The backbone of the dough. Why this? Provides enough protein for structure without being tough.
- Substitute: Pastry flour (adds extra softness but less height).
- 1/3 cup Granulated Sugar: Sweetens the base. Why this? Dissolves quickly into the dough for even sweetness.
- Substitute: Light brown sugar (adds a hint of molasses flavor).
- 1 tablespoon Baking Powder: Our main lift. Why this? This is a high amount to ensure a fluffy interior.
- Substitute: 1 tsp baking soda + 1/2 tsp cream of tartar.
- 1.5 teaspoons Ground Cinnamon: The star flavor. Why this? Infuses the dough with warmth throughout.
- Substitute: Pumpkin pie spice (for a seasonal twist).
- 1/2 cup Unsalted Butter: The fat source. Why this? Frozen butter creates the steam needed for flakiness.
- Substitute: Salted butter (just omit the extra 1/2 tsp salt).
- 2/3 cup Cold Buttermilk: Hydration and tang. Why this? The acid reacts with baking powder for a better rise.
- Substitute: Whole milk with 1 tsp lemon juice.
- 1 Large Egg: Binds the dough. Why this? Adds richness and helps the scones hold their shape.
- Substitute: 1/4 cup plain Greek yogurt.
- 1 teaspoon Vanilla Extract: Flavor enhancer. Why this? Rounds out the cinnamon and sugar notes.
- Substitute: Almond extract (use only 1/4 teaspoon).
Simple Tools for Better Baking
You don't need a fancy pastry cutter for these Homemade Cinnamon Sugar Scones. In fact, I prefer using my hands because I can feel the temperature of the dough. A simple box grater is your best friend here for the butter.
It's much easier than trying to "cut" the butter in with forks or knives, and it ensures every bite has that buttery goodness.
A heavy baking sheet is also helpful to prevent the bottoms from burning before the centers are done. I like to use parchment paper or a silicone mat to make cleanup easy and ensure the sugar topping doesn't stick to the pan.
If you find your scones are browning too fast on the bottom, try nesting two baking sheets together to create an air pocket of insulation.
step-by-step Instructions for Success
1. Prep the Dry Base
Whisk together 2 cups All Purpose Flour, 1/3 cup Granulated Sugar, 1 tablespoon Baking Powder, 1.5 teaspoons Ground Cinnamon, and 1/2 teaspoon Salt. Note: This ensures the leavening and spices are perfectly distributed before adding moisture.
2. Grate the Butter
Using a box grater, shred the 1/2 cup frozen butter directly into the flour mixture. Note: Work quickly so the heat from your hands doesn't melt the butter shreds.
3. Incorporate the Fat
Toss the butter bits into the flour with a fork until they are fully coated and look like small peas.
4. Mix the Wet Elements
In a separate small bowl, whisk the 2/3 cup cold buttermilk, 1 large egg, and 1 teaspoon vanilla extract. Note: Whisking the egg into the milk first prevents over mixing the final dough.
5. Combine the Dough
Pour the wet mixture into the dry ingredients and stir with a spatula until just moistened and a shaggy dough forms.
6. The Fold Technique
Turn the dough onto a floured surface and gently fold it over itself 3-4 times. Note: This creates those visible layers without developing too much gluten.
7. Shape the Disk
Pat the dough into an 8 inch circle that is roughly 1 inch thick throughout the center.
8. Cut and Chill
Cut the disk into 8 wedges and place them on your prepared baking sheet. Freeze the cut scones for 10 minutes before baking. Note: Chilling relaxes the gluten and re solidifies the butter for a better rise.
9. Top and Bake
Brush with 1 tablespoon melted butter and sprinkle with the mix of 2 tablespoons sugar and 1 teaspoon cinnamon. Bake 18 minutes until golden and the tops feel firm.
Fixing Common Scone Baking Errors
If your scones didn't turn out like the pictures, don't worry. Scones are notoriously sensitive to temperature. The most common mistake is having the oven not hot enough, which causes the butter to leak out onto the pan rather than steaming up.
This leads to what I call the "scone puddle," where they spread flat instead of rising high.
Another issue is over hydrating the dough. If you add too much buttermilk, the dough becomes sticky and heavy. It should be slightly dry when you first turn it out onto the counter. The folding process will incorporate those last bits of flour. Trust the process and resist the urge to add more liquid!
| Problem | Root Cause | Solution |
|---|---|---|
| Flat Scones | Butter was too warm | Freeze butter and chill shaped dough |
| Tough Crumb | Over mixing the dough | Stop stirring as soon as moisture is absorbed |
| Dry Interior | Over baking in the oven | Remove when golden; they carry over cook |
Common Mistakes Checklist
- ✓ Never use a rolling pin; your hands are gentler and preserve the air pockets.
- ✓ Ensure your baking powder is fresh (test it in a bit of hot water; it should bubble).
- ✓ Preheat your oven for at least 20 minutes to ensure a true 400°F.
- ✓ Don't skip the 10 minute freezer chill after cutting the wedges.
- ✓ Avoid low-fat buttermilk; the fat is necessary for the velvety texture.
Simple Ways to Change Flavors
If you want a coffee shop twist, try adding half a cup of cinnamon chips or mini chocolate chips to the dry mix. It adds little pockets of sweetness that pair beautifully with the spice. For a more sophisticated version, you can swap the vanilla extract for maple extract and add a handful of toasted pecans.
For those needing a dairy-free alternative, you can use a solid vegan butter stick (frozen) and full fat canned coconut milk. The coconut milk provides the necessary fat content, though it will add a very slight nutty note to the background of your Buttermilk Scones Recipe.
Decision Shortcut
- If you want extra flake, perform two additional folds during the shaping process.
- If you want a softer crust, cover the scones with a clean kitchen towel immediately after baking.
- If you want more crunch, replace the granulated sugar topping with coarse turbinado sugar.
| Feature | Oven Bake | Stovetop Scone |
|---|---|---|
| Crust | Evenly crisp | Heavily charred/browned |
| Texture | Fluffy/Layered | Dense/Cake like |
| Effort | Low (Set and forget) | High (Requires flipping) |
Debunking Scone Baking Myths
Many people think you need a pastry blender to make good scones. This isn't true at all. In fact, a box grater is more efficient because it creates uniform pieces of fat that are easier to distribute without over working the flour.
Your hands are actually your best tool for feeling if the dough is getting too warm or if it needs a tiny bit more moisture.
Another myth is that scones are best the next day. While some cakes improve with age, these Light and Fluffy Scones are at their absolute peak about 20 minutes after they come out of the oven. The exterior is at its maximum crispness and the interior is still steaming.
If you do have leftovers, a quick toast is mandatory to revive that texture.
Storage and Reheating Advice
Keep any leftovers in an airtight container at room temperature for up to 2 days. To get that "just baked" feel back, pop them in a 350°F oven for 5-8 minutes. I don't recommend the microwave because it makes the sugar topping sticky and the dough rubbery.
If you must use the microwave, 10 seconds is the absolute limit.
For long term storage, these freeze beautifully. You can freeze the baked scones for up to 3 months. Just wrap them individually in plastic wrap and then place them in a freezer bag.
To reduce waste, save any leftover cinnamon sugar mix in a small jar; it's fantastic on buttered toast or stirred into your morning oatmeal.
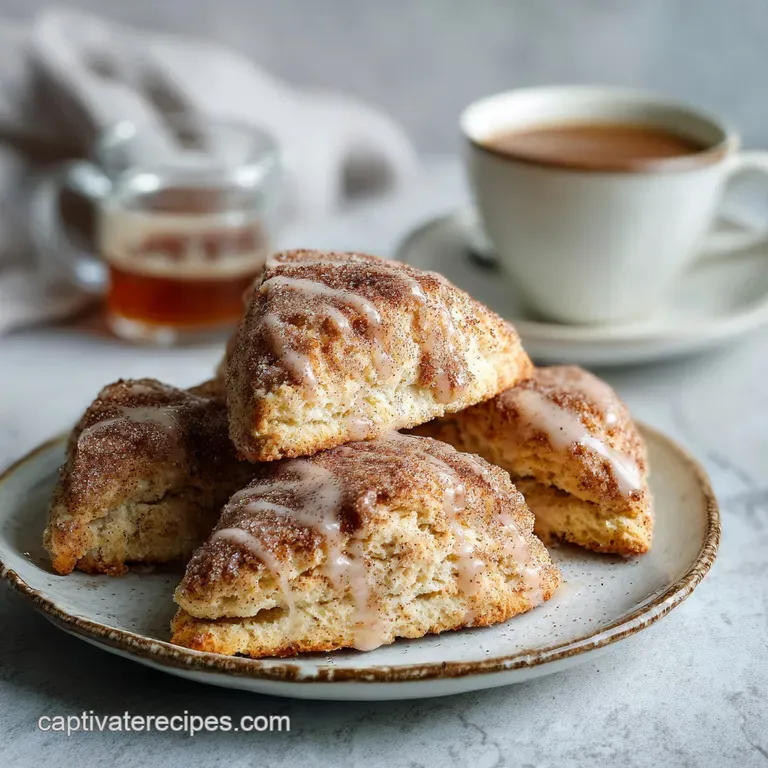
Best Pairings for Scone Breakfasts
The Classic Pairing for these is, of course, a hot cup of coffee or a strong black tea. The bitterness of the drink cuts through the buttery sweetness of the scone perfectly. If you want to go the "Breakfast Spread" route, serve these with a side of salted butter or a dollop of clotted cream.
If you are hosting a brunch, these look beautiful on a platter next to some fresh berries and a bowl of Greek yogurt. They are substantial enough to be the main event, but they also work as a side to a savory omelet. No matter how you serve them, make sure they are warm!
That's when the cinnamon aroma is at its most potent and the crumb is at its most tender.

Recipe FAQs
What is the secret to fluffy scones?
Using frozen grated butter and buttermilk. The frozen butter creates steam pockets when it hits the hot oven, forcing the dough upward for height, while the acid in the buttermilk tenderizes the structure.
What is the 15 minute rule for scones?
No, there is no strict 15 minute rule, but temperature control is key. While 15 minutes is a common stovetop cooking time, for oven baking, the crucial factor is keeping all ingredients, especially the butter, as cold as possible during mixing.
What is the secret to making good scones?
Minimal mixing to control gluten development. Mix the wet and dry ingredients only until a shaggy dough forms, then use the gentle fold technique a few times to create layers without making them tough like bread.
What to avoid when making scones?
Avoid using room temperature butter or overworking the dough. Warm butter melts before it can generate steam, leading to flat scones, and excessive mixing develops too much gluten, resulting in a tough texture.
Is it true I must use a pastry blender to cut in the fat?
No, this is a common misconception. Grating frozen butter with a box grater is faster and creates smaller, more evenly coated pieces of fat, which actually leads to a flakier final product than traditional cutting methods.
How to ensure a dramatic rise in my scones?
Place the cut wedges in the freezer for 10 minutes before baking. This rapid chill solidifies the butter one last time, maximizing the steam explosion when they hit the hot oven, providing maximum oven spring.
What liquid substitute works best if I run out of buttermilk?
Mix 1 teaspoon of white vinegar or lemon juice into 2/3 cup of whole milk. Let this mixture sit for five minutes until it slightly curdles; this recreates the acid needed to react with the baking powder, similar to how we balance flavors in our Lemon Herb Chicken and Potatoes: One-Pot Crispy Baked.
Fluffy Cinnamon Sugar Scones

Ingredients:
Instructions:
Nutrition Facts:
| Calories | 291 kcal |
|---|---|
| Protein | 5 g |
| Fat | 14 g |
| Carbs | 37 g |
| Fiber | 1.4 g |
| Sugar | 11 g |
| Sodium | 326 mg |
