Chocolate Crinkle Cookies: Velvety and Crisp
- Time: Active 20 minutes, Passive 2 hours 10 mins, Total 2 hours 30 mins
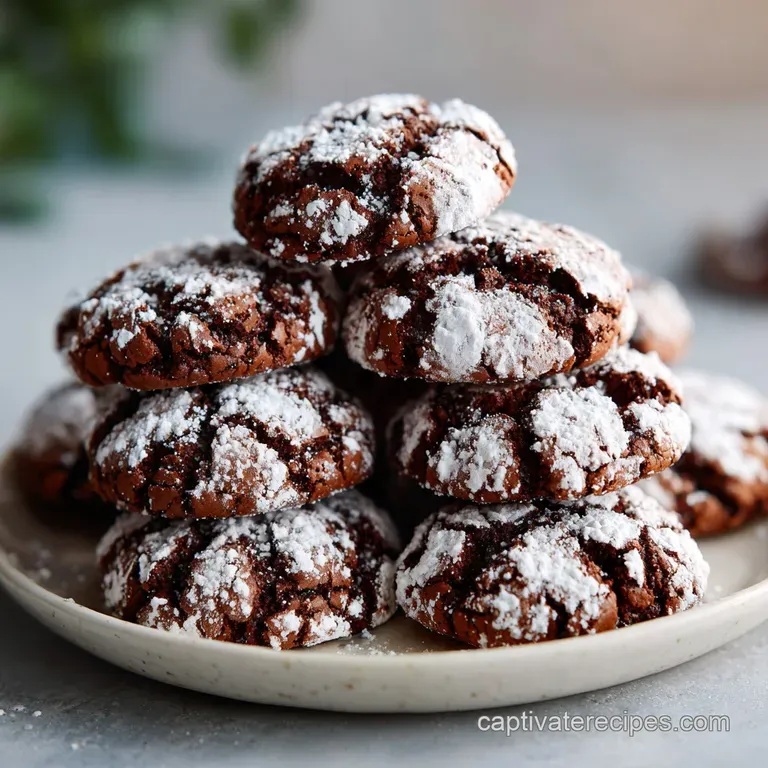
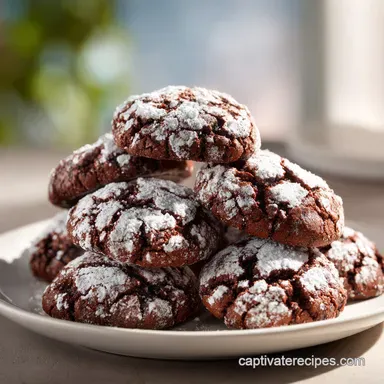
- Flavor/Texture Hook: Velvety dark cocoa center with a crisp, snowy sugar shell that shatters on impact.
- Perfect for: Holiday gift boxes, cozy weekend baking, or satisfying a deep dark chocolate craving.
- Baking the Ultimate Decadent Chocolate Crinkle Cookies with Ease
- Unlocking the Chemistry for That Iconic Cracked Sugar Finish
- Deciphering the Role of Each Key Ingredient Component
- Selecting Your Elements and Smart Ingredient Substitutions
- Essential Tools to Achieve That Signature Snowy Finish
- Step-by-Step Guide to Creating Velvety Chocolate Masterpieces
- Avoiding Common Mistakes for a Consistent Fudgy Texture
- Customizing Your Treats with Creative Flavors and Diet Swaps
- Maintaining Freshness through Proper Storage and Freezing Techniques
- Elevating the Experience: How to Best Enjoy Your Cookies
- Recipe FAQs
- 📝 Recipe Card
Baking the Ultimate Decadent Chocolate Crinkle Cookies with Ease
The very first time I pulled a tray of Chocolate Crinkle Cookies out of the oven, I felt like I’d just mastered a magic trick. Watching that thick, snowy layer of powdered sugar "shatter" as the dough rises, revealing the dark, obsidian like fudge underneath, is one of the most satisfying sights in a home kitchen.
The aroma that fills the house is heavy with Dutch cocoa and a hint of espresso, smelling less like a simple cookie and more like a high end patisserie.
I’ll be honest with you my first attempt years ago was a total disaster because I was too impatient to let the dough chill. I ended up with one giant, flat chocolate puddle on my baking sheet.
But after a lot of trial and error (and many "ugly" but edible mistakes), I’ve figured out exactly how to get that iconic, high contrast look and a texture that’s more like a brownie than a standard biscuit.
We’re aiming for a cookie that is intensely fudgy on the inside, with a slight chew around the edges. It’s all about the temperature and the way we layer the sugars. If you’ve been looking for that "showstopper" treat that looks incredibly difficult but is actually quite straightforward once you know the tricks, you’ve found it.
Let’s get into the details so you can start smelling that cocoa sooner rather than later.
Unlocking the Chemistry for That Iconic Cracked Sugar Finish
The Fractal Shatter Mechanism: The granulated sugar layer pulls moisture from the dough's surface, creating a delicate, dry crust that sets early in the oven. As the interior heats and expands due to the baking powder, it forces this brittle crust to burst, creating the beautiful "crinkle" pattern.
| Cooking Method | Cook Time | Texture Outcome | Best For |
|---|---|---|---|
| Standard Oven (350°F) | 10 minutes | Fudgy center, crisp edges | The classic, reliable result |
| Toaster Oven (350°F) | 9 minutes | Drier edges, soft middle | Small batches (6-8 cookies) |
| Air Fryer (320°F) | 7 minutes | Thicker crust, very gooey | Quick cravings (batches of 4) |
Chilling the dough isn't just a suggestion; it is the most critical step for flavor development. Much like the technique used for a Chewy Chocolate Chip recipe, letting the fats solidify ensures the cookies don't spread too fast, allowing the cracks to form before the dough hits its final shape.
Deciphering the Role of Each Key Ingredient Component
| Component | Science Role | Pro Secret |
|---|---|---|
| Dutch process Cocoa | Lowers acidity and darkens color | Sift it twice to remove stubborn lumps |
| Vegetable Oil | Provides fat without adding water | Use a neutral oil like avocado or grapeseed |
| Espresso Powder | Enhances the perception of bitterness | It won't taste like coffee; it just deepens the cocoa |
| Baking Powder | Primary leavening agent | Ensure it's fresh (less than 6 months old) |
Selecting Your Elements and Smart Ingredient Substitutions
To make these Chocolate Crinkle Cookies, you'll need a few pantry staples and one or two "secret" enhancers. I always recommend using room temperature eggs because they emulsify much better with the oil and sugar, creating a more uniform crumb.
- 1 cup all purpose flour (125g): This provides the structure.
- Substitute: 1:1 gluten-free flour blend (ensure it has xanthan gum).
- 0.5 cup Dutch process cocoa powder (50g): This is darker and smoother than natural cocoa. Why this? It provides that deep, artisanal color and a mellow, less acidic chocolate flavor.
- Substitute: Natural cocoa powder (yields a lighter, tangier cookie).
- 0.75 cup granulated sugar (150g): Sweetens and helps with the crinkle.
- Substitute: Light brown sugar (adds moisture but reduces the "shatter" effect).
- 0.25 cup vegetable oil (60ml): Keeps the center velvety and soft.
- Substitute: Melted coconut oil (adds a faint tropical note).
- 2 large eggs: These bind everything together.
- Substitute: Flax eggs (1 tbsp flax meal + 3 tbsp water per egg).
- 1 tsp baking powder: Essential for the rise.
- 1 tsp vanilla extract: Enhances the overall sweetness.
- 0.5 tsp espresso powder: The "flavor booster."
- 0.25 tsp kosher salt: Balances the sugar.
- 0.25 cup granulated sugar (for coating): The "shield" layer.
- 0.5 cup powdered sugar (60g): The final snowy finish.
If you enjoy the simplicity of oil based cookies, you might also like a 3ingredient peanut butter recipe for those days when you need a treat in under fifteen minutes.
Essential Tools to Achieve That Signature Snowy Finish

- Whisk and Bowl: No heavy machinery needed, though a hand mixer makes the egg and sugar step easier.
- Sifter: Mandatory for the cocoa and powdered sugar.
- Small Cookie Scoop (1 tbsp): To ensure all 24 cookies are identical in size.
- Baking Sheets: Heavy duty rimmed sheets work best for even heat distribution.
- Parchment Paper or Silicone Mats: To prevent the sugar from sticking to the pan.
Chef's Tip: Freeze your metal mixing bowl for 10 minutes before starting. A cold bowl helps keep the oil based dough from becoming too greasy while you mix.
step-by-step Guide to Creating Velvety Chocolate Masterpieces
Step 1: Emulsifying the Base
In a large bowl, whisk together the 0.25 cup vegetable oil, 0.75 cup granulated sugar, vanilla extract, and eggs. Whisk until the mixture is pale and slightly frothy, which usually takes about 2 minutes.
Note: This aeration helps create a lighter texture in an otherwise dense cookie.
Step 2: Folding and Hydrating
Sift the flour, Dutch process cocoa, baking powder, espresso powder, and salt into the wet ingredients. Fold gently with a spatula until no dry streaks of flour remain. Don't overwork it, or the cookies will become tough rather than fudgy.
Step 3: The Cold Cure
Cover the bowl tightly with plastic wrap and refrigerate for at least 2 hours. This is non negotiable. The dough will be very sticky at first, and chilling allows the flour to fully hydrate and the oil to stabilize.
Step 4: The Coating Ritual
Preheat your oven to 350°F. Prepare two bowls: one with the extra 0.25 cup granulated sugar and one with the 0.5 cup powdered sugar. Scoop 1 tablespoon portions of dough and roll into balls. Roll first in granulated sugar, then generously in powdered sugar.
Step 5: The over High heat Bake
Place cookies on the prepared baking sheet, leaving 2 inches of space between them. Bake for exactly 10 minutes. The cookies will look slightly underdone and soft in the center, but they will firm up as they cool.
Step 6: The Final Set
Let the cookies rest on the baking sheet for 5 minutes until they are stable enough to move. Transfer them to a wire rack to cool completely. This prevents the bottoms from becoming soggy.
Avoiding Common Mistakes for a Consistent Fudgy Texture
One of the biggest heartbreaks is when the powdered sugar seemingly vanishes into the cookie. This usually happens because the dough was too warm or you didn't use the "double coat" method.
To Prevent "Disappearing" Powdered Sugar
The granulated sugar layer acts as a barrier, preventing the moisture in the dough from dissolving the fine powdered sugar. If you find your sugar is still melting, try adding a tiny bit of cornstarch (about 1/2 tsp) to your powdered sugar bowl to help it stay dry.
Overbaking: The Fudginess Killer
Because these cookies are dark, you can't rely on them "browning." If you bake them until they feel firm to the touch, they will be dry like a rock once cooled. You want to pull them when the cracks look set but the valleys between the cracks still look slightly shiny and moist.
| Problem | Root Cause | Solution |
|---|---|---|
| Flat, thin cookies | Dough was too warm | Chill for the full 2 hours or overnight |
| No crinkle pattern | Oven temp too low | Check oven with a thermometer; must be 350°F |
| Yellowish sugar | Oil seeped through | Double coat with granulated sugar first |
Common Mistakes Checklist:
- ✓ Ensure eggs are at room temperature to prevent the oil from seizing.
- ✓ Sift the cocoa powder; Dutch process cocoa is notorious for hard lumps.
- ✓ Use a cookie scoop for even sizes, ensuring they all bake at the same rate.
- ✓ Don't skip the espresso powder; it's the key to a professional grade flavor.
- ✓ Let the baking sheet cool completely between batches.
Customizing Your Treats with Creative Flavors and Diet Swaps
If you want to move beyond the classic Chocolate Crinkle Cookies, there are several ways to pivot. Adding a half teaspoon of peppermint extract makes these the ultimate holiday treat, reminiscent of a thin mint but in fudgy form.
Dietary Adjustments
For those with specific needs, these cookies are surprisingly adaptable.
| Original Ingredient | Substitute | Why It Works |
|---|---|---|
| All purpose Flour | Almond Flour (1:1) | Note: Result will be much denser and richer |
| Large Eggs | 0.5 cup Applesauce | Note: Makes a softer, cake like texture |
| Granulated Sugar | Monk Fruit Sweetener | Note: Keep the ratio 1:1 for best results |
For a completely different flavor profile that still uses the "crinkle" concept, you could try a similar technique with lemon zest and juice for a bright, citrusy version.
Maintaining Freshness through Proper Storage and Freezing Techniques
These cookies stay moist for quite a while because of the oil content, but they do have a "peak" window of about 3 days.
- Room Temperature: Store in an airtight container for up to 5 days. Add a small piece of white bread to the container to keep them soft.
- Freezing Dough: You can freeze the rolled (but un sugared) dough balls for up to 3 months. When ready to bake, roll in the sugars while still frozen and add 2 minutes to the bake time.
- Freezing Baked Cookies: Place cooled cookies in a single layer on a tray to freeze, then transfer to a freezer bag. This prevents the powdered sugar from smearing.
- Zero Waste Tip: If you have leftover powdered sugar from the coating bowls, sift it to remove any cocoa crumbs and save it for your next batch or for dusting over brownies.
Elevating the Experience: How to Best Enjoy Your Cookies
While these are fantastic on their own, the "flavor layers" really shine when paired correctly. A cold glass of whole milk is the classic choice, but for a more artisanal experience, try serving them alongside a sharp espresso or a tart raspberry coulis.
The acidity of the berries cuts through the richness of the Dutch cocoa perfectly.
If you’re hosting a party, these make a gorgeous centerpiece. Arrange them on a dark slate platter to make the white sugar "shatter" pattern pop. You can even sprinkle a tiny pinch of flaky sea salt over the top immediately after baking to emphasize the chocolate notes.
Decision Shortcut
- If you want a brownie like center: Bake for exactly 9 minutes and chill the dough overnight.
- If you want a crispy, biscuit like snap: Bake for 12 minutes and use natural cocoa powder.
- If you want the brightest white finish: Double roll in the powdered sugar after the granulated sugar coat.
Debunking Baking Myths
- Myth: You must use butter for a good cookie. Truth: In crinkle cookies, oil actually provides a superior "fudgy" texture and keeps them moist much longer than butter based versions.
- Myth: More baking powder means more cracks. Truth: Too much leavening will cause the cookie to collapse. The cracks come from the surface drying out, not just the rise.
Whether you're making these for a holiday exchange or just a Tuesday night treat, the joy of watching those cracks form never gets old. It’s a simple recipe that yields a truly showstopping result, proving that sometimes, the best things in life are a little bit messy and beautifully shattered.
Enjoy the process and the velvety reward!

Recipe FAQs
What is the secret to crinkle cookies?
The mandatory overnight chill and double sugar coating. Chilling the dough ensures it doesn't spread too fast, allowing the exterior crust to set before the interior rises, which causes the signature shattering cracks.
What is the best flour to use for crinkles?
Use standard All-Purpose flour. This flour provides the best balance of structure and chew needed to support the heavy cocoa and the sugary crust.
Are chocolate crinkle cookies good?
Yes, they are exceptional if baked correctly. They offer a uniquely fudgy, brownie like center contrasted by a thin, crisp, snowy exterior shell.
Can I use butter instead of oil in crinkle cookies?
No, stick with oil for the best texture. Oil is liquid at room temperature, which keeps the center intensely moist and velvety, whereas butter yields a slightly drier, more traditional cookie crumb.
How do I stop my powdered sugar coating from melting into the dough?
Roll first in granulated sugar, then immediately in powdered sugar. The initial layer of granulated sugar acts as a moisture barrier, preventing the fine powdered sugar from dissolving during the chilling and baking process.
Why are my cookies baking flat instead of cracking high?
The dough was insufficiently chilled or overworked. If you enjoyed controlling cookie spread here, see how the same principle of temperature control applies to our Cheats Opera Cake recipe for layer stability.
Is it true I should bake them until they look slightly underdone?
Yes, that is the correct sensory cue. Because the goal is a fudgy interior, you must remove them when the centers still look shiny and soft; they continue setting on the hot pan, preventing the dreaded dry-cookie syndrome.
Fudgy Chocolate Crinkle Cookies
Ingredients:
Instructions:
Nutrition Facts:
| Calories | 92 kcal |
|---|---|
| Protein | 1.5 g |
| Fat | 3.0 g |
| Carbs | 16.1 g |
| Fiber | 0.7 g |
| Sugar | 10.8 g |
| Sodium | 44 mg |
