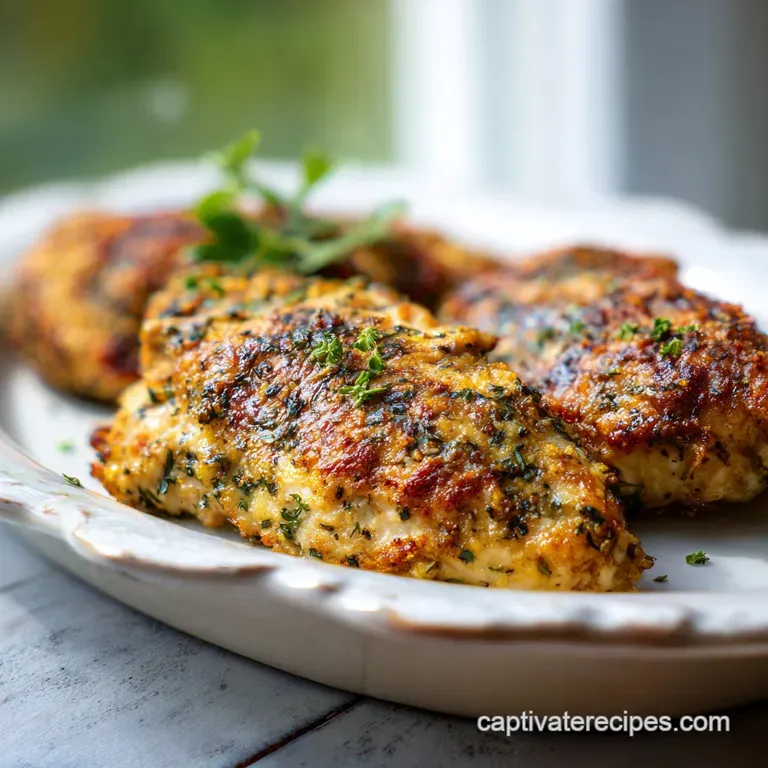
Garlic and Herb Chicken Thighs: Crispy and Juicy
- Time: Active 15 minutes, Passive 35 minutes, Total 50 minutes
- Flavor/Texture Hook: Shattering crispy skin with a velvety, herb infused interior
- Perfect for: Stress free weeknight dinners or reliable meal prep
- Why This Recipe Actually Works
- Sourcing the Right Components for Flavor and Texture
- Essential Kitchen Gear for a Better Chicken Sear
- Step by Step Guide to Roasting Your Chicken Thighs
- Professional Secrets to Avoid Soggy Chicken Skin
- Creative Variations for Customizing Your Garlic and Herb Dish
- Debunking Chicken Roasting Myths
- Best Practices for Storing and Reheating Your Leftovers
- Ideal Pairings for a Complete Herb Roasted Meal
- Very High in Sodium
- Recipe FAQs
- 📝 Recipe Card
Why This Recipe Actually Works
- Thermal Buffer: The central bone acts like an insulator, distributing heat slowly through the meat so the outside doesn't dry out before the inside is cooked.
- Surface Dehydration: Rubbing salt and spices directly onto the skin 20 minutes before cooking draws out moisture, which allows the fat to render and the skin to crisp up faster.
- Cold Start Logic: While we preheat the oven, starting the sear on the stovetop ensures the skin reaches that mahogany color that an oven alone can't achieve.
- Aromatic Infusion: Smashed garlic and lemon rounds release their oils into the rendered chicken fat, creating a natural basting liquid that flavors the meat from the bottom up.
| Thickness | Internal Temp | Rest Time | Visual Cue |
|---|---|---|---|
| 1 inch | 165°F (74°C) | 5 minutes | Juices run clear when poked |
| 1.5 inches | 165°F (74°C) | 5 minutes | Skin is deep mahogany and firm |
| 2 inches | 165°F (74°C) | 8 minutes | Meat pulls away slightly from bone |
Choosing the right cut is half the battle when you're working on a budget. Bone in thighs are significantly cheaper than boneless ones, and the flavor payoff is much higher. If you are looking for a side dish to make this a full meal, this Roasted Chicken and Vegetables method works beautifully alongside these herbs.
Sourcing the Right Components for Flavor and Texture
| Ingredient | Science Role | Pro Secret |
|---|---|---|
| Kosher Salt | Protein breakdown | Use coarse salt to draw out more moisture from the skin |
| Smoked Paprika | Color and depth | Provides a "grilled" flavor without needing a BBQ |
| Fresh Rosemary | Heat stable aromatics | Bruise the leaves before mincing to release the oils |
| Fresh Garlic | Flavor base | Smash, don't mince, to prevent burning in the over high heat oven |
Chicken thighs are the workhorse of the kitchen. They have more connective tissue than breasts, which means they stay moist under high heat. When we talk about the herbs, fresh is always best here.
Dried herbs tend to burn and become bitter in a 400°F oven, whereas fresh rosemary and thyme just get toasted and fragrant.
- 4 Large Bone in, skin on chicken thighs (approx. 850g): Why this? The skin provides the fat needed for the sear.
- 1.5 tsp Kosher salt: Why this? Essential for the dry brine process.
- 1 tsp Cracked black pepper: Why this? Adds a necessary bite to the rich fat.
- 1 tbsp Fresh rosemary, finely minced: Why this? A woody herb that stands up to high heat.
- 1 tbsp Fresh thyme leaves: Why this? Adds a floral, earthy note.
- 1 tsp Smoked paprika: Why this? Gives that beautiful mahogany color.
- 1/2 tsp Onion powder: Why this? Adds savory depth without burning like fresh onions.
- 6 cloves Fresh garlic, smashed: Why this? Smashed cloves flavor the oil without scorching.
- 2 tbsp Extra virgin olive oil: Why this? High smoke point for the initial sear.
- 1 Lemon, sliced into rounds: Why this? The acid cuts through the richness of the chicken.
Essential Kitchen Gear for a Better Chicken Sear
You don't need a pantry full of gadgets, but a cast iron skillet is the absolute star of this show. It holds heat better than stainless steel or non stick, which is vital for getting that skin to shatter. If you don't have cast iron, any heavy bottomed, oven safe pan will work.
Just avoid thin pans that might warp or cause the garlic to burn too quickly.
A reliable instant read thermometer is your second best friend. Relying on "time" alone is how people end up with dry chicken. Since every oven runs a bit differently, checking the internal temperature at the 25 minute mark ensures you pull the meat out at the exact moment of peak juicity.
step-by-step Guide to Roasting Your Chicken Thighs
- Prep the meat. Pat the chicken thighs extremely dry using paper towels to remove all surface moisture. Note: Dry skin is the only way to get a crispy result.
- Mix the rub. In a small mixing bowl, combine the kosher salt, black pepper, rosemary, thyme, smoked paprika, and onion powder.
- Season thoroughly. Rub the herb mixture generously over every inch of the chicken, including under the skin. Allow the chicken to sit at room temperature for 20 minutes to dry brine.
- Heat the oven. Preheat your oven to 400°F (200°C).
- Sear the skin. Heat the olive oil in a 12 inch cast iron skillet over medium high heat until the oil shimmers. Place the thighs skin side down and sear without moving for 5-7 minutes until the skin is mahogany colored and releases easily.
- Add aromatics. Flip the thighs so they are skin side up. Scatter the smashed garlic cloves and lemon rounds into the gaps between the chicken pieces.
- Roast in oven. Transfer the skillet to the oven and roast for 25-30 minutes until an instant read thermometer reaches 165°F (74°C).
- Rest the meat. Remove the pan from the oven and let the chicken rest for 5 minutes before serving. Note: This allows juices to redistribute so they don't run out when you cut in.
Professional Secrets to Avoid Soggy Chicken Skin

The Power of the Dry Brine
One mistake I made for years was seasoning the chicken and putting it straight into the pan. By letting the salted chicken sit for 20 minutes, you are actually performing a "mini cure." The salt pulls moisture out, dissolves into a brine, and then is reabsorbed into the meat.
This seasons the chicken all the way to the bone, not just on the surface.
Avoiding the Steam Trap
When you flip the chicken and add the lemon and garlic, make sure you don't place them on top of the skin. If you cover that beautiful, seared skin with a wet lemon slice, it will turn soft and soggy in the oven.
Keep the aromatics in the gaps between the meat so they can perfume the air and the fat without ruining your hard work.
Troubleshooting Your Sear
| Problem | Root Cause | Solution |
|---|---|---|
| Skin is sticking | Pan wasn't hot enough or moved too soon | Wait until it naturally releases from the pan |
| Garlic is burnt | Garlic was added too early or minced too fine | Use whole smashed cloves and add after flipping |
| Meat is dry | Overcooked beyond 175°F | Use a thermometer and pull at exactly 165°F |
The key to a successful Bone In Chicken Thigh Recipe with Garlic and Herbs is patience. If you try to flip the chicken and it feels stuck, it is telling you it isn't ready. Give it another minute. The proteins will eventually contract and release themselves from the metal.
Common Mistakes Checklist
- ✓ Don't skip the paper towel step; moisture is the enemy of crispiness.
- ✓ Preheat your skillet for at least 3 minutes before adding the oil.
- ✓ Ensure the chicken is skin side up when it goes into the oven.
- ✓ Don't crowd the pan; if the thighs are touching, they will steam instead of roast.
- ✓ Let the meat rest for 5 full minutes to keep it succulent.
Creative Variations for Customizing Your Garlic and Herb Dish
If you want to change things up, this recipe is incredibly flexible. For a Mediterranean twist, swap the smoked paprika for dried oregano and add some kalamata olives to the pan during the roasting phase. The salty olives get slightly warm and wrinkled, releasing a wonderful brine that mixes with the chicken fat.
If you are cooking for a crowd, you can easily double this recipe. Just remember that you might need to sear the chicken in batches. If you crowd the pan with eight thighs at once, the temperature of the oil will drop, and you will end up boiling the chicken instead of searing it. For a different flavor profile, you could even serve these thighs with a quick Chicken Gravy Recipe made from the pan drippings.
| Method | Time | Texture | Best For |
|---|---|---|---|
| Cast Iron Skillet | 50 mins | Maximum crisp skin | Traditional flavor |
| Air Fryer | 25 mins | Very crispy but less juice | Quick weeknight |
| Sheet Pan | 45 mins | Even roasting, less sear | Bulk cooking |
Debunking Chicken Roasting Myths
One of the biggest myths is that you should wash your chicken before cooking. Please, don't do this. Washing chicken doesn't kill bacteria; it just splashes it all over your sink and counters. The heat of the 400°F oven is what makes the food safe.
Another myth is that you must cook chicken until it is "white" all the way through. Bone in chicken often stays slightly pink near the bone due to the marrow, even when it is fully cooked to 165°F. Trust your thermometer, not just your eyes.
Finally, some people think you should leave the garlic in its skin. While that prevents burning, you lose out on all that wonderful flavor infusion. By smashing the cloves but leaving them whole, you get the best of both worlds: deep garlic flavor and no bitter, burnt bits.
Best Practices for Storing and Reheating Your Leftovers
Storage: You can keep these chicken thighs in an airtight container in the fridge for up to 4 days. If you want to freeze them, they will stay fresh for about 3 months. Just make sure they are completely cool before you seal them up to prevent ice crystals from forming.
Zero Waste: Don't you dare throw away those bones or the lemon garlic pan drippings. The bones can be tossed into a freezer bag for a future batch of homemade stock. The leftover fat in the pan (liquid gold!) can be used to roast potatoes the next day.
Just strain it and keep it in a small jar in the fridge.
Reheating: To keep the skin crispy, avoid the microwave. Instead, put the thighs in a 350°F (180°C) oven or a toaster oven for about 10 minutes. This will wake up the fats and crisp the skin back up without making the meat rubbery.
Ideal Pairings for a Complete Herb Roasted Meal
These chicken thighs are the star, but they love a good supporting cast. A simple green salad with a sharp vinaigrette is perfect for cutting through the richness. If you want something heartier, a pile of buttery mashed potatoes or some crusty bread to soak up the garlic infused pan juices is heaven on a plate.
I often serve this with roasted root vegetables. Since the oven is already at 400°F, you can toss some carrots or parsnips with olive oil and salt on a separate tray and they will be finished right at the same time as the chicken.
It is a reliable, comforting meal that feels much fancier than the 15 minutes of active work it requires. Enjoy the sizzle, and don't be afraid to eat that crispy skin first!

Very High in Sodium
882 mg 882 mg of sodium per serving (38% 38% of daily value)
The American Heart Association recommends limiting sodium intake to less than 2,300 mg per day for most adults.
Tips to Reduce Sodium
-
Halve the Salt-25%
Reduce the 1.5 tsp Kosher salt to 0.75 tsp. This is the most significant sodium source and halving it will drastically cut sodium.
-
Amplify Lemon Flavor-10%
Increase the amount of lemon slices used. Lemon adds brightness and acidity, which can enhance flavor and make you less reliant on salt.
-
Boost Herbs and Spices
Emphasize the use of fresh rosemary, fresh thyme leaves, smoked paprika, and onion powder. These ingredients add significant flavor without adding sodium.
-
More Garlic Power-5%
Increase the quantity of smashed fresh garlic. Garlic provides a pungent and savory flavor that can compensate for reduced salt.
Recipe FAQs
How to get the skin extra crispy?
Pat the chicken thighs extremely dry using paper towels before applying any seasoning. Removing surface moisture is the only way to ensure the skin renders properly and reaches a crispy, mahogany finish during the 5 7 minute sear.
Why is my chicken skin sticking to the skillet?
You are likely trying to flip the meat too soon. If the chicken feels stuck, it is not ready; wait until the skin naturally releases from the pan once it has achieved a deep, golden color.
How to ensure the garlic does not taste bitter?
Use whole smashed cloves and add them only after flipping the chicken. Adding minced garlic too early or exposing it to the direct heat of the skillet for the full roasting duration will cause it to scorch and turn bitter.
Is it necessary to let the chicken sit before cooking?
Yes, allow the chicken to dry-brine at room temperature for 20 minutes. This short resting period allows the kosher salt and herbs to penetrate the meat while further drying out the skin for a superior sear.
How to tell when the chicken is perfectly cooked?
Use an instant read thermometer to check for an internal temperature of 165°F (74°C). If you enjoyed mastering these sensory doneness cues here, see how the same principle of temperature precision works in our Chicken Saganaki for perfectly succulent results.
Can I cook this at a lower temperature to prevent burning?
No, sticking to 400°F (200°C) is essential. This specific heat level is required to roast the thighs through in 25 30 minutes while ensuring the skin remains crisp without drying out the meat.
How to store leftovers?
Place cooled chicken in an airtight container in the refrigerator for up to three days. To regain some texture when reheating, place the thighs back into a skillet over medium heat until the skin warms through.
Garlic Herb Chicken Thighs 2

Ingredients:
Instructions:
Nutrition Facts:
| Calories | 352 kcal |
|---|---|
| Protein | 23.6 g |
| Fat | 27.4 g |
| Carbs | 2.8 g |
| Fiber | 0.7 g |
| Sugar | 0.4 g |
| Sodium | 882 mg |
