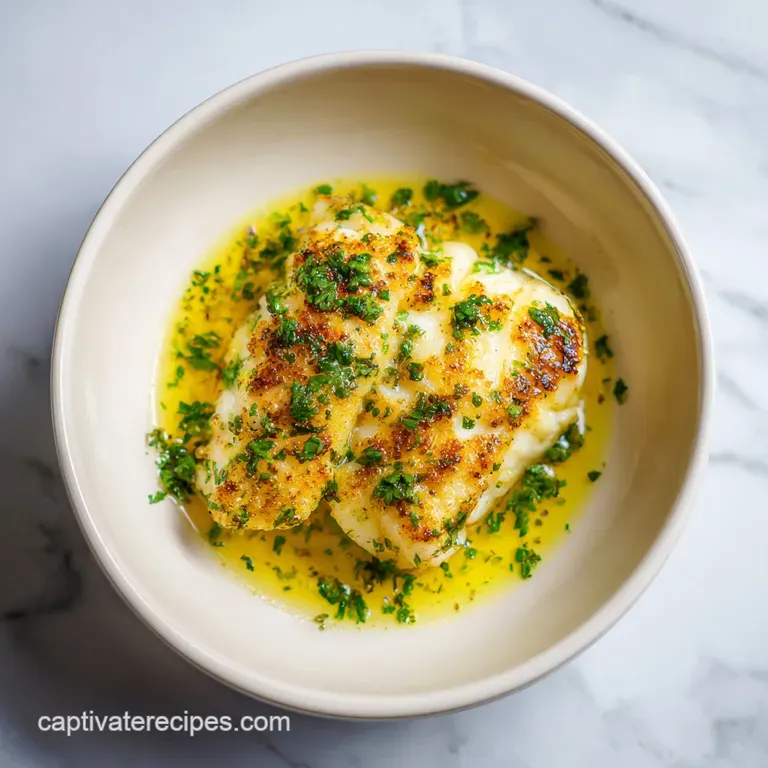
Golden Seared Cod with Herb Butter Sauce
- Time: Active 10 minutes, Passive 10 minutes, Total 20 minutes
- Flavor/Texture Hook: Shatteringly crisp exterior with a velvety, herb infused butter finish
- Perfect for: Busy weeknights when you want a sophisticated dinner without the complexity
- Master the Golden Seared Cod Recipe with Herb Butter Sauce
- The Secret to a Shatteringly Crisp Exterior and Flaky Interior
- Component Analysis of This Simple Seafood Supper
- Comparing Fresh Ingredients to Quick Kitchen Shortcuts
- Minimal Tools for Professional Quality Results at Home
- Step by Step Guide to Flawless Pan Seared Fish
- Solving Common Issues with Pan Seared Cod Filets
- Flavor Variations for Your Herb Butter Cod Recipe
- Storage Guidelines for Maintaining That Silky Texture
- Elevating Your Quick Fish Dinner Recipe for Guests
- Recipe FAQs
- 📝 Recipe Card
Master the Golden Seared Cod Recipe with Herb Butter Sauce
Have you ever wondered why your home cooked fish often ends up swimming in a pool of gray liquid instead of boasting that gorgeous, mahogany crust you see at high end steakhouses? It is a frustration I lived with for years, assuming I simply did not have the right industrial equipment.
The truth is much simpler: it is all about managing surface moisture and understanding how proteins react to intense heat. Discover our top rated Golden Seared Cod Recipe with Herb Butter Sauce for your next meal.
The first time I really nailed this, I realized I had been treating fish too gently. We often think of white fish as fragile, so we lower the heat, but that is exactly what causes it to steam and turn rubbery.
This recipe relies on a few reliable tricks like using a specific type of flour and a very hot pan to create a barrier that locks in juices while providing that satisfying crunch.
We are going to walk through the exact steps to ensure your cod loins come out perfectly every single time. No fancy gadgets or complicated French techniques are required here. We are focusing on minimal tools just a heavy skillet and a spoon to achieve a result that tastes like you spent hours in the kitchen when, in reality, you were done in 20 minutes.
The Secret to a Shatteringly Crisp Exterior and Flaky Interior
Many home cooks skip the most vital part of seafood preparation: the drying phase. When water hits a hot pan, it immediately turns to steam. If your fish is wet, that steam gets trapped between the flesh and the pan, preventing the Maillard reaction from occurring.
By aggressively patting the fish dry, we ensure the heat goes directly into browning the surface rather than evaporating surface moisture.
The addition of a light dusting of Wondra flour or cornstarch acts as a secondary insurance policy. These starches have a much finer particle size than standard all purpose flour, creating a microscopically thin "shroud" that crisps up instantly.
This layer protects the delicate proteins of the cod from drying out while providing the perfect "hook" for the herb butter to cling to later.
Surface Dehydration: Removing moisture prevents steaming and allows for immediate browning upon contact with the oil.
Starch Barrier: A thin coating of cornstarch creates a crisp lattice that shields the fish from direct, toughening heat.
Butter Convection: Basting with foaming butter cooks the top of the fish with gentle, aromatic heat while the bottom sears.
Thermal Carryover: Removing the fish just before it's fully opaque allows internal heat to finish the job without overcooking.
| Thickness | Internal Temp | Rest Time | Visual Cue |
|---|---|---|---|
| 1 inch | 140°F | 2 minutes | Opaque and easily flaked |
| 1.5 inches | 140°F | 3 minutes | Center loses translucent look |
| 2 inches | 140°F | 4 minutes | Segments begin to separate |
Understanding these timing windows is the difference between a dry piece of fish and one that melts in your mouth. Cod is quite forgiving, but it does have a "sweet spot" where the flakes are moist and large. As soon as that center changes from translucent to white, you want to get it out of the pan.
Component Analysis of This Simple Seafood Supper
Choosing the right ingredients for this Golden Seared Cod Recipe with Herb Butter Sauce is about quality over quantity. Because we are using so few items, each one needs to work hard.
I always recommend European style butter because it has a lower water content and higher butterfat, which means it browns more beautifully without splattering as much as standard supermarket butter.
| Ingredient | Science Role | Pro Secret |
|---|---|---|
| Cod Loins | Structural Protein | Use loins, not fillets, for even thickness and better searing. |
| Wondra Flour | Crispness Agent | This pre gelatinized flour dissolves instantly and never clumps. |
| Avocado Oil | Heat Conductor | High smoke point prevents the oil from breaking down and tasting bitter. |
| Fresh Dill | Aromatic Finish | Add at the very end to preserve the volatile oils and bright color. |
The choice of oil is just as important as the fish itself. If you use extra virgin olive oil, it will likely smoke and burn before the fish gets that golden color. Avocado or grapeseed oil can handle the high temperatures needed to get that initial sear, keeping the flavor clean and the kitchen smoke free.
For the Golden Seared Cod
- 4 (6 oz) Cod Loins: Look for "center cut" loins which are thick and uniform. Why this? They cook evenly compared to thin, tapered tail pieces.
- 1 tbsp Grapeseed or Avocado Oil: High smoke point oils are essential. Why this? Prevents burning during the initial 3-4 minute sear.
- 1 tsp Kosher Salt: Coarse grains allow for better control. Why this? Draws out deep flavor without being overly "salty."
- 0.5 tsp Black Pepper: Freshly cracked is always best. Why this? Provides a subtle heat that cuts through the rich butter.
- 1 tbsp Wondra Flour or Cornstarch: Use cornstarch for a gluten-free option. Why this? Creates that signature "shatter" texture on the crust.
For the Velvety Herb Butter Sauce
- 4 tbsp Unsalted European style Butter: Higher fat content is key. Why this? Produces more "foam" which is better for basting.
- 3 Garlic Cloves, smashed: Just peel and crush with the side of a knife. Why this? Infuses the butter without burning like minced garlic would.
- 1 tbsp Fresh Parsley: Finely minced for the best distribution. Why this? Adds a necessary grassy brightness to balance the fat.
- 1 tsp Fresh Dill or Chives: Choose based on your preference. Why this? Dill offers a classic seafood pairing; chives add mild onion notes.
- 0.5 Fresh Lemon: Juiced directly into the pan. Why this? The acidity "wakes up" the entire dish and cuts the richness.
Comparing Fresh Ingredients to Quick Kitchen Shortcuts
When you are tired and just want dinner on the table, it is tempting to reach for dried herbs or bottled juice. While this recipe is designed to be easy, there are some trade offs to consider.
Fresh lemon juice, for instance, contains bright citric acid that bottled versions lack, but in a pinch, a high-quality concentrate can work if you balance it with a tiny pinch of sugar.
| Feature | Fresh Approach | Shortcut Method | Resulting Impact |
|---|---|---|---|
| Herbs | Fresh Parsley/Dill | Dried Herb Blend | Dried herbs are muted; use 1/3 the amount. |
| Acid | Fresh Squeezed Lemon | Bottled Lemon Juice | Bottled can be metallic; fresh is much brighter. |
| Starch | Wondra Flour | All Purpose Flour | AP flour is heavier and can become gummy if wet. |
If you find yourself without fresh herbs, don't panic. A teaspoon of dried Italian seasoning or even just a heavy dusting of paprika in the flour can create a different, yet reliable, flavor profile.
However, for that true steakhouse vibe, the fresh dill is what really sets this apart from a standard Tuesday night meal.
Minimal Tools for Professional Quality Results at Home
One of the reasons I love this dish is that it doesn't require a sink full of dishes. You really only need one good pan and a few basic utensils. If you have a cast iron skillet, that is my top recommendation because it holds heat so well. Once it gets hot, it stays hot, even when you drop cold fish into it.
If you don't have cast iron, a heavy stainless steel pan works wonders too. Just avoid thin, cheap non stick pans if you can. They often don't distribute heat evenly, and you might find the edges of your fish burning while the center is still raw.
A flexible "fish spatula" is also a massive help it’s thin enough to slide under the delicate crust without breaking it.
Chef's Tip: Freeze your butter for 10 minutes before adding it to the pan. This slows down the browning process, giving the garlic more time to infuse without the milk solids in the butter burning too quickly.
step-by-step Guide to Flawless Pan Seared Fish
- Remove the cod from the refrigerator 15 minutes before cooking. Note: This takes the chill off, ensuring the center cooks at the same rate as the exterior.
- Use paper towels to aggressively pat all sides of the fillets until they are bone dry to the touch. Note: This is the most important step for a crispy crust.
- Season the cod loins evenly with kosher salt and black pepper.
- Lightly dust the surface of the fish with Wondra flour or cornstarch, tapping off any excess to ensure a thin coating. Note: You want a veil, not a blanket.
- Heat a 12 inch heavy bottomed skillet over medium high heat. Add the high smoke point oil and wait until it is shimmering and just starting to smoke.
- Carefully place the cod loins into the pan. Sear undisturbed for 3 to 4 minutes until a deep mahogany crust forms on the bottom.
- Flip the fish gently using a flexible fish spatula. Reduce the heat to medium.
- Add the butter, smashed garlic, parsley, and dill/chives to the pan.
- Once the butter foams, tilt the skillet and use a large spoon to continuously baste the hot herb butter over the fish for 2-3 minutes until the fish is opaque and flakes easily.
- Squeeze the fresh lemon juice over the fish and remove from heat. Serve immediately.
Solving Common Issues with Pan Seared Cod Filets
If things go wrong, it is usually a matter of temperature or moisture. If your fish is sticking, it is often a sign that the pan wasn't hot enough when you started, or you are trying to flip it too early. Protein "releases" from the pan naturally once the crust has formed.
If you feel resistance, give it another 30 seconds.
Sometimes the butter might start to smell a little too nutty or look dark brown. This is "beurre noisette," which is delicious, but if it crosses into black territory, it becomes bitter.
If you see the butter browning too fast, simply drop in a small splash of oil or an extra knob of cold butter to bring the temperature down instantly.
Why Your Cod Is Not Getting Crispy
The most common culprit is surface moisture. If the fish isn't dry, it steams. Another reason is overcrowding the pan; if the loins are touching, the steam from one will soften the crust of the other. Ensure there is at least an inch of space between each piece of fish.
Why Your Fish Is Falling Apart
Cod is naturally flaky, which is its best trait but also its most difficult. If it's falling apart, you might be flipping it too many times. You only want to flip once. Also, ensure you are using a thin spatula. A thick plastic spatula can act like a wedge and split the delicate layers of the fish.
| Problem | Root Cause | Solution |
|---|---|---|
| Fish sticks to pan | Pan was too cold or fish was wet | Preheat pan longer; pat fish bone dry. |
| Butter tastes burnt | Heat was too high during basting | Lower heat to medium before adding butter. |
| Fish is dry/tough | Internal temp exceeded 145°F | Remove from heat when center is barely opaque. |
Common Mistakes Checklist
- ✓ Skipping the 15 minute temper; cold fish will seize and cook unevenly.
- ✓ Using a non stick pan at too high a temperature, which can damage the coating.
- ✓ Not tapping off excess starch; too much creates a gummy, paste like layer.
- ✓ Forgetting to reduce the heat before adding butter; butter burns at a much lower temp than oil.
- ✓ Moving the fish too soon; let that crust develop for the full 3-4 minutes.
Flavor Variations for Your Herb Butter Cod Recipe
While the lemon and dill combo is a classic for a reason, this technique is a blank canvas. If you are in the mood for something more robust, you can swap the herbs for rosemary and thyme, or even add a pinch of smoked paprika to the flour for a Spanish inspired version.
If you are looking for a different texture entirely, you might be interested in how this compares to other white fish. For example, Ina Garten Sea Bass uses a similar pan searing method but the fish itself is much fattier and richer. Cod is leaner, which is why the butter basting step in this recipe is so critical it adds the fat that the fish naturally lacks.
| Original Ingredient | Substitute | Why It Works |
|---|---|---|
| Cod Loins | Halibut or Haddock | Similar texture. Note: Halibut is firmer; Haddock is slightly sweeter. |
| Fresh Dill | Fresh Tarragon | Adds a sophisticated anise/licorice note. |
| Wondra Flour | Rice Flour | Provides a very light, gluten-free crunch. |
For a spicy kick, try adding a half teaspoon of red pepper flakes to the butter while you are basting. The heat will infuse into the fat and coat the fish evenly without being overwhelming. You could also toss in some capers at the very end for a "Piccata" style finish that adds a salty, briny pop to every bite.
Storage Guidelines for Maintaining That Silky Texture
Fish is always best eaten immediately, but if you have leftovers, they can be saved. The key is reheating it without turning the fish into leather. Avoid the microwave at all costs! It will vibrate the water molecules in the fish and make it rubbery in seconds.
Storage: Keep cooked cod in an airtight container in the fridge for up to 2 days. I do not recommend freezing cooked fish, as the texture becomes grainy upon thawing.
Zero Waste: If you have leftover herb butter in the pan, don't wash it away! Pour it into a small ramekin and let it solidify in the fridge. It is incredible spread on toast the next morning or used to sauté vegetables for another meal.
You can also use leftover flaked fish to make quick fish tacos or a cold seafood salad with a bit of mayo and celery.
Reheating: To maintain the crust, reheat in a skillet over medium low heat with a tiny splash of water and a lid. The steam will warm the center while the pan heat refreshes the bottom crust.
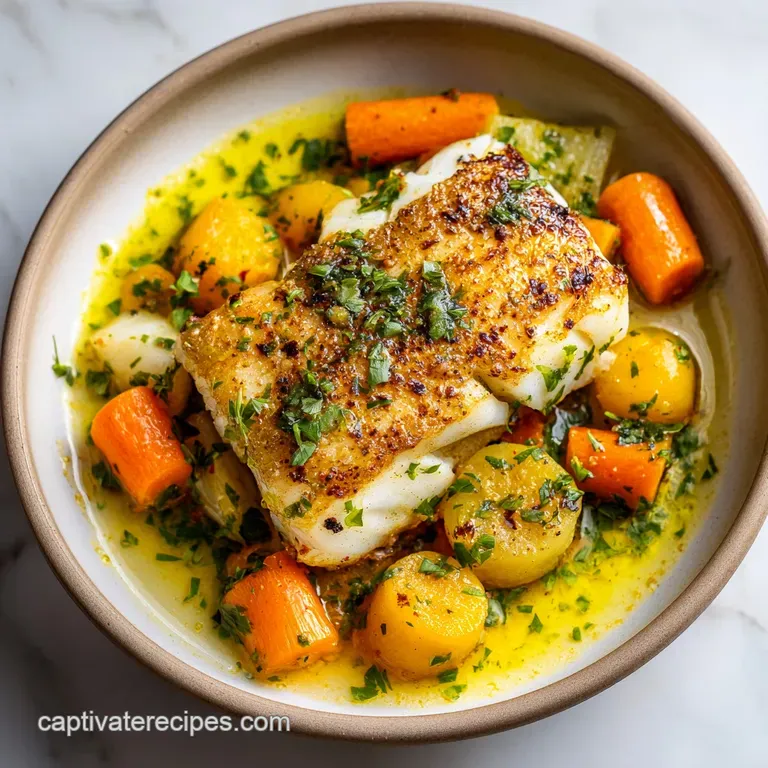
Elevating Your Quick Fish Dinner Recipe for Guests
Presentation is everything, especially with a dish that comes together this fast. To get that "restaurant look," don't just dump the sauce over the top. Instead, plate the fish first, then carefully spoon the golden butter complete with the bits of herbs and garlic directly down the center of the loin.
Since this is a lighter main, I like to serve it with something that can soak up that extra herb butter. If you want a full seafood themed evening, this pairs surprisingly well alongside a small portion of Pineapple Shrimp Fried Rice, or more traditionally, over a bed of garlic mashed potatoes or wilted spinach.
- Height: Place the fish on top of a small mound of greens or risotto to give the plate dimension.
- Color: Save a few fresh sprigs of dill to place on top at the very end for a pop of vibrant green.
- Garnish: A final micro grate of lemon zest over the plated fish adds a hit of aroma that hits the guest before they even take a bite.
Right then, you are ready to conquer the kitchen. This Golden Seared Cod Recipe with Herb Butter Sauce is your new secret weapon for those nights when you want to feel fancy but only have 20 minutes to spare.
Trust me on this once you master the "dry and sear" technique, you will never look at a piece of white fish the same way again. Happy cooking!

Recipe FAQs
Why is my fish sticking to the pan?
You likely moved the fish too early. Let the cod sear undisturbed for the full 3 to 4 minutes to allow a deep mahogany crust to form, which naturally releases the fillet from the skillet surface.
How to get a crispy crust on the cod?
Pat the fish until bone dry using paper towels. Moisture is the enemy of a sear; removing surface water combined with a light dusting of Wondra flour or cornstarch ensures the crust forms instantly upon contact with the hot oil.
Can I store leftovers for later?
Yes, for up to 2 days in the refrigerator. Store the fish in an airtight container, but avoid reheating in the microwave to prevent the texture from turning rubbery.
Is it true I should let the fish come to room temperature before searing?
Yes, this is essential for even cooking. Remove the cod from the refrigerator 15 minutes before cooking so the center isn't ice-cold, which prevents the exterior from overcooking before the middle is done.
How to reheat the fish without ruining the texture?
Warm the fillets gently in a low-heat oven. Since the microwave ruins the delicate proteins, a slow, indirect heat is the best way to maintain the silky texture you achieved during the initial sear.
How to ensure the butter sauce does not burn?
Reduce your heat to medium immediately after flipping the fish. Butter has a low smoke point compared to the oil used for searing, and lowering the heat keeps the milk solids from turning bitter during the basting process.
Does the basting technique work for other proteins?
Yes, basting is a foundational skill for building flavor. If you enjoyed using this technique to create a rich pan sauce here, you can apply the same basting principles to keep chicken breasts succulent while infusing them with herb infused fats.
Golden Seared Cod

Ingredients:
Instructions:
Nutrition Facts:
| Calories | 283 kcal |
|---|---|
| Protein | 31 g |
| Fat | 16 g |
| Carbs | 3.1 g |
| Fiber | 0.2 g |
| Sugar | 0.3 g |
| Sodium | 581 mg |
