Better-Than-Bakery Soft Pretzel Rolls
- Time: Active 110 minutes, Passive 15 minutes, Total 125 minutes
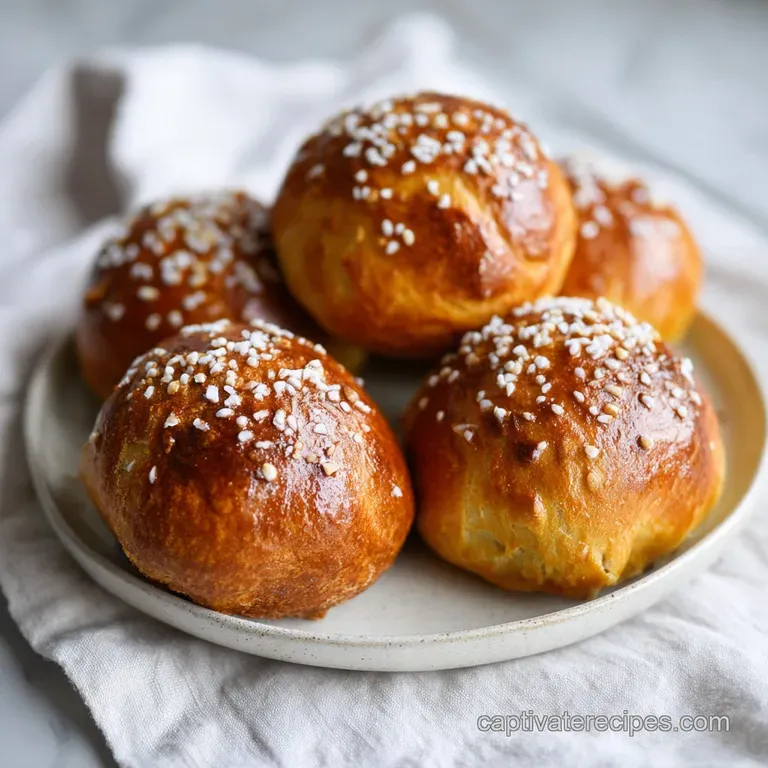
- Flavor/Texture Hook: Deep mahogany crust with a pillowy, salt flecked interior
- Perfect for: Gourmet burger nights, hearty sandwiches, or dipping in beer cheese
- Why the Soda Bath Works
- Serving Sizes and Batch Details
- Essential Ingredients for Better Bread
- Gear Needed for Perfect Buns
- Step by Step Preparation Guide
- Solving Common Pretzel Baking Issues
- Tasty Variations and Flavor Swaps
- Storing and Reheating Your Rolls
- Perfect Pairings for Your Breads
- Myths About Pretzel Baking
- Recipe FAQs
- 📝 Recipe Card
Why the Soda Bath Works
The most important part of making soft pretzel rolls is understanding what happens during that quick dip in the boiling water. Most people assume it's just for flavor, but it's actually a structural necessity.
- Surface Gelatinization: Submerging the dough in boiling water "sets" the outer starches instantly, which prevents the rolls from rising too much in the oven and gives them that signature chewy tug.
- Alkaline Browning: The baking soda raises the pH level of the dough's surface, which speeds up the browning process significantly so the crust gets dark before the inside dries out.
- Texture Creation: This brief bath creates a skin that becomes glossy and thick, providing the perfect canvas for the coarse salt to stick without dissolving immediately.
- Yeast Deactivation: The heat of the water kills the yeast on the very outside of the roll, which ensures the crust stays smooth rather than bursting unpredictably like a standard loaf of bread.
Because we are using bread flour, the higher protein content gives the dough the "muscle" it needs to hold its shape during the boil. If we used all purpose flour, the rolls might go limp or deflate when they hit the water. This recipe ensures the structure stays tall and proud.
Serving Sizes and Batch Details
Before you start measuring out your flour, it's helpful to know exactly how much this recipe yields and how it fits your needs. Whether you are hosting a small dinner or a larger gathering, having the right proportions is key.
| Servings | Ingredient Adjustments | Pan Size | Cook Time |
|---|---|---|---|
| 5 people | Halve all ingredients | 1 half sheet pan | 12-15 minutes |
| 10 people | Use official recipe amounts | 2 half sheet pans | 15 minutes |
| 20 people | Double all ingredients | 4 half sheet pans | 15 minutes (batches) |
When you divide the dough, aim for portions around 85 to 90 grams each. This size is the "Goldilocks" zone for pretzel slider buns recipe needs or standard sandwiches. It's large enough to hold a hefty burger but small enough to enjoy as a side roll with a bowl of soup.
Chef Tip: If you want to make these for sliders, divide the dough into 20 smaller balls (about 45g each) and reduce the boiling time to 20 seconds per side.
Essential Ingredients for Better Bread
The quality of your ingredients directly impacts the "snap" and flavor of your rolls. While these are pantry staples, how they interact is pure magic.
| Ingredient | Science Role | Pro Secret |
|---|---|---|
| Bread Flour | High protein for structure | Weigh it for accuracy to avoid dry, heavy rolls. |
| Active Dry Yeast | Leavening and fermentation | Ensure your water is exactly 105°F to 110°F to wake it up. |
| Baking Soda | pH adjustment for crust | Use a fresh box for the most vibrant mahogany color. |
| Honey | Food for yeast and browning | It adds a subtle floral sweetness that balances the salt. |
While you might be tempted to use table salt for the topping, please don't. Coarse pretzel salt is non melting, meaning it stays white and crunchy even after the rolls cool down. If you use fine salt, it will just disappear into the crust, leaving you with a salty but boring looking bun.
Gear Needed for Perfect Buns
You don't need a professional bakery setup to make the best pretzel bread recipe at home, but a few specific tools make the process much smoother. A stand mixer is your best friend here because the dough is quite stiff and requires a good amount of kneading to develop that elastic gluten.
You will also want a wide, shallow pot for the boiling phase. A narrow pot makes it hard to flip the rolls without squishing them. A slotted spoon or a "spider" strainer is essential for lifting the wet dough out of the water without tearing the delicate skin we've just created.
Finally,, let's talk about the baking surface. I highly recommend using a silicone baking mat (like a Silpat). These rolls are notorious for sticking to parchment paper because of the alkaline bath and the egg wash.
If you must use parchment, grease it very lightly with oil first, or you'll be peeling paper off the bottom of your beautiful buns.
step-by-step Preparation Guide

- Activate the yeast. In your stand mixer bowl, combine 300ml warm water, 15g honey, and 7g active dry yeast. Let it sit for 5 to 7 minutes until it looks foamy and smells like bread. Note: If it doesn't foam, your yeast might be old or the water was too hot.
- Mix the dough. Add 30g melted butter, 500g bread flour, and 10g fine sea salt to the yeast. Knead with a dough hook on medium low for 5 to 7 minutes until the dough is smooth and pulls away from the sides.
- The first rise. Place the dough in a lightly greased bowl and cover with a damp cloth. Let it sit in a warm, draft free spot for 90 minutes until it has doubled in size.
- Shape the rolls. Gently punch down the dough to release air. Divide into 10 equal portions (about 85-90g each). Roll them into tight, smooth spheres by tensioning the dough against the counter.
- Prepare for baking. Preheat your oven to 425°F (218°C). While that heats, bring 2 liters of water and 60g baking soda to a rolling boil in a wide pot.
- The alkaline bath. Submerge the rolls in the boiling water in batches of 3 or 4. Boil for 30 seconds, then flip and boil for another 30 seconds until they look slightly puffed and wrinkled.
- Egg wash and score. Use a slotted spoon to move the rolls to your lined baking sheet. Brush each one with the egg wash (1 egg beaten with 1 tbsp water). Use a sharp knife to cut an "X" or two parallel slashes in the top.
- Season and bake. Sprinkle generously with the 2 tbsp coarse pretzel salt. Bake for 12 to 15 minutes until they reach a deep, dark mahogany brown.
- Cooling. Transfer the rolls immediately to a wire rack. This prevents the bottoms from getting soggy as they cool.
| Original Ingredient | Substitute | Why It Works |
|---|---|---|
| Honey | Agave Nectar | Similar sugar profile for yeast. Note: Adds a slightly more neutral sweetness. |
| Unsalted Butter | Coconut Oil (Solid) | Provides the necessary fat. Note: Will add a very faint tropical aroma. |
| Bread Flour | All Purpose Flour | Lower protein. Note: The rolls will be softer and slightly less "chewy." |
Solving Common Pretzel Baking Issues
Even with a great easy pretzel roll recipe, things can go a bit sideways if the environment isn't quite right. The most common frustration is the "deflated" roll. This usually happens if you let the rolls rise too long after shaping them but before boiling them.
They get too full of air and collapse when they hit the hot water.
Why Your Rolls Deflate After Boiling
If your beautiful spheres turn into flat pancakes after their bath, it's likely over proofing. When the yeast produces too much gas, the structural walls of the dough become thin. The heat of the boiling water causes that gas to expand rapidly and then pop.
To fix this, move straight from shaping to boiling, or even pop the shaped dough in the fridge for 15 minutes to firm up the structure before the bath.
Why the Bottoms Are Soggy
Soggy bottoms are usually the result of two things: using parchment paper without grease or not moving the rolls to a wire rack quickly enough. Because the rolls come out of the water bath wet, they carry extra moisture.
If they sit on a flat baking sheet while cooling, that steam gets trapped underneath and turns the crust into mush.
| Problem | Root Cause | Solution |
|---|---|---|
| Pale crust | Not enough baking soda | Ensure you use the full 60g of soda in the 2L of water. |
| Salt disappears | Adding salt too late | Sprinkle salt immediately after the egg wash while the surface is tacky. |
| Rubbery texture | Under kneading | Ensure you knead for the full 5-7 minutes until the dough is elastic. |
Common Mistakes Checklist
- ✓ Never skip the 90 minute rise; this is where the flavor develops.
- ✓ Don't overcrowd the boiling pot or the rolls will stick together and lose their shape.
- ✓ Make sure your oven is fully preheated to 425°F before the rolls go in.
- ✓ Pat the bottom of the rolls on a clean towel for a split second after boiling to remove excess water.
- ✓ Use a "lame" or a brand new razor blade for the cleanest scoring lines.
Tasty Variations and Flavor Swaps
Once you've mastered how to make pretzel rolls in their classic form, you can start getting creative with the finishes. While the coarse salt is traditional, the sturdy nature of this dough makes it perfect for carrying heavier toppings.
If you want to try something different, check out my Soft Pretzel Bites recipe for a smaller, snackable version of this same dough. It's the same logic but better for parties where people want to graze.
For a savory twist, try "Everything" Pretzel Buns. After the egg wash, instead of just salt, use a blend of dried garlic, dried onion, poppy seeds, and sesame seeds. The alkaline crust pairs beautifully with these toasted flavors.
If you are a cheese lover, you can press a small cube of sharp cheddar into the center of the dough before shaping it into a ball. Just make sure the seal on the bottom is very tight, or you'll have a cheese explosion in your boiling water!
Another fun option is the sweet and salty route. Skip the coarse salt and egg wash. Bake the rolls plain, then brush them with melted butter immediately after they come out of the oven and roll them in a mixture of cinnamon and sugar. It’s a total showstopper for a weekend brunch.
Storing and Reheating Your Rolls
Fresh bread is a joy, but unless you're feeding a crowd, you'll likely have a few left over. The biggest challenge with salted pretzel rolls is that the salt draws moisture out of the air, which can make the crust "weep" and turn sticky after a few hours.
- Room Temperature
- Store in a paper bag for up to 2 days. Avoid plastic bags if possible, as they trap moisture and make the crust soggy.
- Fridge
- I don't recommend the fridge for these; it tends to dry out the crumb faster than anything else.
- Freezer
- These freeze beautifully! Wrap each roll tightly in plastic wrap and then place them in a freezer bag. They will stay fresh for up to 2 months.
Zero Waste Tip If you have rolls that have gone a bit stale, don't throw them away. They make the absolute best croutons you've ever had. Tear them into chunks, toss with olive oil and garlic powder, and bake at 350°F until they are crunchy.
You can also use them for a savory bread pudding or as the base for a very "extra" French toast.
To reheat, the oven is your best bet. Avoid the microwave, which can make the dough rubbery. Instead, pop them in a 350°F oven for 5 to 8 minutes until they are warmed through and the crust regains its slight snap.
Perfect Pairings for Your Breads
These rolls are incredibly versatile, but they really shine when paired with bold, savory flavors. Because the crust is so distinct, you want fillings that can stand up to that saltiness.
They are the ultimate vessel for a juicy brisket sandwich or a thick bratwurst with spicy mustard. If you're looking for a snack focused pairing, I often serve these alongside my Peanut Butter Pretzels for a "pretzel themed" snack board. The contrast between the soft, warm rolls and the crunchy, sweet savory nuggets is always a hit.
Decision Shortcut If you want maximum shine, use the full egg wash and don't skip the second boil flip. If you want extra chew, use bread flour and ensure your dough is slightly tacky, not dry.
If you want sandwich buns, flatten the dough spheres slightly before the first rise so they bake into a wider, flatter shape.
Myths About Pretzel Baking
There are a few misconceptions floating around about how to get that authentic "pretzel" vibe. Let's clear those up so you can bake with confidence.
One big myth is that you must use lye to get a dark crust. While professional bakeries use food grade lye, it can be dangerous to handle at home. A concentrated baking soda bath, like we use here, provides about 90% of the same result with 0% of the risk of chemical burns.
The trick is the ratio you need enough soda to actually change the pH.
Another common thought is that you can just spray the rolls with soda water instead of boiling them. This doesn't work. The boiling process isn't just about the soda; it's about the heat gelatinizing the starch.
Without the "cook" in the water, you won't get that specific chewy texture that makes a pretzel roll different from a regular roll.
Finally, some people think the "X" on top is just for decoration. While it looks great, it’s actually a "score" that allows the bread to expand in a controlled way. Without it, the steam inside will build up and cause the roll to tear or burst at the weakest point, usually near the bottom, which ruins the perfect sphere shape we worked so hard to create.

Recipe FAQs
What are pretzel rolls?
Pretzel rolls are yeasted bread buns dipped in a baking soda solution before baking. This brief alkaline bath is what creates their signature chewy texture and deep mahogany color.
Is a pretzel bun healthier than a regular bun?
No, they are nutritionally comparable to standard white bread rolls. While they have a unique flavor and texture, they use the same base ingredients like bread flour and honey, totaling approximately 218 kcal per serving.
Are pretzels ok on a low carb diet?
No, this is a common misconception. These rolls are made primarily from bread flour, making them high in carbohydrates and unsuitable for strict low-carb or ketogenic diets.
Does Aldi have pretzel buns?
Yes, Aldi frequently stocks pretzel buns in their bakery or bread aisle. Availability can vary by location and season, so check your local store's current inventory.
How to keep the crust from becoming sticky?
Store your baked rolls in a paper bag at room temperature rather than plastic. Plastic bags trap moisture, which causes the salt on the crust to pull water from the air and turn the surface sticky.
How to achieve the signature dark brown color?
Submerge the rolls in a boiling water and baking soda solution for 30 seconds per side before baking. This chemical reaction is essential to achieve that classic mahogany color and the distinct pretzel flavor during your 12 15 minute bake at 425°F.
How to tell if the yeast is ready to use?
Look for a foamy layer on top of the water mixture after 5 7 minutes. If the mixture remains flat, your yeast may be inactive or the water temperature was outside the 105°F to 110°F range, which will prevent the dough from rising properly.
Homemade Pretzel Rolls

Ingredients:
Instructions:
Nutrition Facts:
| Calories | 218 kcal |
|---|---|
| Protein | 7.1 g |
| Fat | 3.8 g |
| Carbs | 39.2 g |
| Fiber | 1.4 g |
| Sugar | 1.7 g |
| Sodium | 695 mg |
