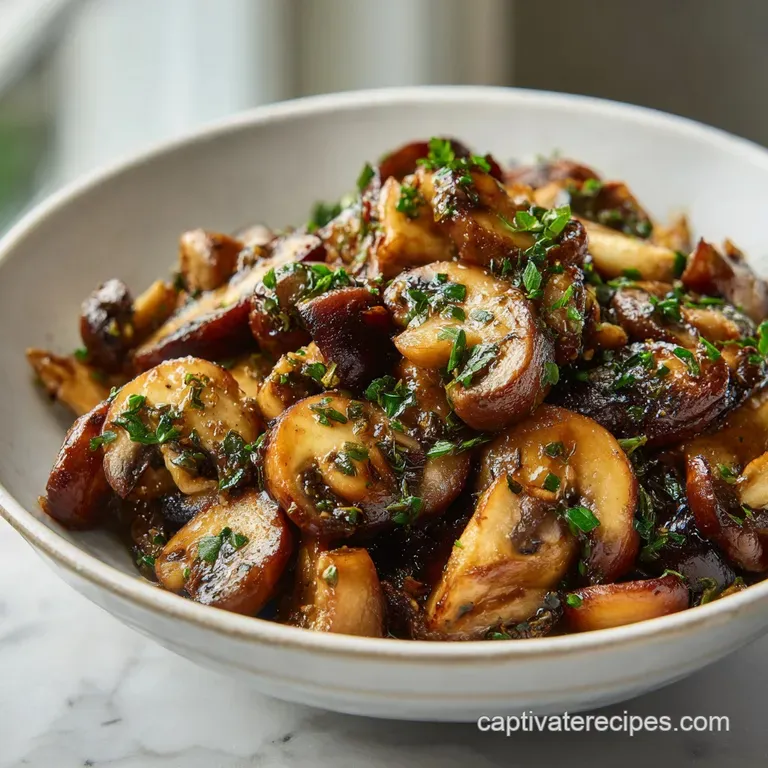
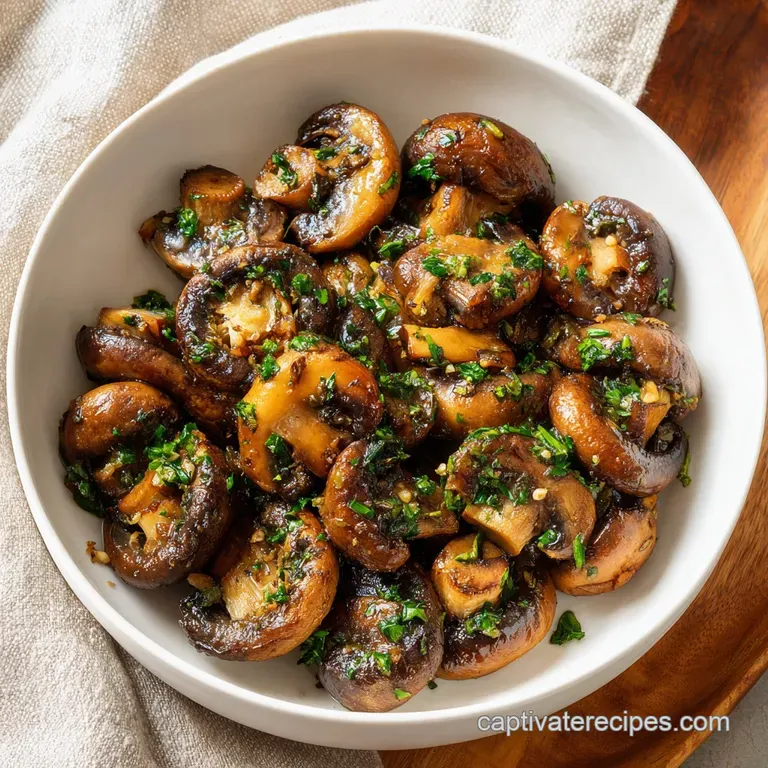
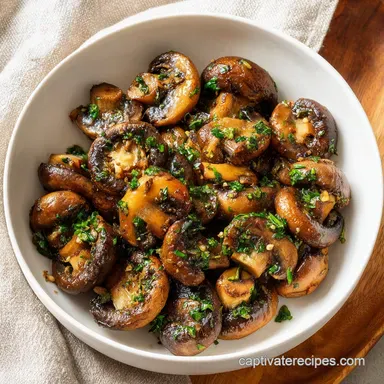
How to Saute Mushrooms: Caramelized and Tender
- Time: Active 5 minutes, Passive 10 minutes, Total 15 minutes
- Flavor/Texture Hook: Nutty, caramelized edges with a tender, buttery center
- Perfect for: Quick weeknight sides, steak toppers, or easy meal prep
- Essential mechanics of browning mushrooms
- Component analysis and science roles
- Core components and flavor profile
- Choosing the right cooking tools
- Step by step cooking method
- Fixing common kitchen mistakes
- Creative flavor and herb variations
- Scaling for different groups
- Understanding common mushroom myths
- Smart storage and waste reduction
- Delicious pairing and serving ideas
- Recipe FAQs
- 📝 Recipe Card
Essential mechanics of browning mushrooms
When we talk about getting a good sear, we're looking at how the mushroom's structure reacts to heat. Unlike vegetables that soften and turn to mush, mushrooms contain chitin, a sturdy fiber that holds its shape even under intense heat.
This is why you can't really "overcook" them into a liquid, but you can definitely make them tough if you don't handle the water release correctly.
High Heat Evaporation: The initial high heat drives off surface moisture immediately, preventing the mushrooms from sitting in a pool of their own liquid.
Delayed Osmosis: By waiting to add salt, we keep the cell walls intact longer, allowing the exterior to brown before the interior juices are drawn out.
Fat Saturation: Mushrooms are porous like sponges, so adding the butter later ensures it coats the browned exterior rather than being absorbed into the raw interior.
| Category | Fresh Mushrooms | Shortcut (Canned) | Resulting Impact |
|---|---|---|---|
| Texture | Firm and meaty | Soft and rubbery | Fresh allows for a "shatter" crisp edge that canned cannot achieve |
| Flavor | Earthy and complex | Salty and metallic | Fresh develops deep umami through browning; canned stays flat |
| Water Content | High but manageable | Pre saturated | Fresh mushrooms sear; canned mushrooms mostly just warm up |
The difference between a fresh mushroom and a shortcut version is really about the texture. While canned versions save 5 minutes of slicing, they never truly crisp up. If you want that velvety finish, sticking with fresh Cremini or Baby Bellas is the way to go.
Component analysis and science roles
Before we get the pan hot, we need to understand what each ingredient is actually doing in the skillet. It’s not just about flavor, it’s about the physics of the sear and the final emulsion that creates that silky sauce.
| Ingredient | Science Role | Pro Secret |
|---|---|---|
| Cremini Mushrooms | Structural Umami | Slice them 1/4 inch thick to balance crispy edges with a meaty bite |
| Cold Butter | Emulsion Builder | Adding it cold at the end creates a thicker, glossier coating than melted butter |
| Olive Oil | Heat Conductor | The oil has a higher smoke point than butter, allowing for the initial over high heat sear |
| Sherry Vinegar | Acidic Balance | A tiny amount of acid breaks down the heavy fats and brightens the earthy tones |
A paragraph between tables is essential to keep things readable and prevent formatting errors. Choosing the right fat is crucial here. We use olive oil for the heavy lifting because butter would burn before the mushrooms got brown. The butter comes in later to add that rich, nutty flavor we all love.
| Cooking Method | Total Time | Texture Result | Best Application |
|---|---|---|---|
| Stovetop Saute | 10 minutes | Crispy and juicy | Best for steaks and immediate serving |
| Oven Roasting | 25 minutes | Concentrated and chewy | Best for large batches and meal prep |
| Air Fryer | 12 minutes | Very crispy but dry | Best for healthy snacks or salad toppers |
Core components and flavor profile
You only need a handful of items for this, and most are probably sitting in your pantry right now. I always suggest Cremini (the brown ones) over white button mushrooms because they have a lower water content and a much deeper flavor.
- 16 oz Cremini or Baby Bella mushrooms: Cleaned and sliced 1/4 inch thick. Why this? They hold their shape better than white mushrooms and offer more "meatiness".
- 3 cloves Garlic: Smashed and finely minced. Why this? Fresh garlic provides a pungent bite that pre minced jars simply lack.
- 1 tbsp Extra virgin olive oil: For the over high heat phase.
- 2 tbsp Unsalted butter: Cold and cubed. Why this? Cold butter incorporates into the mushroom juices to form a velvety glaze.
- 1 tsp Fresh thyme leaves: Fresh is best for that woody aroma.
- 1 tbsp Fresh Italian parsley: Chopped for a burst of color and freshness.
- 1/2 tsp Sea salt: Added at the very end to prevent sogginess.
- 1/4 tsp Cracked black pepper: For a subtle, sharp heat.
- 1 tsp Sherry vinegar: Or fresh lemon juice to cut the richness.
If you don't have sherry vinegar, a squeeze of lemon works perfectly fine. For another earthy pairing, this dish goes exceptionally well alongside a Polish Sausage Sauerkraut and Potatoes dinner, where the mushrooms add a layer of umami to the hearty sausage.
Choosing the right cooking tools
You don't need a kitchen full of gadgets, but the pan you choose will dictate your success. Avoid non stick pans if you can. While they're easy to clean, they don't allow for the same level of browning. A heavy bottomed stainless steel or cast iron skillet is your best friend here.
The heavy base holds onto heat, which is vital when you dump 16 oz of cold mushrooms into the pan. A thin pan will lose its temperature instantly, and instead of searing, the mushrooms will just start to leak their juices. You also want a pan that is at least 12 inches wide.
If the mushrooms are piled on top of each other, the steam from the bottom layer will cook the top layer, leaving you with a rubbery texture.
I personally love using a well seasoned cast iron skillet. It creates a crust that is almost like a "shatter" texture on the edges of the mushrooms. If you’re worried about sticking, just make sure the oil is shimmering before the mushrooms hit the surface.
Trust the process and don't be tempted to stir them every ten seconds.
step-by-step cooking method
- Clean the mushrooms by wiping with a damp paper towel and slice uniformly into 1/4 inch pieces. Note: Washing under running water can make them too wet to sear.
- Ensure the mushrooms are bone dry before they ever see the pan.
- Heat a 12 inch heavy bottomed skillet over medium high heat and add the olive oil.
- Once the oil shimmers, add the mushrooms in a single layer across the pan.
- Allow the mushrooms to sear undisturbed for 3–4 minutes until a deep brown crust forms.
- Toss the mushrooms and add the cold cubed butter, minced garlic, and thyme.
- Saute for an additional 2–3 minutes until the butter foams and garlic smells nutty.
- Remove the pan from the heat immediately to prevent the garlic from scorching.
- Stir in the sea salt, cracked black pepper, and fresh parsley.
- Add the optional splash of sherry vinegar and toss until the mushrooms are glossy and coated.
Fixing common kitchen mistakes
The most frequent issue people face is the dreaded "mushroom soup" effect. This happens when the heat isn't high enough or the pan is too small. If you see liquid pooling in the bottom of your pan, don't panic. Just turn the heat up to high and let that liquid evaporate.
It might take an extra minute, but you can still save the sear.
Another common pitfall is burning the garlic. Garlic has a very low tolerance for high heat, which is why we add it only after the mushrooms have done their heavy browning. If you add it at the start, you'll end up with bitter, black specks that ruin the whole dish. Always wait until that last 2-3 minute window.
Preventing the soggy effect
This usually happens because of premature salting. Salt draws out moisture through osmosis. If you salt at the beginning, the mushrooms release their liquid before the outside has a chance to crisp. By waiting until the heat is turned off, you keep the juices inside and the crunch on the outside.
Stopping the garlic burn
If your pan feels too hot when you add the garlic, toss in the butter first. The butter will lower the surface temperature of the pan slightly and coat the garlic, acting as a buffer against the direct heat of the metal.
| Problem | Root Cause | Solution |
|---|---|---|
| Rubberiness | Low heat / Steaming | Use medium high heat and don't overcrowd the pan |
| Bitter Taste | Burnt garlic | Add garlic only in the last 2 minutes of cooking |
| Bland Flavor | Lack of acidity | Add a splash of vinegar or lemon juice at the end |
The goal is to have a dish that feels rich but balanced. If it tastes "heavy," it's likely missing that tiny hit of acid.
Common Mistakes Checklist
- ✓ Don't wash mushrooms under the tap; use a damp cloth to wipe dirt.
- ✓ Use a large enough pan so mushrooms don't overlap in layers.
- ✓ Wait for the oil to shimmer before adding the mushrooms.
- ✓ Resist the urge to stir for at least 3 minutes to let the crust develop.
- ✓ Save the salt for the very last step to prevent water release.
- ✓ Use cold butter for a better emulsion and glossier finish.
Creative flavor and herb variations
Once you have the basic technique down, you can start playing with the aromatics. While thyme and parsley are the gold standard, there are plenty of ways to change the vibe of the dish depending on what else you're serving.
Infusing a steakhouse vibe
To get that classic steakhouse flavor, add a teaspoon of Worcestershire sauce along with the butter. The fermented anchovies and tamarind in the sauce add a massive boost of umami that makes the mushrooms taste incredibly "meaty." This version is a dream when served alongside Roasted Asparagus and Carrots for a complete restaurant style meal at home.
Creating a wine reduction
If you want something a bit more sophisticated, splash in 2 tablespoons of dry white wine (like Sauvignon Blanc) right before you add the butter. Let the wine bubble away until it's almost gone.
This process, known as deglazing, picks up all the browned bits (the fond) from the bottom of the pan and incorporates them back into the mushrooms.
Scaling for different groups
When you're cooking for one or two, it’s easy to get that single layer in the pan. If you're scaling down, you can use a smaller 8 inch skillet, but keep the cooking times roughly the same. Since there are fewer mushrooms, they might brown even faster, so keep a close eye on them.
If you are doubling the recipe for a crowd, do not just buy a bigger bag and dump them in. You must work in batches. If you put 32 oz of mushrooms in a 12 inch skillet, they will never brown. Cook half, remove them to a plate, then cook the second half.
Combine them all at the end when you add the butter and seasonings. This ensures everyone gets those crispy edges.
| Servings | Mushrooms | Butter | Pan Size | Cook Time |
|---|---|---|---|---|
| 2 people | 8 oz | 1 tbsp | 10 inch | 8 mins |
| 4 people | 16 oz | 2 tbsp | 12 inch | 10 mins |
| 8 people | 32 oz | 4 tbsp | 12 inch (Batches) | 18 mins |
Working in batches might seem like a pain, but it's the difference between "okay" mushrooms and the ones people ask for the recipe for. Trust me, the extra 8 minutes is worth it.
Understanding common mushroom myths
One of the biggest myths is that mushrooms are like sponges and will absorb gallons of water if you wash them. While they do absorb some, the bigger issue is surface moisture. If they are wet on the outside, they have to spend the first 5 minutes in the pan "drying off" before they can even start to brown.
Wiping them is safer for the sear.
Another myth is that you need a lot of oil to start. Because mushrooms are porous, they will soak up whatever fat you put in the pan immediately. You might think you need more, but don't add it! As the mushrooms cook and their structure breaks down, they will actually release that oil back into the pan.
Be patient and wait for the fat to return.
Searing meat doesn't "seal in juices," and neither does searing mushrooms. What it does is create the Maillard reaction, which is a chemical reaction between amino acids and reducing sugars that gives browned food its distinctive flavor. It's about taste, not "sealing."
Smart storage and waste reduction
If you find yourself with leftovers, these mushrooms store beautifully in the fridge for up to 3 to 4 days. Keep them in an airtight container. When you're ready to eat them again, don't use the microwave if you can avoid it it makes them rubbery.
Instead, toss them back into a hot skillet for 2 minutes to wake up the fats and crisp the edges back up.
For zero waste, don't throw away those mushroom stems! While they can be a bit woody for a quick saute, they are packed with flavor. Throw them into a freezer bag and save them for the next time you make a vegetable or beef stock.
You can also finely mince them and saute them with onions to create a base for a "duxelles" to fill omelets or top crostini.
Freezing cooked mushrooms is possible, but the texture will change. They will become much softer once thawed. If you do freeze them (up to 2 months), plan on using them in soups, stews, or pasta sauces where the texture matters less than the deep, concentrated flavor they provide.
Delicious pairing and serving ideas
These mushrooms are the ultimate "utility player" in the kitchen. They can elevate a simple bowl of pasta or turn a piece of grilled chicken into a gourmet meal. I love serving them over a thick slice of sourdough toast that has been rubbed with a raw garlic clove and spread with a bit of goat cheese.
If you’re doing a big Sunday roast, these are the perfect companion. They bridge the gap between the heavy meat and the lighter vegetable sides. Their earthy flavor profile also makes them a great match for anything involving balsamic vinegar or red wine reductions.
Honestly, sometimes I just eat a bowl of them on their own with a little extra cracked pepper and a hunk of crusty bread to soak up that garlic butter at the bottom. It’s simple, reliable comfort food at its finest.

Recipe FAQs
How to saute mushrooms correctly?
Place sliced mushrooms in a single layer in a shimmering, oil-coated skillet. Let them sear undisturbed for 3 4 minutes to develop a brown crust before stirring, which ensures they brown rather than steam.
How to cook mushrooms for diabetics?
Follow the standard searing method without adding sugars or heavy cream. Mushrooms are naturally low-glycemic, making them an excellent side dish, much like the nutrient dense vegetables used in our savory breakfast casseroles.
Should you saute mushrooms in oil or butter?
Use both for the best flavor and texture. Start with olive oil to handle the initial high heat searing, then stir in cold cubed butter toward the end to create a rich, fragrant glaze without burning the milk solids.
Should mushrooms be sautéed on high or low heat?
Use medium high heat consistently. High heat is necessary to evaporate moisture rapidly so the mushrooms brown rather than boil in their own juices.
Why are my mushrooms soggy instead of browned?
Avoid overcrowding the pan and do not salt the mushrooms until the end. Salting too early draws out moisture prematurely, preventing the development of a crisp, caramelized exterior.
Is it necessary to wash mushrooms under running water?
No, this is a common misconception. Washing under running water adds excess moisture that inhibits browning; instead, wipe them clean with a damp paper towel to keep them bone dry for the pan.
How do I know when the mushrooms are finished cooking?
Watch for a deep brown crust and a fragrant, foamy butter sauce. The total cooking time is approximately 10 minutes, at which point the mushrooms should be tender and evenly caramelized.
How To Saute Mushrooms
Ingredients:
Instructions:
Nutrition Facts:
| Calories | 109 kcal |
|---|---|
| Protein | 3.1 g |
| Fat | 9.3 g |
| Carbs | 5.6 g |
| Fiber | 1.2 g |
| Sugar | 2.3 g |
| Sodium | 294 mg |
